
Hello, Crafty Makers!
This month at 613 Avenue Create, our challenging twist is a throwback to an oldie but a goodie. I love paper piecing! While creating this project, numerous ideas for future projects kept popping into my head. I have over 200 6x6 paper pads and probably an equal number of 12x12 and 8x8 pads. I could paper piece the world if I set my mind to it!😁
A Funky Flower

AALL & Create #120 Growth in Numbers
I am a big fan of the AALL & Create border stamps. For one thing, I can afford them! But more than that, they are extremely versatile and ideal for slimline card projects! I actually combined components from three AALL & Create Stamp sets in this design.
Step One - Choosing A Stamp


I like to choose stamps that have large open areas. This makes the paper pieced area more visually impactful. Generally, if I am using multiple patterned papers, I find that a large image ensures that my design will not be too busy!
Step Two - Choosing Papers

I chose these papers because they matched the style of the image, and I knew they would work well with a Kraft card base. For the most part, when choosing papers, the sky is the limit.
Step 3 - Determining The Background
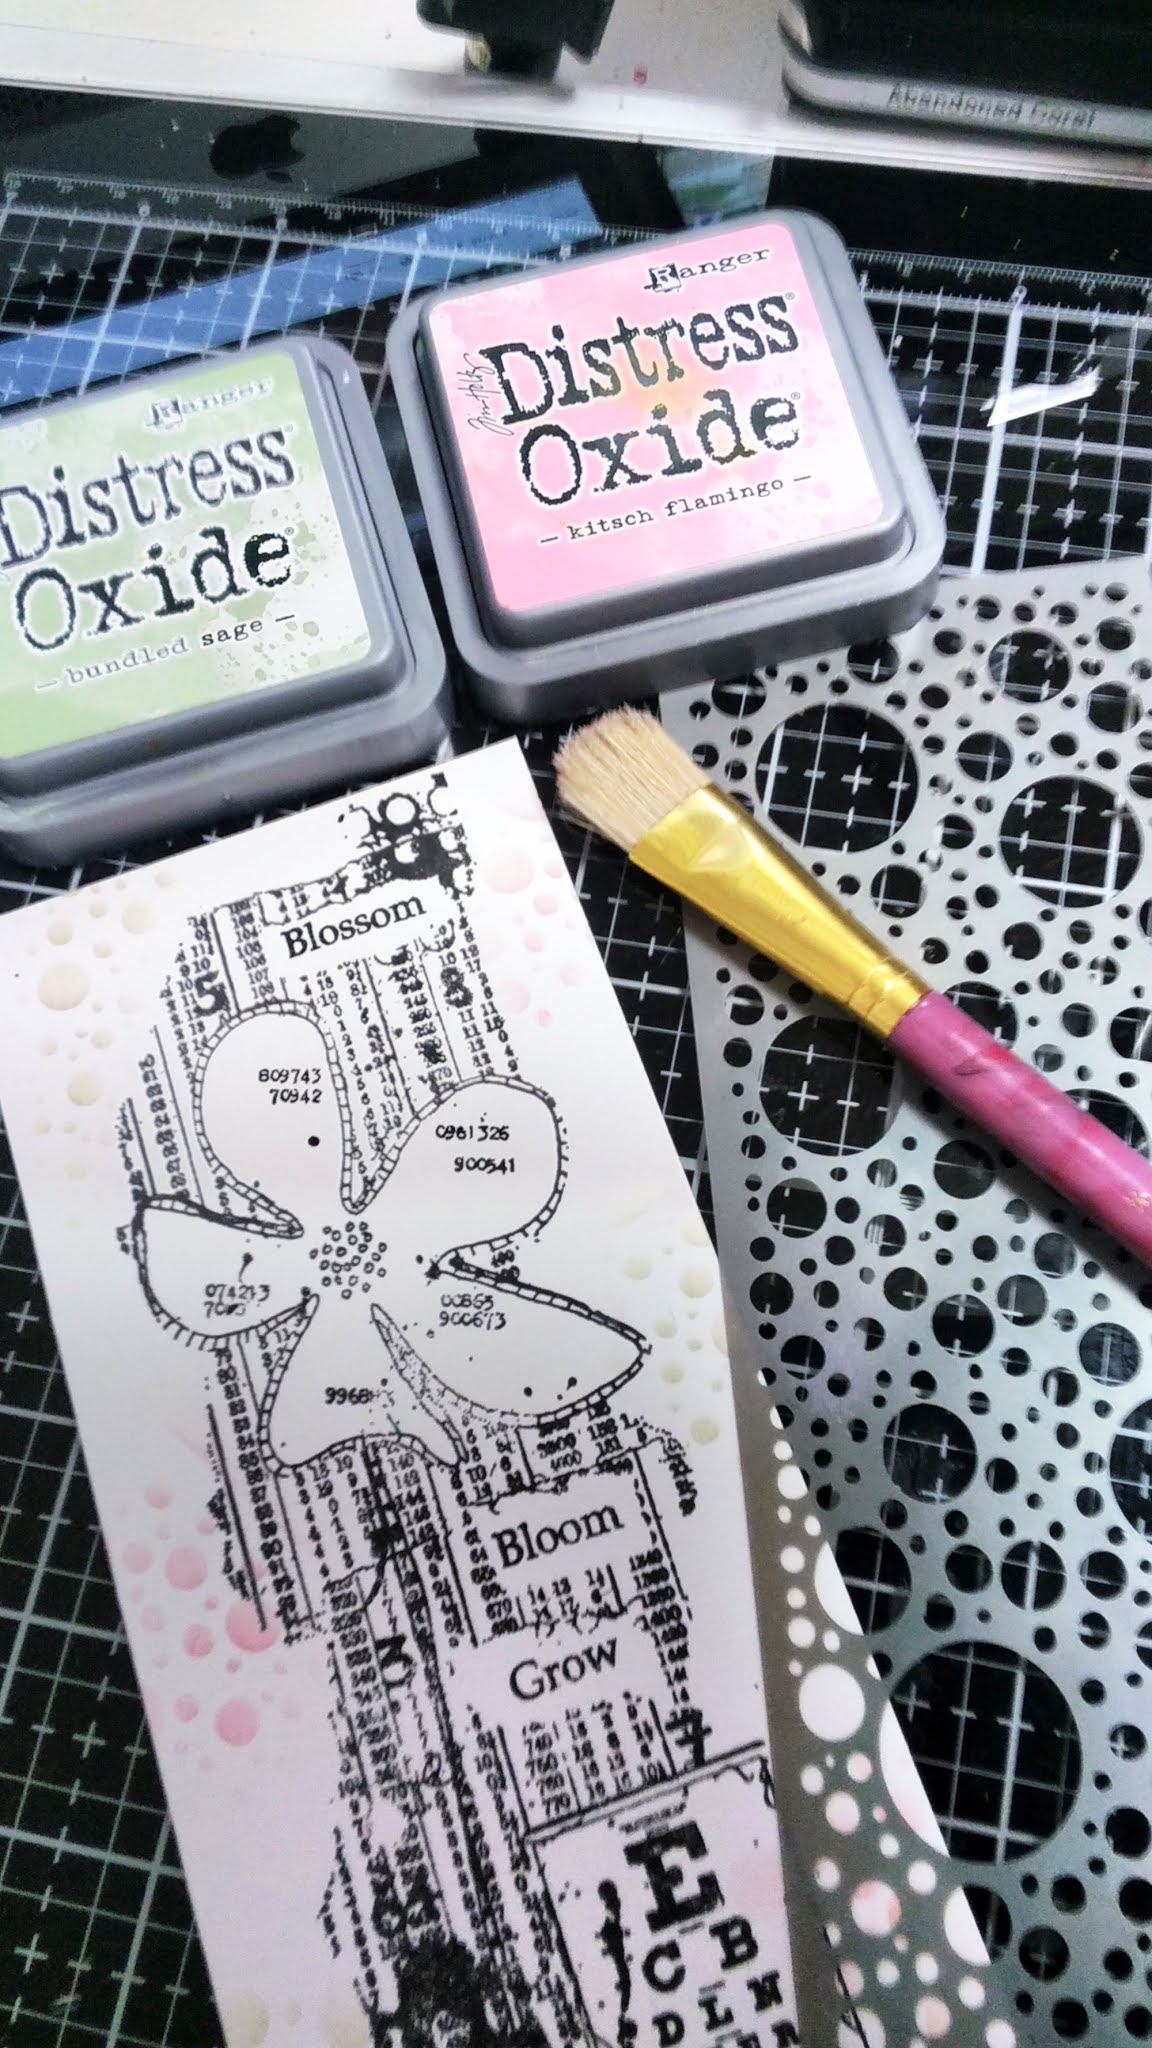
I knew from jump street that I would need to highlight the colors in my patterned papers somewhere in the design. The patterns are not bold enough to stand on their own. I felt that they would not make a strong enough artistic statement. Adding a stenciled element is an easy way to level up a project. The stencil should be related to the design. In my case it was geometrics.

This has to be my money-saving tip find of the year. Instead of using black cardstock to border my face panels, I go around the edges with a black (or colored) Sharpie™. Thanks, Jo Rice.
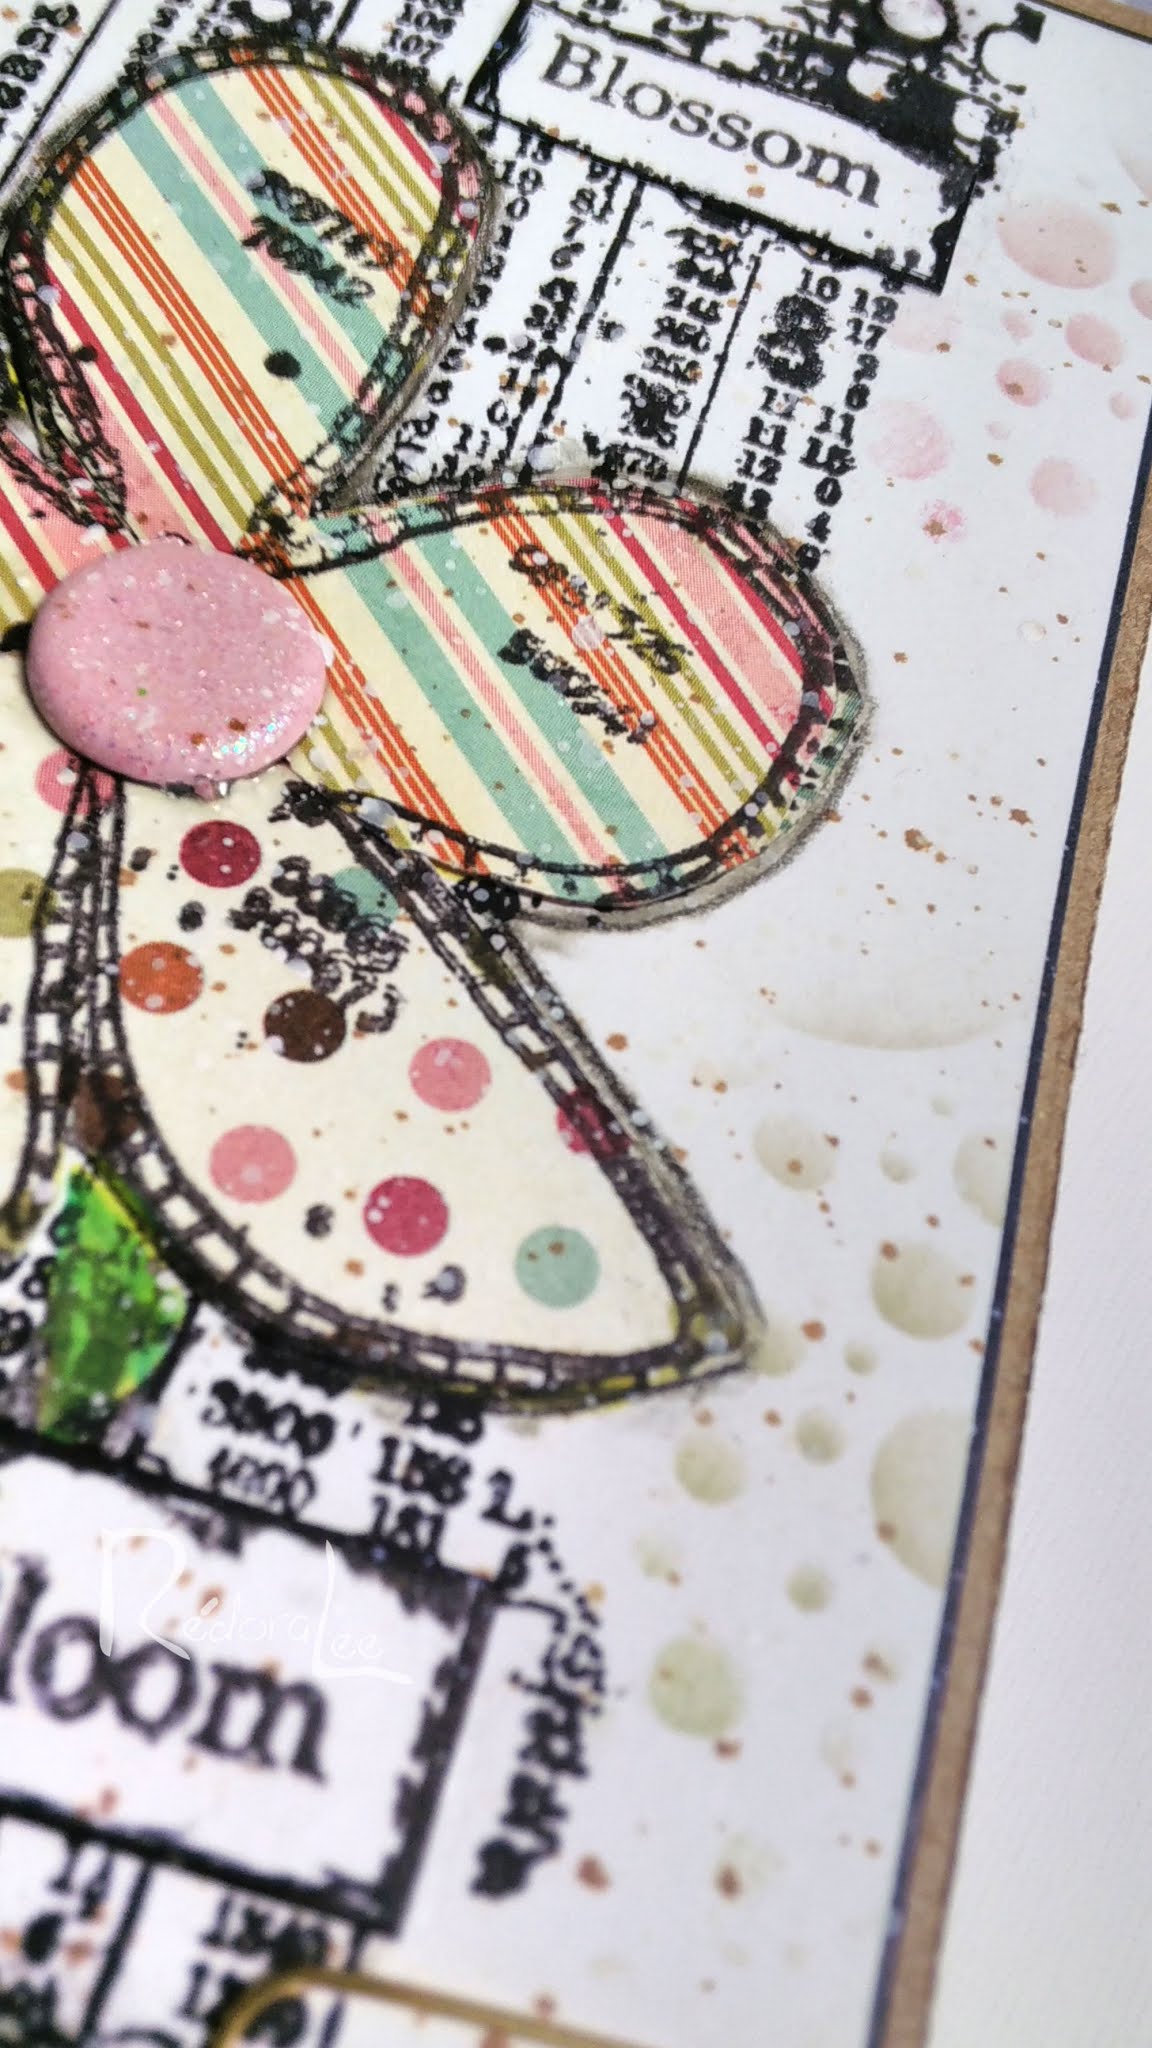
Step 4 - Paper Piecing
I used simple pattern papers. This simplified the stamping and saved paper. The image was stamped in the corner of each sheet.

Using a bold design also increases the ease of cutting out your image.

I played around with various combinations of my chosen patterns. In the end, I felt that selecting two papers for the petals worked best. Rather than trying to get a precise cut to match the center, I added a brad secured with a dollop of Glossy Accents.

I used the two remaining papers on the flower vase!

The vase was pieced from the floral paper, and I used the final geometric pattern for the collar. The final step was the addition of a piece of twine and a mini brad!
Step 5 - Finishing The Design
Little things matter! Nowhere is that more true than in the world of paper crafting. I wanted to pull in more of the Kraft color, so I added splatters using Vintage Photo and Picket Fence Distress inks.
~~~~~~~~~~~~~~~~~~~~~~~~~~~~~~~~~


Thanks so much for stopping by!
If you have never tried Paper Piecing, we hope you will use our challenge as a place to start!
Hugz!

Stuff I Used:


Papers: My Mind's Eye - Vanity Fair (2011)
Stencil: DecoArt Andy Skinner Bubbles (12"x3") (discontinued)
Brad: Imaginisce - Fairy Dust Brads (Fairest of Them All Collection)


