Hello, Crafty Mates!
Three months have passed since my last blog post. I wish I could say that I am 100% and ready to start crafting full-time again, but that is not the case. I miss "making" stuff! Anyway, completing this project forced me to work on my small motor skills.
ALERT !!!!!
LONG POST WITH LOTS OF PICTURES
100% Handmade Fauxbonichi Agenda
Bookmaking is another one of my crafting passions. When I came up with the idea of a 100% handcrafted challenge, I thought a handmade journal/planner would be the perfect project.
The Cover
I knew I would sometimes use the planner out of its jelly cover, so I added corner protectors.
Transparent Leather Cover
Creating this cover was easy. I only had to measure, fold, pin, and then sew the four edges of the cover. To remain true to the challenge, I hand-stitched the edges.
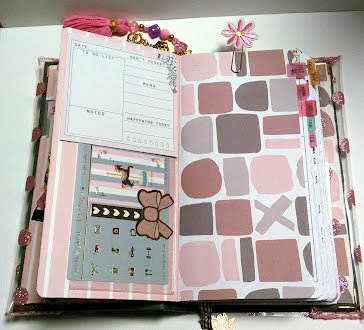
Front - Inside: I was able to create one long pocket, and one rounded corner pocket on the inside of my front and back covers. These provide storage for my sticker kits and decorative paper clips.
I used papers from one of The HoneyBShop "Babe Boxes" to decorate the inside covers and fly pages. I also used them as cover pages for my inserts.
Handstitched Inserts
I used the fly page opposite my monthly insert as an "inbox." To create the pocket for my sticker sheet (below the note pad) I used an adhesive pocket mounted sideways.
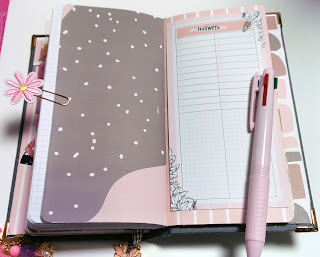
I used this pretty floral for my weekly insert. It gives the eyes relief from the strong geometrics on the other inserts.

"Hustle" and "Growth" are my vision words for 2022. I just love the beautiful design on this paper. Because "The BabeBox" comes with a digital component, I was able to upload the pages to PS and manipulate them as needed.
Handmade Beaded Dangle
I have wanted to try this for a while. I used to make stick pins, so I had tons of beads in my stash. For some reason, I purchased a 50pc bundle of embroidery floss, so I had everything I needed to create this cute embellishment.
The inserts were all hand-cut and sewn using a
Sea Lemon Tutorial for Kettle Stitch Binding.
No agenda is complete without page markers. I had seen a video a few years back that I wanted to try. Fortunately, the Etsy Shop that sold the Craft Cart Stickers had a few left in stock. The stickers are no longer available, but they sell a companion note pad that can be used instead. I surely hope she restocks because these carts are the best. Most months, my BabeBox sticker book has a craft cart sticker included. I am going to try to create a page pocket using one of those.
THE END
Thanks for stopping by!
Hugz,
Chana Malkah
Stuff I Used:
Designer Papers: The HoneyBShop - June Digital Babe Box
Hobonichi Style Inserts: Rhoro Designs (Etsy)
Craft Cart Stickers: Frank Hearts You Etsy)
Hobinichi Weeks Sticker Kits: Plan4Happy (Etsy)
Other Companies: Inserts, clips, pens, etc.
Goldmine and Cocoa
Simply Gilded
The Planner's Society
Krafted by Kayy


