Friday, July 7, 2023

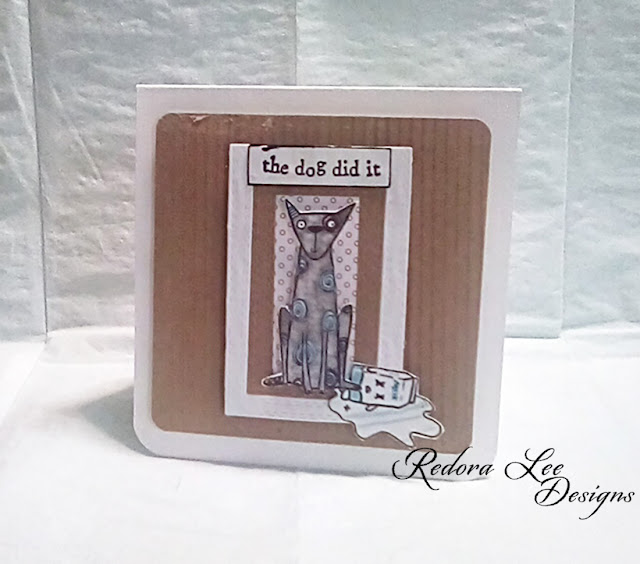
The Dog Did It!

 Hello, Crafty Makers!

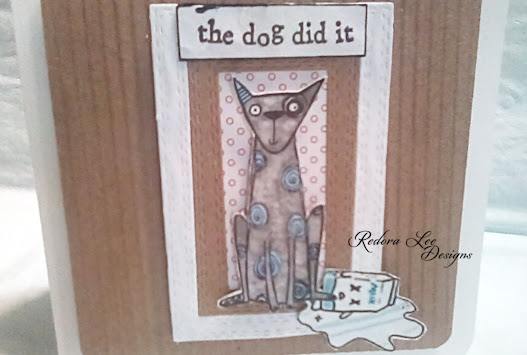
I like creating critter cards but I find that I don't reach for my critter stamps and die often enough! I made this card for my friend who just got a new Shih Tzu puppy!  Her cat, who is not very happy about the situation, has been acting out!   I simply could not resist sending her this card! 

The Dog Did It!

I purchased this AALL & Create stamp set when I was creating a planner for a cat lover.  They went into my stash and were untouched for over a year.  But I have used them twice in the past three months.

I found this great spilled milk image on Google.  It was perfect.  I used PS to resize the image.

The expression on his face is priceless.  It reminded me of my kids when they were little.  Standing there with crumbs all around their mouths and swearing they had not been in the cookies.  Just the other day my son (who is now 52 years old) asked if I was planning to make chocolate chip cookies when he comes to visit in August!  I swore that I was not.  Of course, I am!  It will be fun to watch his face as his kids eat them all!


I remember when people used to do five-minute card challenges!  It takes me that long to find my glue!
 😁

Thanks for Stopping By!
Hugz,
Chana Malkah
Submitted to:
--------
Stuff I Used:
Double Stitched Rectangular Dies-Gina Marie: https://wholesalecraftingsupplies.com/collections/dies/products/limited-edition-double-stitched-in-and-out-cut-rectangle-die-set-gina-marie-designs AALL & Create Stamps #465 - Tall Cats: https://www.franticstamper.com/AALL-Create--Clear-Stamp-A6-size--Set-465-Tall-Cats_p_189206.html

Tuesday, July 4, 2023

Shoping Our Stash - Challenge #500 - Use Any Number

 Hello, Crafty Peeps!

Over at Shopping Our Stash, we are celebrating reaching Challenge #500.  So, to honor this milestone, we want you to create a celebratory project (birthday, anniversary, etc.,) that includes at least one number. 

 Anniversary!
On August 2, 2023, the Hubster and I will celebrate our 54th Anniversary! And they said it wouldn't last!
I fell behind in my planner prep and the challenge date for Shopping Our Stash got away from me.  As I type this, it is 1:00 am and I am so happy that this challenge doesn't go live until 6:00 am.
I did not execute my background properly, but it was too late to start over. I did enjoy using my new 3D embossing folder. On Mother's Day, my husband surprised me with seven 3D EF that he ordered from AliExpress. The stash items (at least one-year-old) in this project are the Heart Die, Distress Inks, and the Cats Stamp.
I think this AlinaCutle Teardrop frame die is so pretty!  I know this set is going to get a lot of use!  I fussy cut the cats to get rid of the tree branch they were sitting on!   I don't know what the Hubster is going to think about this.  We both dislike cats!

I can't wait to see your creations in our challenge!
Thanks so much for stopping by!
Hugz,
Chana Malkah
`````````````````````````````````````````````
Submitted to:

Stuff I Used:
Floral Embossing Folder - AliExpress
Cats on a Branch Stamp - AliExpress
Distress Inks: Pumice Stone, Shaded Lilac, Tattered Rose, Worn Lipstick, Bundled Sage, Squeezed Lemonade, Fossilized Amber, Shabby Shutters

Monday, July 3, 2023

A PLACE TO START - JULY CHALLENGE: Anything Goes w/Optional Twist: Life's A Beach

 Hello, Crafty Mates!

This month at A Place To Start we want to see your best "Beach" creations.  Of course, you may always play both options.  

Anything Goes or "Life's A Beach!"

~~~~~~~~~~~~

Life's a Beach!  Enjoy the Waves!

I have had this small critter stamp and die set since 2020  and it has never been used.  The set included four stamps with matching dies.  There is an animal group for each season of the year.  I thought this summer set would be perfect for a split window card.

Very simple interior.  I think the sun adds fun to the inside.  And I have my water and a white sandy beach!
~~~~~~~
A Beach of Our Own
I colored a piece of vellum with Vintage Photo Distress Oxide and Pumice Stone Distress Ink to create a little sand bar.  I needed to ground my images.  Behind my critters is another piece of vellum that I colored with Faded Jeans Distress Inks.  This is my nod to the waves!  

TUTORIAL FOR SPLIT CARD
Step by Step
Tools Needed: 
Paper Trimmer, Bone Folder, Scoreboard, Piercing Tool, Die-cutting machine

Paper Supplies:
Paper: White Card (80lb or 110lb)  2 pieces cut to 4-3/4" x 4-1/4"
Paper: Vellum Shimmer or Plain.  2 pieces cut to 4.25" wide by 5.50" long
Paper: Colored Card. 1 piece cut to 4.25"x 5.50", and  1piece cut to 4"x 51/4"
Tape:   Strong adhesive tape runner and Double-sided tape

Stamping Supplies:
Rubber/Digital Image(s) (Size matters. The image will bridge your split.)
Sentiment Stamp(s)
Alcohol Markers or Colored pencils
Glitter pen (Optional)
Embellishments (Optional)

Die Cutting Supplies:
Die that matches your image or you can fussy cut your image
Border dies (Boderablities, Edgeabilities, etc.)
~~~~~~~~~~~~
1. Stamp your images, color and die cut them then set them aside. 

2. Score the two 4-3/4" x 4-1/4" pieces at 1/2" on the 4-1/4" (left) side. Burnish.

3. Position and cut your border dies as desired at the bottom of your top panel and at the top of your bottom panel.

4. Insert the vellum panels inside your white panels.  Position your border dies on the vellum in the desired position and cut.

5.  Once you have determined the distance your vellum will "peek" from beneath your white card, secure the vellum temporarily with a piece of washi or purple tape.


6.  Take the smaller piece of colored card 4" x 5.25" and insert it into the flaps of your top and bottom halves.  Determine the distance you want between the halves.  You can test the distance with your image.


7.  Apply adhesive to the 1/2" flap to secure your flap to your colored card base.  Make sure to leave the washi tape on your vellum pieces to keep them in place. 

8.  Trim excess paper from the top, bottom, and sides
9.    Stamp your sentiment on the front of your card.

10. Apply adhesive ( glue runner is best) to the top and bottom flaps to secure your vellum.

11.  Apply adhesive to the back of your image and add your image to your card!

12. Apply double-sided tape to the back of your card face. (The glue will give you time to position your card face if you need to.)
13. Center your completed card front onto the 4.25" x 5.50" piece of colored card.
Add creative touches as desired.
I added a little Wink of Stella to the shell of my snail as well as the dress, wings, socks, shoes, and the dress of the little girl.


Finished Project

Thanks for Stopping By!
See You at A Place To Start!
Hugz,
Chana Malkah
Submitted to:

Sunday, July 2, 2023

613 Avenue Create -Anything Goes w/Optional Twist: Nautical

 Hello, Crafty Makers!

Our challenge twist at 613 Avenue Create is
Nautical
(Boats, Sand, Water, Beach, etc.)
You know us. We like to keep it "easy." You don't have to worry about trying to create an entire scene.  A cute boat will work just fine!
~~~~~
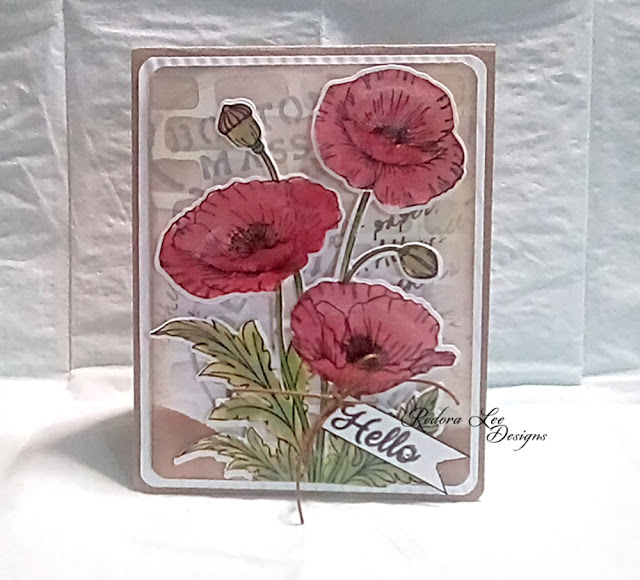
I elected the Anything Goes Option.  I wanted to try out my new Poppy Stamp, Die, and Layering Stencil Bundle!

I love Poppies!  When I saw this Poppy Die I just had to have it.   I decided to try coloring in the Poppies with Distress Oxide Inks.  I am not good at water coloring so I wasn't expecting anything special in this project.  My technique needs a lot of work (my shading and highlights are awful.)  Overall, as a first attempt, I was pretty pleased.

I cut the die twice using plain white cardstock.  I colored the Poppies, and then fussy cut away the white edge.  I then layered my colored images on top of the plain white die-cut image.    I  don't like having those white edges around my cuts, but given the dark background on this project, I felt that the edges were needed.
Before I glued the two die-cuts together. I used my wall stencil on the space between the flowers on the uncolored layer.    This saved time and I didn't have to fussy cut around the stems and leaves!
I am always in a tizzy about what to do with embellishments on my focal grouping.  I decided I would use a piece of paper string and a flag banner.  It works better than I had hoped.
I sealed my Poppies with a coat of Aleen's Glossy Acrylic Sealer.  I used Desert Sand Kraft Cardstock for my base!  The Wall was stenciled with Pumice Stone Distress Ink.  I also used the Pumice Stone to create the dirt in front of my wall.  I mean flowers have to grow out of something, right?

I ended up liking this project more than I thought I would.  I am taking some coloring classes from Kit and Clowder, so hopefully, all of my skills will improve over the coming months.

I look forward to seeing your awesome creations when you join us at 613 Avenue Create!

Hugz,
Chana Malkah
Submitted to:

-----
Stuff I Used: