Greetings, Happy Crafters!
The current fortnight challenge at Shopping Our Stash, Tropical Delights, is a chance to create projects that celebrate summer. The imagery that can be used includes but is not limited to: Palm trees, Parrots, Toucans, Hula girls, Tiki bars, Hibiscus, Pineapples, blue drinks with little umbrellas, etc., are all acceptable.
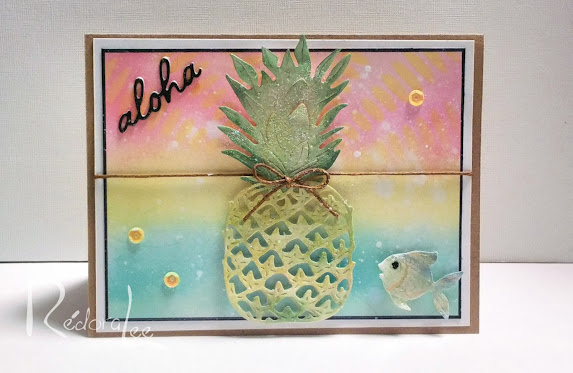
The Lone Pineapple This challenge theme was particularly daunting to me. First, it took several days to locate a beach-themed kit that I purchased ages ago. Then, after wasting all that time, I decided not to use it but only after wasting another two hours fooling around with various layouts. As the clock ticked toward midnight, my frustration level increased. Finally, I figured I would just die-cut pineapple and place it in the center of a color-blended panel.
 This challenge theme was particularly daunting to me. First, it took several days to locate a beach-themed kit that I purchased ages ago. Then, after wasting all that time, I decided not to use it but only after wasting another two hours fooling around with various layouts. As the clock ticked toward midnight, my frustration level increased. Finally, I figured I would just die-cut pineapple and place it in the center of a color-blended panel.
I cut the pineapple from a color-washed paper kit. I applied a little Bundled Sage, Peeled Paint, and Squeezed Lemonade Distress Inks to deepen the color. I cut the crown of the pineapple from a scrap bit of light green card stock. I highlighted the center of the crown with Squeezed Lemonade Distress Ink and distressed the edges with Peeled Paint.
To finish off the topper, I splattered on a bit of white paint and added a piece of twine. I adhered the pineapple to the topper with foam tape. I also added glitter to create more interest. My little fish was leftover from this shadow box project.
The distress inks used to create the background are, Picked Raspberry, Squeezed Lemonade, and Salvaged Patina! After the night I have had, I need a Pina Colada!
I look forward to seeing your projects in our challenge!
Hugz,
Chana Malkah


