Sunday, April 28, 2019

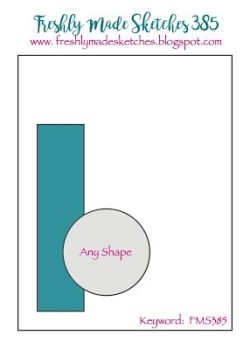
Colorful World - Freshly Made Sketches

Hello, Crafty Makers!
I was practicing lining up my new Stencil Girl®/Ann Bulter ™Quilting patterns before I tackle creating a pin cushion from one of Ann's tutorials.  Well, one of my practice sheets looked pretty not so bad, so I figured I would make a card.  
I looked around and found this sketch at 
That'll work!
~~~~
Colorful World
My world is a scrap piece of background paper I created on my homemade Geli plate.  I colored my frame with the Distress Oxide Inks used for the side panel then I used the Ann Butler™ stencil to add flowers.  The sentiment is from the Altnew® Crafty Mail Collection!
The challenge closes on the 29th. 
You still have time to play along..if you hurry!
Hugz,


Saturday, April 27, 2019

Sisterhood of Snarky Stampers #138 -" N" is for NERD! - Stylin' Hollywood Nerds

Hello, Crafty Peeps!
I couldn't sleep last night, so I decided to visit a few challenge blogs.  
Well, I only made it to one: 
Sisterhood of Snarky Stampers.
I have this funny stamp I wanted to use but wasn't quite sure how.  I didn't want to do the usual nerdy computer guy thing!
I hope the Snarky Sisters agree that my Hollywood Nerds fit the challenge!
Stylin' Hollywood Nerds
The paper pieced tops were both done from one double-sided 6"x6" patterned paper.  I used a Copic marker to add a little green color to the creamed colored polka dot paper (you can see the original color in the decorative circle at the upper right).
~~~~~
I have checked another box in my personal crafting challenge.  I used dies and that Hollywood Stamp is at least 10 years old.  I also reduced my paper scraps and pulled out my swiss dot embossing folder that hasn't been used for a while.  I am on a personal roll!  Now, to clean up my studio!

Thanks, so much for stopping by!
There is still time for you to enter the challenge

Stuff I Used
Stamp -  Inkadinkado "Las Vegas"; Friends
Papers:  Echo Park "This&That" 6x6 Pad (I think it is retired)
Dies: Magnolia Doohickeys "Film Strip"; Flower Layered Die


Wednesday, April 24, 2019

Double D - Only Black and White - Entry #2 - Friending While Drinking

Hello, Crafty Makers!
My second submission to the Double D Challenge:
"Only Black and White" is a true child of serendipity!  I was playing around with my new edge dies and after I made the cut, I realized that I should have turned the die the other way to get the effect I wanted.  
~~~~
Friending While Drinking
 I decided to use a piece of black cardstock as backing and I cut it slightly longer than the base to form a lip.  It would have been more impactful if  I had embossed the die cut but I wasn't even sure this would actually end up as a project.  However, once I saw how pretty and understated this presentation was, I realized the embossing would have been a nice touch.  
 I added my stamp and sentiment, both of which were stamped with black ink and then embossed with clear embossing powder.  I am so proud of me because I resisted the urge to put the ladies in little black dresses.  The only embellishment is the addition of the small rhinestones in the center of my florets.
From the side, you get a peek-a-boo glimpse of the black layer.
I like these types of challenges because you are forced to focus more on composition and typography to make your design statement.

Thanks for stopping by!
Give this Double D Challenge a try!

Hugz,


Tuesday, April 23, 2019

Shopping Our Stash: Use a Cupcake: Image/Sticker/Paper, etc.

Hello, Crafty Makers!
Our fortnightly challenge at Shopping Our Stash invites you to create a project featuring Cupcakes!💖  I love cupcakes and oddly, I had only two cupcake stamps in my entire collection, at least in the entire portion of my collection that I had the strength to look through.😜  Exhausted, I went to Google where I found a FREE line drawing that worked perfectly for my idea.   
This project satisfies my personal goal of creating more "cutesy" cards using critter and people images.  It was also a stash reducer.
BIG HUGZ! 
I really must force myself to create more cutesy cards.  If nothing else, they will help me reduce my stash and my supply of Really Reasonable Ribbons.
What I did:
  1.  I opened the cupcake file in Photoshop and resized to 2.333" x 2.977" (700px   893px).
  2. The image was colored with Copic Markers.  Copics used: Icing: G82, G21, YG11,   Cupcake Holder: BV01, BV000, BV04, BV02, BV08, BV13. Glossy Accents™ was added to the icing and then sprinkled with glitter.
  3. While my cupcake was drying (I always allow Glossy Accents™ to dry overnight) I cut a piece of white cardstock to 4.25" x 11.0" and folded it at 5.50". (A2)
  4. I die cut an oval window on the front of the card and attached a piece of acetate.
  5. I used my oval die to cut a piece of patterned paper to be used as a background layer for the cupcake.  
  6. Next, I stamped my elephant image, colored and fussy cut it.  I also stamped my sentiment and cut it out with my scalloped punch.  
  7. I cut four additional scalloped circles from a piece of scrap and glued them together and then attached them to the back of my sentiment for added dimension.  I also added double-sided foam tape to both the image and the sentiment. 
  8. Finally, I attached a ribbon and bow to the bottom of the oval.
  
~~~~~
Stuff I Used:
Happy Elephant Balloon Stamp
Gina Marie Designs  - Stitched Wonky Oval Die
Simple Stories - Color Fusion Paper Pad
The Paper Studio - White Card Stock
Wink of Stella, Momento Tuxedo Black Ink
Really Reasonable Ribbon - Lavender Gingham Ribbon
Right-click image to download

Sunday, April 21, 2019

AAA Cards CAS Game #138 - Along The Edge w/Optional Twist: Sewing

Hello, Crafty Makers!
~~~~
Today, I challenged myself to go to Paper Playful and create a project for the first challenge on the Sunday list.  Of course, I forgot that my challenge, 613 Avenue Create, was the first one listed.  Undaunted, I went to the next challenge AAA Cards.
~~~~ 
This project not only satisfies my goal of entering more challenges but also allows me to check off another CAS project as well as using an old die from my stash of dies.
~~~~
Sharing Your Toys
A very different wedding card!
The challenge requires that your focal image, grouping, die cut, etc. be located on the edge of our card.  I knew I wanted to do a wedding card and so I first played around with several heart stamps and dies but nothing really moved me.  And then, while searching through my die stash, I came across my mixed media dies and thought one of them would be perfect.  This was intended as a single layer card but I felt it needed more so I added a layer of printed paper behind the die cut!   I love the cute little kiddie quote and found it perfect for a more casual card sentiment for this casual card design.
Thanks for stopping by and I hope you will check out this fun challenge at AAA Cards!

Hugz,

Stuff I used:
Top Flight™ White Card Stock
Graphic 45® "Couture 6x6 Patterns and Solids"
Memory Box® Open Studio™ "Distressed Windham Collage" Die
Kaiser Scrapbook ® "Island Lagoon" Rhinestones
ClearSnap "Fairy Dust Glitter"

Other Challenges Entered:
The Corrosive Challenge - Anything Goes


Saturday, April 20, 2019

Double D Challenge: Black and White Only

Hi, Crafty Makers!
Thanks to Double D Challenges
Their current challenge gives me the opportunity to check yet another box in my "2019 Personal Challenge."
 Successfully using three different Circle Die Sets to create this card is the first step in my goal to create at least 12 layered projects before the end of the year.  
This was also a great stash reduction project.
Ebony and Ivory Layered Circles
 Stash items: All the papers and the pearl embellishments have been in my "this and that" bin for over a year.  Even the foam squares I used between each layer to add depth were purchased at the Dollar Tree™ over three years ago.
I did not notice that one of my pearls has shifted until all the pictures were taken and the equipment put away.  I hope that little oops can be forgiven.
 Adding this sentiment and die cuts to the inside was an afterthought but I think it works and keeps the design cohesive!

The Double D Design Team has created some fabulous projects and there are some wonderful and inspiring challenge entries.
Stop by and add your inspiration!

Hugz,
Stuff I used:
The patterned papers are scraps from my stash so I don't have the names of the pads.  Honestly, my pads are so old, I would imagine most of them are no longer available!
Flower Layered Circle Dies

Other Challenges Entered:
Pile It On:  Lots of Layers and /or Use Scraps

Monday, April 15, 2019

A Place To Start - Mid Month Makes - Anything Goes w/ Optional Twist

Hello, Crafty Peeps!
Don't stress out over your taxes just file an extension and join us at
Our current Challenge is
Anything Goes w/Optional Twist:
Use 3 of these 5 Elements on your project!
Tag
Vellum/Parchment
Die
Flower(s)
Watercolor
~~~~
A Very Busy Guy
I chose this image because my son is a systems engineer and this is the view my daughter-in-law has of him most evenings after the kids are in bed.  In all honesty, since she is building her event planning business, they probably have the same view of each other. 
(Watercolor, Vellum, Dies)
~~~~~
Building My Base Layers
One of the things I am experimenting with this year is using what would be, for me, unexpected paper combinations.  Another challenge is to find creative ways to use some of the ten million dies I own!  The first iteration of this design was my usual rectangular layers.  My base was a cream color and the patterned paper was a cream and brown truly masculine print.  But I really wanted to pull in some of the colors from my water colored background so I decided to use a color that fell in-between the blues and greens.  This grey polka dot was my final design answer!💖
Watercoloring 
I must say I am having a great deal of fun playing around with my Distress Oxide Inks™.  To create the background for the stamped image, I took a piece of white card stock and used  Tea Dye Distress Ink™ to lightly color the entire area.  In random areas, I applied just a tiny bit of  Old Paper Distress Ink.  These inks were applied with my mermaid makeup blending brushes.  To distress the edges, I used regular Vintage Photo Distress Ink™. To color my stencils, I smeared Distress Oxide Inks™ on to my media mat and spritzed them lightly with water.  I used a dry watercolor brush to color in the stencil.  I removed excess water from my brush with a paper towel to achieve graduation in my colors.
Stamping
I was very certain that I did not want to color the image.  So I chose one or two images on the back of the computer and applied spot color.  I first stamped the image using black ink.  I heat set that (not necessary, I'm just a little OCD) and then stamped the image again using VersaMark® embossing ink.  I used clear embossing powder and heat embossed the image.  This process gives the image more definition and allows it to play better against the strong background.  I used a spray acrylic sealant on the finished panel.

To create my vellum strip, I used Distress Oxide Ink™ to color a white strip of vellum.  I combined Broken China and Iced Spruce on the front and Iced Spruce on the back.  It came out beautifully and was almost a perfect match to the stenciled colors.💝

Stuff I Used:
Stamped Image: Loves Store/AE Unbranded DIY Man **
Card Stock Plain: Cards and Pockets "Hot Fudge Matte" 
Printed Paper: Echo Park "Dots and Stripes" (Metropolitan Collection)
Dies: Gina Marie Designs "Wonky Rectangles-Stitched"; Spellbinders "Labels 22"
Stencils:  The Crafter's Workshop Mini "And so on"; Andy Skinner "Code Breaker"
Distress Oxide Inks™: Iced Spruce, Broken China
Distress Inks™: Tea Dye, Old Paper, Vintage Photo
Mermaid Ink Blending Brushes:  DSC Beauty
Twine: Tim Holtz Ideology®: Paper String
** There is an individual name Lara Smith who says that the image on the stamp used in this project was stolen by someone in China.  I purchased the stamp from the store in the link above.  I have no idea who designed the stamp!   Ms. Smith has been posting all over Facebook and on my personal and challenge blogs that I use and promote stolen images.  This is blatantly untrue.  If Ms. Smith has an issue with the company from whom I purchased the stamp she really needs to take that up with them.


I look forward to seeing your project in the Challenge!
HUGZ

Wednesday, April 10, 2019

613 Avenue Create -Twist: Wedding/Anniversary - Save The Date Wrap Card

Hello, Crafty Makers!
Today I am presenting a second project for the challenge at 
I actually created this card several months ago but for some reason, I did not create a post for it.  
Wrap cards are fun and easy. 
 Save The Date Notice
  When choosing your die, make sure the back edge is not a cutting edge.
Although the card measures 4"x4", it fits nicely into an A2 envelope.  If I were creating these for a real client, I would make envelopes sized to match the cards.
I used a very nice Deckle Edge Stationery sheet on the inside.  
I applied Wink of Stella™ to the stamped image.
A simple rubber stamp with a place to add the date!
I added a few champaign flatback pearls to elevate the design.
 My biggest challenge was figuring out how to thread the ribbon without damaging the flaps. For the life of me, I could not find my thin blue ribbon.
I love the ribbon closer, however, one could make a belly band instead.

Stuff I Used
Papers:  Deckle Edge Stationery, Blue Cardstock.  Both from Paper Plus
Die:  Heartfelt Creations "Layered Scalloped Posy" Cut and Emboss Die


Thanks for stopping by!  Hope you will join the Challenge.
HUGZ!

Tuesday, April 9, 2019

Shopping Our Stash #393 - Chipboard

Hello, Crafty Peeps!
Welcome to another fortnight challenge at Shopping Our Stash!  For the next two weeks, we want you to share with us and our followers your projects created using CHIPBOARD as one of the design elements.

Comfort and Hope
 Napkin Decoupaged onto Chipboard
 ~~~~~~~
 I have a slew of these really pretty cocktail napkins and as a part of my stash reduction plan, I am using them in as many ways and on as many projects as I possibly can.  This current challenge was the perfect opportunity.  I cut a chipboard square down to 5"x5" and applied Mod Podge® to the surface. 
I then cut the portion of the napkin I was using and carefully placed it onto the chipboard.  I allowed this to dry completely and then I covered it with a piece of parchment paper and used my craft iron to apply heat. The colors will deepen when heat is applied. I allowed it to dry again and then cut around the image of the Iris.  I used a little Tea Dye Distress Ink™ to darken the color of the napkin just a bit and then attached it with foam squares to the face panel of my card!
The sentiments are from a set of sympathy stamps that I have had for almost 13 years now.  The patterned papers were in my scraps pile and I don't remember the name of the pad from which they were torn.  I was so happy to be able to make this entire project from stash items.

My teammates have created some fabulous projects and I know you will draw inspiration from them!  Click HERE to play along!

HUGZ!
Submitted To:
Get Creative Challenge - Anything Goes
Path of Positivity - Anything Goes w/Optional Twist:  Happiness