Showing posts with label embossing. Show all posts

Wednesday, June 24, 2020

2020 Stash Party #26 - Thinking of You - A Sympathy Card

Hello, Crafty Peeps!
I rarely create sympathy cards.  For one thing, they are not a part of the expression of sympathy in my faith and for another, It is difficult to strike just the right balance in the tone of the card. I want my cards to be an elegantly clean and simple expression of sympathy.  I never ever put stamped text on the inside.  This card was ordered by my SIL.  She asked for something "different."  I hope she likes this when she sees it!  I am creating these as a set but each one will have a different background color.  I may post the companion pieces later in the week.
~~~~~
Thinking of You
Once again, I found a treasure in my stash.  When I purchased this stencil so many years ago, my plan was to use it on my Gelli plate.  But my Gelli plate enthusiasm waned when I got a look at the amazing work that was being done by mono-printing enthusiasts!  There are so many interesting ways to use this stencil but I decided to use it in the most traditional style.

After taping the stencil to my card, I pressed VersaMark Embossing Ink onto the stencil.  To ensure complete coverage, I made two or three passes over the entire design.  I then covered the stencil with Purple embossing powder and heat embossed.  I used copy paper (you can use a phone book or tissue paper might work) to cover the stencil (I used two sheets) and I ironed off the shiny layer.
I wish my photography skills were better and I could show you the satin finish that this ironing technique gives the ink. This card background was a deep, deep, purple but after ironing, I was left with this soft lavender color!
The ironing process also created this wonderful splattering of dark purple throughout the card. I added a little splatter around the area of the ribbon just to introduce a little more interest in the focal area. I still needed a bit more balance in the design so I finished off by adding the three sequins.

HUGZ,
Stuff I Used: 
Stamp'n Stuff - Violet Opaque Embossing Powder (no longer available)
Really Reasonable Ribbon -Diamond Satin Pastel Green
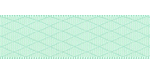
Diamond Satin Pastel Green

Saturday, July 16, 2016

Create Your Own Patterned Paper

Hello, Crafty Folks!
I enjoy creating my own backgrounds and my own patterned papers.  

The most difficult part of this project was deciding which Teresa Collins™  products to use.  Choosing from a new line of stamps created for ClearSnap® and exciting A4 embossing folders created for Craftwell® wasn't easy but I finally chose the "Love" and "Hope" stamps and her new Craftwell® A4 embossing folder "SnapShot".  Need I say more?

Before


To see the tutorial for this project and to learn more about the new Teresa Collins® products for ClearSnap® and Craftwell®, please check out my post on the ClearSnap® Blog

HUGZ
Challenges:


Disclosure Statement

EFFECTIVE DECEMBER 1, 2009, FTC GUIDELINES REQUIRE BLOGGERS TO DISCLOSE ANY TIME THEY ARE COMPENSATED FOR ENDORSING OR REVIEWING PRODUCTS OR SERVICES.

The Project demonstrated above contains components received for free in return for my services and for posts on my blog. I affirm that I have not made, nor would I ever make or endorse, misleading statements regarding any product or service used in the operation of this blog.

IF YOU HAVE QUESTIONS REGARDING ANY PRODUCT OR SERVICE USED ON MY BLOG, PLEASE CONTACT ME AT CMALKAH@YAHOO.COM.


Tuesday, July 12, 2016

Shopping Our Stash #260 - Get Inspired By Your Bedding!

Hey, Crafty Peeps!
We are back with another one of our off the wall Shopping Our Stash challenges!  The last time we wandered this far into the land of unique inspiration we asked you to get inspired by your shower curtain! I drew my inspiration from the bedding in one of our guest rooms. 
The primary focal is the geometric pattern in the comforter.   The comforter is reversible, so I was inspired by the greyish brown color and tried to match that in the cardstock used for my base.  My paper is much darker but the true color is more correctly reflected in the banner and the designer paper used on the inside. 

 I wanted to play around with double-embossing the front of my card.  For this creation, I used ColorBox® Silver Embossing Powder in combination with the WRMK® Next Level "Quilted" Embossing Folder
A tutorial for double-embossing can be found HERE on the ClearSnap® Blog
I finished off the design with the Heidi Swapp® Love, Love, Love Banner.  I die cut a heart using my Sizzix® Hearts. Both the sentiment and the heart are secured with double-sided foam tape.  This created a cool 3D look IRL.  

The interior was finished off with a designer sheet from Teresa Collins'™ "Far Away" collection.   Finally, I added a Petaloo Glass Flower. 

Thanks for stopping by!   Try this double-embossing.  You can create fun, elegant faux metal designs and save money!  
Hugz,
Chana

Materials
1 Pc Card Stock cut to 5-1/2" x 12.0"  (finished card will be 5-1/2" x 6.0")
1 Pc Card Stock cut to 5-1/4" x 5-1/4"
1 Pc Designer Paper - Teresa Collins™ Far Away
Embossing Folder - WRMK® Next Level - Quilted
ColorBox® Silver Embossing Powder
Top Boss® Embossing Ink
Die - Sizzix - Hearts
Embellishments -
     Heidi Swapp "Love, Love, Love" Banner
     Petaloo Premier Spring 1 Darjeeling Collection - Glass Flower with Leaves
Parchment Paper
Decoupage Clue
Double-sided foam
Tools
Paper Trimmer
Craft Iron

Disclosure Statement

EFFECTIVE DECEMBER 1, 2009, FTC GUIDELINES REQUIRE BLOGGERS TO DISCLOSE ANY TIME THEY ARE COMPENSATED FOR ENDORSING OR REVIEWING PRODUCTS OR SERVICES.

The Project demonstrated above contains components received for free in return for my services and for posts on my blog. I affirm that I have not made, nor would I ever make or endorse, misleading statements regarding any product or service used in the operation of this blog.

IF YOU HAVE QUESTIONS REGARDING ANY PRODUCT OR SERVICE USED ON MY BLOG, PLEASE CONTACT ME AT CMALKAH@YAHOO.COM.