Showing posts with label ClearSnap. Show all posts

Saturday, July 16, 2016

Create Your Own Patterned Paper

Hello, Crafty Folks!
I enjoy creating my own backgrounds and my own patterned papers.  

The most difficult part of this project was deciding which Teresa Collins™  products to use.  Choosing from a new line of stamps created for ClearSnap® and exciting A4 embossing folders created for Craftwell® wasn't easy but I finally chose the "Love" and "Hope" stamps and her new Craftwell® A4 embossing folder "SnapShot".  Need I say more?

Before


To see the tutorial for this project and to learn more about the new Teresa Collins® products for ClearSnap® and Craftwell®, please check out my post on the ClearSnap® Blog

HUGZ
Challenges:


Disclosure Statement

EFFECTIVE DECEMBER 1, 2009, FTC GUIDELINES REQUIRE BLOGGERS TO DISCLOSE ANY TIME THEY ARE COMPENSATED FOR ENDORSING OR REVIEWING PRODUCTS OR SERVICES.

The Project demonstrated above contains components received for free in return for my services and for posts on my blog. I affirm that I have not made, nor would I ever make or endorse, misleading statements regarding any product or service used in the operation of this blog.

IF YOU HAVE QUESTIONS REGARDING ANY PRODUCT OR SERVICE USED ON MY BLOG, PLEASE CONTACT ME AT CMALKAH@YAHOO.COM.


Tuesday, July 12, 2016

Shopping Our Stash #260 - Get Inspired By Your Bedding!

Hey, Crafty Peeps!
We are back with another one of our off the wall Shopping Our Stash challenges!  The last time we wandered this far into the land of unique inspiration we asked you to get inspired by your shower curtain! I drew my inspiration from the bedding in one of our guest rooms. 
The primary focal is the geometric pattern in the comforter.   The comforter is reversible, so I was inspired by the greyish brown color and tried to match that in the cardstock used for my base.  My paper is much darker but the true color is more correctly reflected in the banner and the designer paper used on the inside. 

 I wanted to play around with double-embossing the front of my card.  For this creation, I used ColorBox® Silver Embossing Powder in combination with the WRMK® Next Level "Quilted" Embossing Folder
A tutorial for double-embossing can be found HERE on the ClearSnap® Blog
I finished off the design with the Heidi Swapp® Love, Love, Love Banner.  I die cut a heart using my Sizzix® Hearts. Both the sentiment and the heart are secured with double-sided foam tape.  This created a cool 3D look IRL.  

The interior was finished off with a designer sheet from Teresa Collins'™ "Far Away" collection.   Finally, I added a Petaloo Glass Flower. 

Thanks for stopping by!   Try this double-embossing.  You can create fun, elegant faux metal designs and save money!  
Hugz,
Chana

Materials
1 Pc Card Stock cut to 5-1/2" x 12.0"  (finished card will be 5-1/2" x 6.0")
1 Pc Card Stock cut to 5-1/4" x 5-1/4"
1 Pc Designer Paper - Teresa Collins™ Far Away
Embossing Folder - WRMK® Next Level - Quilted
ColorBox® Silver Embossing Powder
Top Boss® Embossing Ink
Die - Sizzix - Hearts
Embellishments -
     Heidi Swapp "Love, Love, Love" Banner
     Petaloo Premier Spring 1 Darjeeling Collection - Glass Flower with Leaves
Parchment Paper
Decoupage Clue
Double-sided foam
Tools
Paper Trimmer
Craft Iron

Disclosure Statement

EFFECTIVE DECEMBER 1, 2009, FTC GUIDELINES REQUIRE BLOGGERS TO DISCLOSE ANY TIME THEY ARE COMPENSATED FOR ENDORSING OR REVIEWING PRODUCTS OR SERVICES.

The Project demonstrated above contains components received for free in return for my services and for posts on my blog. I affirm that I have not made, nor would I ever make or endorse, misleading statements regarding any product or service used in the operation of this blog.

IF YOU HAVE QUESTIONS REGARDING ANY PRODUCT OR SERVICE USED ON MY BLOG, PLEASE CONTACT ME AT CMALKAH@YAHOO.COM.


Tuesday, June 28, 2016

Shopping Our Stash - How Does Your Garden Grow?


 Hello, Crafty Peeps!
Welcome to another week of stash reducing fun!  
The Shopping Our Stash Team thought we would keep it easy this week and give you a broad theme: 
 Anything One Might Find In A Garden!
This has proven to be another good stash reducing challenge for me.  About three years ago I purchased a box of tags (1000 count) because I planned on making a bunch of tag minis!   Need I say it? There are still 975 tags in the box!  I was also able to use some embellishments from a card that I "deconstructed."
Stash Items: Manilla Tag - 3 years old
Paper Butterfly - 2 years old
Crinkled Ribbon - 4 years old
Brad - 4 years old

Tutorial - Creating A Leafy Background using ColorBox 

Supply List:
Standard Tag - Manilla
Die Cut Butterfly/flowers
Ribbon
Brad
Step Tutorial
I created a second tag using a fall palette.
~~~~~


Determine your color palette (I wanted the manilla to show through in my design.  You can color your tag or used a colored tag.)  I used the purples and greens from the Queue stack and Creamy Brown, Burnt Sienna, Yellow Citrus and Dark Brown Cat's Eye Pads.

Using your Cat's Eye Pad, stamp your leaf design onto the tag.  I started with my lightest color (Creamy Brown) and worked from light to dark (Dark Brown.) 

When you are satisfied with your "leafy" background, add your stencil design and ink with the purple pads.

Distress the edges of the tag using Burnt Sienna.  I used Smooch to color the hole reinforcement paper.  This is not necessary with a crafting or die cut tag.

Place your ribbon and  secure with a staple.  Add your sentiment.
I salvaged these flowers from an old project!
Layer your flowers on top of the stenciled image.
Add a brad and you are done!

Thanks for dropping by!
Hugz,
Chana Malkah!


Disclosure Statement

EFFECTIVE DECEMBER 1, 2009, FTC GUIDELINES REQUIRE BLOGGERS TO DISCLOSE ANY TIME THEY ARE COMPENSATED FOR ENDORSING OR REVIEWING PRODUCTS OR SERVICES.

The Project that is demonstrated above contains components I received for free in return for my services and for posts on my blog. I affirm that I have not made, nor would I ever make or endorse, misleading statements regarding any product or service used in the operation of this blog.

IF YOU HAVE QUESTIONS REGARDING ANY PRODUCT OR SERVICE USED ON MY BLOG, PLEASE CONTACT ME AT CMALKAH@YAHOO.COM.


Tuesday, June 7, 2016

Shopping Our Stash - Tea For Two - Use Coffee or Tea Theme

Hello, Crafty Peeps!

Our Stash Reducing Challenge this week at Shopping Our Stash is:
TEA FOR TWO  
We want you to create a project using a coffee or tea theme.
I like to create my own vellum paper backgrounds and thought I would use this challenge to color up some of the vellum sheets that have lingered in my stash for a couple of years now.  

 I colored one side of the vellum with ColorBox®  Paintbox Chalk Ink Pad - Mercantile.
 The ClearSnap® Rollergraph is very handy tool for applying inked designs to large areas.

Thanks for stopping by!  I hope to see your designs in the challenge!
HUGZ!
Chana Malkah

Thursday, June 2, 2016

ClearSnap June Color Challenge - Upcycled Beach House Tote

Hello, Crafty Peeples!

I am delighted to be a Guest Blogger for ClearSnap®.   


How could you not design a fabulous Beach, Nautical, or Coastal project using these cool summer colors?  What I love most about this palette is that you can use all of these colors and still create a cohesive well-integrated design. 


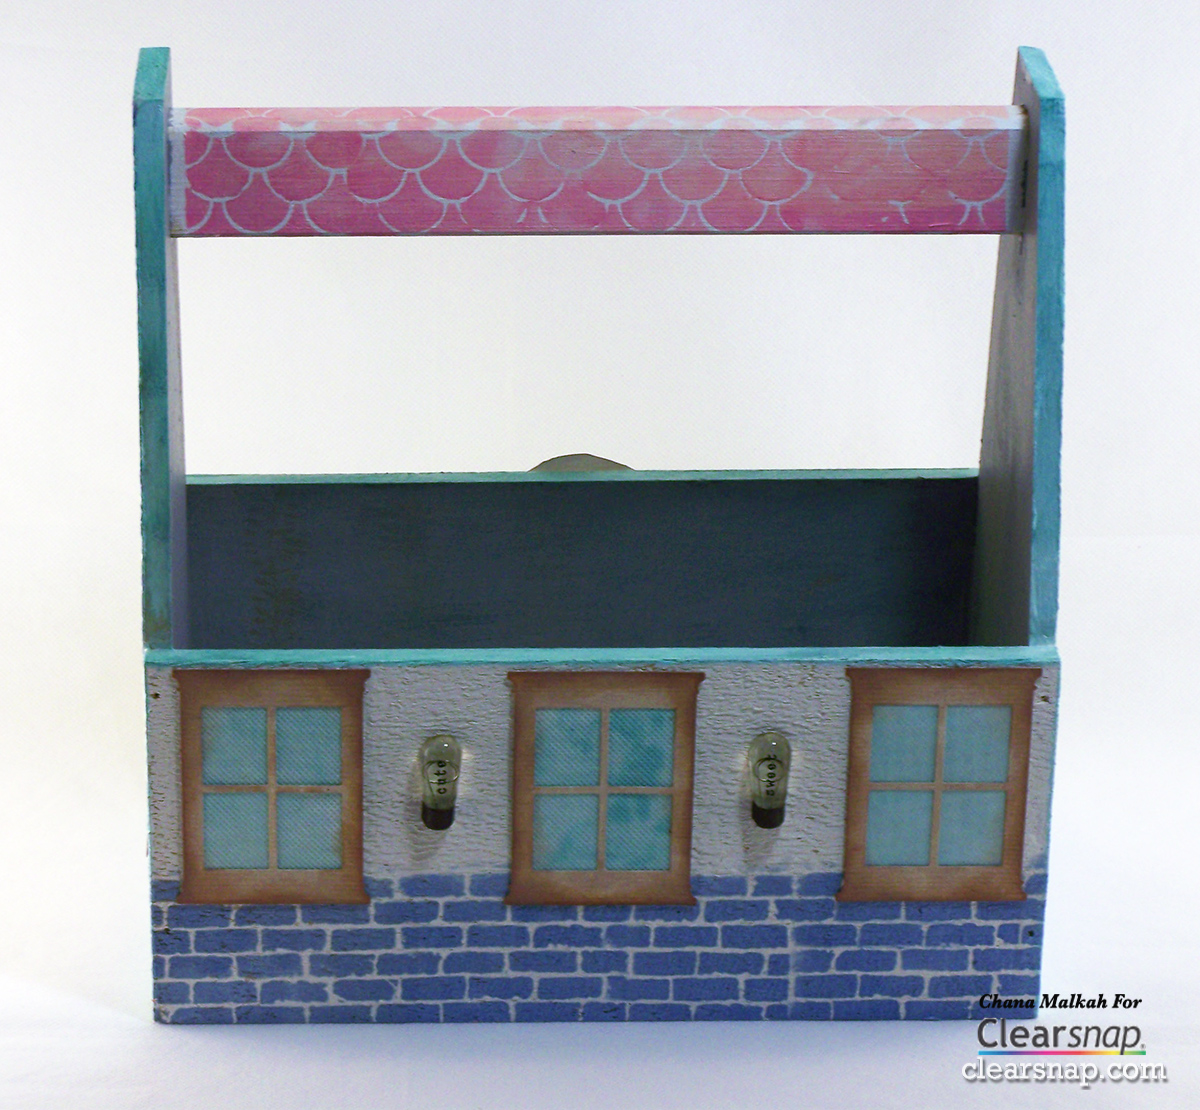
COASTAL "BEACH COTTAGE"  TOTE
A friend good friend is moving to a Beach House on Tybee Island off the Savannah Coast.
This altered Walnut Hollow Rustic Tote (filled with cleaning supplies) is a fun  house warming gift! 
Beach House Front
Beach House Rear
 The floor of the Beach House should be as interesting as the facade!  I found the perfect ColorBox® Art Screen to complement this whimsical design.

THIS IS HOW IT WAS DONE
This wonderful Walnut Hollow Rustic Tote was one of the goodies in my ClearSnap® Guest Blogger haul!  
  • The front and back panels have a rough finish but I resisted the urge to sand them smooth. You will see why later.    I started with a very thin coat of gesso and then used the Direct to Surface technique to apply my ink color: ColorBox ® Archival Dye Ink - Seattle Sky.  This ink dries rather quickly and I used my Color Blender® to blend missed areas and streaks. The process went much faster than expected.
  • My next step was to cover the rest of the toolbox with a thicker coat of gesso.  Dry thoroughly before moving on to the next step.

  • To stencil on the roof design I used ColorBox® Art Screen™ - Rooftop.  The Stylus tool is indispensable when working with stencils and masks.  The dual tip makes working with two colors a breeze.

  • Cut a piece of heavyweight chipboard to the size of the toolbox bottom.
  • Cover with gesso.
  • Stencil Floor Design - ColorBox® Art Screen™. 
  • Heat set and then seal using an acrylic sealant (Spray).
  • Cover with clear shelf lining and adhere to toolbox bottom with a strong adhesive.


  • I die cut large window frames and shutters and colored them with one of our new Ann Butler Crafter's ® Inks - Desert Sand.  I rubber stamped the screen door and colored to match.
  • The window shade was created by coloring a piece of non-woven fabric, running it through the crimper and brushing the raised crimped areas with Desert Sand Ink.
  • Seal the entire project with an acrylic sealant!
The texture of the gesso on the rough wood created a stucco-like effect that worked well in this design.  Bricking the entire tote would have made the design too heavy.  The same held true for the shutters.  They work beautifully on the sides, but would have been distracting on the front and back.  The oval address stickers and sentiment balance the design.

SUPPLY LISTING
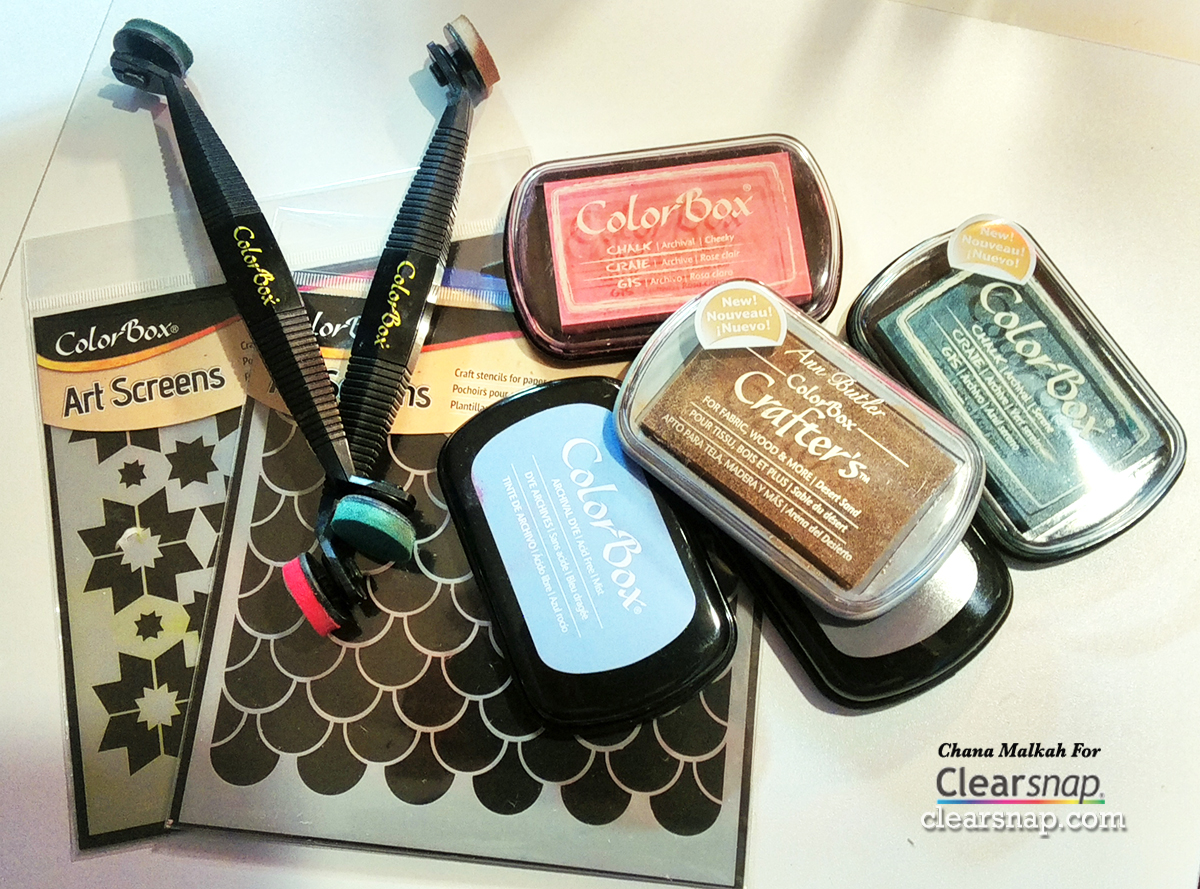
ColorBox® Archival Dye - Mist
CoorBox® Archival Dye - Seattle Sky
ColorBox® Chalk - Cheeky
ColorBox® Chalk Ink - Serene
Ann Butler™ for ColorBox®, Crafter's™ - Desert Sand
ColorBox® Pigment Ink - Seaglass
ColorBox Art Screens - Starpoints and Rooftop
ColorBox® Stylus Handles and Tips
Walnut Hollow® Rustic Tote


THANKS FOR STOPPING BY!   I LOOK FORWARD TO SEEING YOUR ENTRIES IN THE 
CLEARSNAP® MONTHLY COLOR CHALLENGE

HUGZ,
CHANA

Disclosure Statment:
EFFECTIVE DECEMBER 1, 2009, FTC GUIDELINES REQUIRE BLOGGERS TO DISCLOSE ANY TIME THEY ARE COMPENSATED FOR ENDORSING OR REVIEWING PRODUCTS OR SERVICES.
The Project demonstrated above contains components I received for free in return for my services and for posts on my blog. I affirm that I have not made, nor would I ever make or endorse, misleading statements regarding any product or service used in the operation of this blog.
IF YOU HAVE QUESTIONS REGARDING ANY PRODUCT OR SERVICE USED ON MY BLOG, PLEASE CONTACT ME AT CMALKAH@YAHOO.COM.


This project is being shared in the following Challenges:
Rhedd's Creative Spark - ATG Mixed Media and Altered Art Only

Tuesday, May 10, 2016

Shopping Our Stash #251 - April Showers Bring May Flowers

Hello, Crafty Peeples!

I hope you will join in the fun this week at Shopping Our Stash!  
This week our Stash Reducing Theme is:

April Showers Bring May Flowers 
Create your project using: umbrellas, rain or flowers. 
Another idea would be a creation for a Baby or Wedding Shower.  

My project is pretty pedestrian.  I am working with some new ColorBox products and I don't have many pastels, so I decided to go with the earth colors of which I am so fond!

GROW WHERE YOU ARE PLANTED!
My flower was created using the ClearSnap Art Screen "Poinsettia."  The background was embossed with the WRMK Next Level EF "Butterfly."
 Rather than fabricating a traditional card, I chose to create a panel card!  I knew I wanted to use the "Grow where you are planted" sentiment but the problem was finding a complementary sentiment for the back panel.

Supplies used:
Stash Items:
The vertical Paintbox has been in my studio since the year 2000, I think!  It definitely qualifies as a stash item! The white card stock is also about 10 years old.  It was left over when we closed our graphics business in 2005.

I used the ColorBox Stylus tool and cotton swabs to color in the stencil.  After the inks dried, I fussy cut the flower and sprayed it with Aleene's Glossy Sealant.  I love the new colors and the fabulous Chalk Paintbox!

Happy Crafting!  Looking forward to seeing your project in our challenge!

HUGZ,
CHANA