Tuesday, May 29, 2018

Shopping Our Stash - Graduation/Congratulations

Hello, Crafty Peeps,
Graduations and weddings will dominate the summer months so my teammates over at Shopping Our Stash would like to see your creations for your graduates from K-PhD!

This canvas panel is a gift for the IT /Systems Analyst grad.
The symbolism in this panel may be lost on many.  I included the 1's and 0's because the binary code is nothing more than a series of 1's and 0's. 


Materials Used:
Andy Skinner® Mixed Media Stencil - "Code Breaker"
Tim Holtz® Collection Stencil - Crackle
Tim Holtz® Alterations™ Mixed Media Die
Tim Holtz® Alterations Frameworks™Die - "Trellis"
Liquitex Acrylic Paints
Inka Gold Metallic Wax Paints

Hope you like the project!
Hugz,
Chana Malkah

Tuesday, May 22, 2018

Shopping Our Stash - April Showers Bring May Flowers


Hello, Crafty Peeps!
It is so nice to join my teammates this week at Shopping Our Stash for a fun, fun challenge.   This week we pay homage to "April Showers Bring May Flowers."  Our ask is not big, we simply want you to use a flower on your project.

I am working on my TN setup for June, so I decided to make a loaded page marker.   I love making these and they are perfect for stash reduction.

Loaded Page Markers for your Planner.

Best little laminator on the planet!  You'll need this.
Markers and paper clips are easy to make.  You'll need patterned paper, pocket labels (or not, you can create your own using laminating pouches.)  Paper clips, clue and double-sided tape (Like Scor-Tape.)
To satisfy the challenge, I used a floral patterned paper and I added little floral stickers to my markers and paper flowers as toppers on my small book/page marks.  One of my images is sporting a floral dress, as well.
Since this marker is for my To Do List insert, I figured "hustle" was an appropriate sentiment.  I purchased the file from the Silhouette Store.  The To Do header is included in the die cut template at Scrapcraftastic (see link below).
The small brown bag contains additional stickers and die cuts!
 Back of Markers.  
The large marker is double loaded (pockets front and back) 
the smaller pink marker is front loaded.
These little puppies will eat up stash scraps.  I have become addicted and plan to spend tomorrow making a bunch of these.

You can also make these for use in junk journals and mini albums.  Here is a link to a designer whose work I just love.


Sunday, May 20, 2018

Teacher Appreciation Gift

Hello, Fellow Paper Crafters!
Tell Your Story Journal Set
One school year of homeschooling and I have gained so much more respect for those amazing teachers who year after year strive to educate our youth.  Today I am sharing the appreciation gift created for my grandson's ELA instructor.  She is simply awesome!
Alert! Alert!  Photo Overload!  
Save those strips at the top of the single 12"x12" papers.  I used those to make the banners on my flower.  The "Daily Junque" is a different collection, but the banner worked for this journal. 
Because Ms. R. Teaches English Language Arts (in my grandson's case, 9th-grade Composition and Literature) I thought a journal would be a perfect gift for her.  I have been holding on to this Theresa Collins "Tell Your Story" Kit for almost three years and finally decided to cut into it.  I was impressed with her ability to get our seventh-grader to do ninth grade ELA work.  His writing is impressive and he has been introduced to Literature that I first encountered as a college freshman.
Sorry about the lousy photo
The "Button Hole Stitch" bookbinding method is fun and easy for beginners (like me) to learn.  Sea Lemon has a great tutorial.

I decorated the signature dividers with ephemera from paper collections related to writing, typesetting, etc.  Although I did not create pockets on these dividers, I have done so on others.   


I did, however, include pockets inside the covers.  I added thank you cards, library cards, and a few envelopes.  I also found the perfect Washi Tape in my stash!


Lately, I want to deliver all my crafting gifts in hinged boxes.  
This one was super fun to create!
I created a note holder by lining the lid with business card magnets.

Thanks for stopping by!
Hugz,
Chana Malkah


Sunday, May 13, 2018

Traveler's Notebooks - My New Obsession

Hi, Crafty Peeps!
I recently reorganized my studio and vowed to either use, donate, or throw away all those things that have gathered dust, paint and who knows what else over the past year.
The glitter is actually green. I have no idea why it photographed blue.
I definitely wanted to keep the faux leather fabric that was left over from an upholstery project. Unsure of how I would use the fabric, I sought inspiration on youtube.  I was inspired by this video  ZucchiniKitty to attempt my first Traveler's Notebook Cover. 
Inside Cover TN #1-Muslin, Stamps, Copics, Ephemera
Curious to find out if the fabric would accept paint, I used my favorite Earth Safe Chalk paint and the result was fabulous!  

Inside TN Cover#2- Muslin, Stamp, Stencil, Copics and Acrylic Paint


I was able to use old Gelli prints to make insert covers. 


I've discovered the Planner community and there is an abundance of information, freebies, tutorials, and images available for newbies like me.   The most rewarding aspect of this new journey was finding so many African American images to use in my planner. I have long been frustrated by the lack of images of "people who look like me" to use in my projects, which is one of the reasons I moved away from creating cards. 
Super cute page marker.
All you need is a laminator.
I love this image! (minus the Starbucks Cup)

I rarely take a purse to the store or to doctor's appointments.  Everything I need is in my TN including credit cards, DL, and health insurance ID.   I love this 16 pocket card holder insert.  The tutorial was easy to follow.  This is a great way to reduce your paper scraps stash!  
Here is the link:  Crystal & Company
I also created this top-loading dashboard that holds planning supplies and can be used to hold cash, too.  Even when I carry my purse, I just drop my TN inside and my purse is always organized.
I find creating my own planner far more engaging (creatively) and I am pleased with my early efforts.  If you have never created or used a Traveler's Notebook (or Fauxdori) as they are sometimes called, check out the fabulous Youtube tutorials. 

Thanks for stopping by!
Happy Crafting
Chana Malkah


Friday, May 11, 2018

Paper Crafting...A Cut Above

Hello, Crafty Peeps!


It has been a minute since I posted anything on my blog.   my husband and I volunteered to teach a few classes and do some study halls for our grandson who is being homeschooled, so,
there has been very little time for crafting.  However,  I became so inspired by self-directed learning that I decided to take a MOCC Graphic Design Course and learn a bit more about elements of design that would help me with future projects.

Our first assignment was to pick a common household item and create 10 representations of that item using different techniques and approaches to design.  Of course, the "real" graphic design students were churning out Illustrator and PS images.  Some twisted and morphed into alluring and captivating shapes.  The problem was, this was a denotative exercise and the key point was to make sure that the object was still recognizable as itself.   I chose the lowly knife and decided to stay true to my paper crafter roots and use the techniques I've learned making cards and other projects.   Well, ladies, just know, I crushed it!

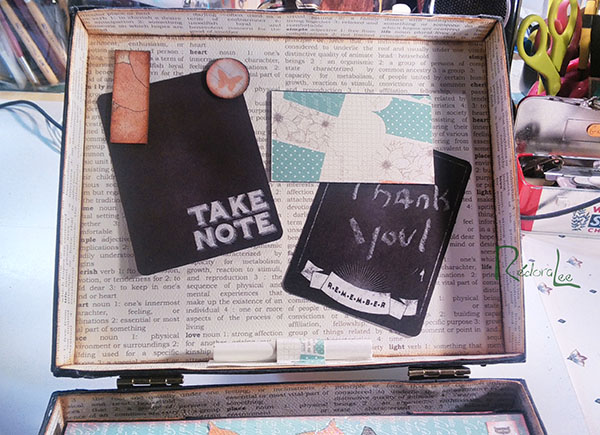
Click Image for larger view.
This is my "Game of Thrones" Knife.  I cut the knife from a piece of chipboard which I then embossed and covered with Aleene's Tacky Glue.   I used the "Burned Glue" method to create a faux metal look.  The blade is accented with Inka-Gold Old Silver and the handle with Rub'n Buff Ruby Rubi metallic finish.  Three flat back crystals on the handle and I was good to go.

Here are some of my other creations.  One of the designs had to be a "blind drawing."  I will spare you that one.
This is my "Roman" Dagger.  I used lots of acrylic paint and crackle to develop the texture and then used Rub'n Buff to convey age and exposure to the elements.   This one received very positive feedback.
This was very simple...just a lot of flat back pearls and crystals in the shape of a knife.

For this design, I used chipboard, glycerine water, and Tim Holtz distress ink to create a faux leather knife.  I embossed the surface and sealed it with Glossy Accents.  This is my favorite...so cool!

The other designs are mostly conceptual and not very interesting for a paper crafting blog.  It was interesting to see how different my submission was from most others.   One thing I know for sure, I need to feel paper in my hands and get ink on my fingers.  Wish me luck!   I will continue to share any of OUR techniques I use in my submissions.  Now, I have to come up with three new images using different techniques.  They are to be connotative and deliver a message.  "We shall see," said the blind man.

Hugz,
Chana Malkah