Tuesday, March 30, 2021

Shopping Our Stash - #442 - Spring Holidays

 Hello, Crafty Peeps!

Welcome to our fortnight challenge at Shopping Our Stash.  For the next two weeks, we look forward to seeing your Spring holiday (Easter, Passover, etc.) creations.  

The actual theme of the challenge at Shopping Our Stash is slightly different than the title I used here.  Jewish religious holidays are strictly governed by biblical text and therefore lack association with images from popular culture.  

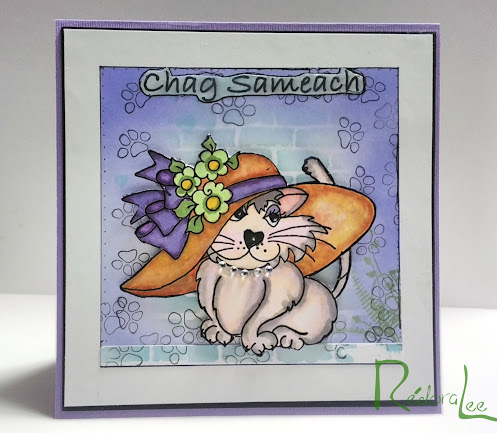
"Chag Sameach!"

This cute little art stamp by Loralie Designs has been in my stash for 10 years and has only been used once before this. I figured she was benign enough to be used to pass along a Happy Passover greeting.

I really think that "Shaded Lilac" may be one of the prettiest and most underutilized inks in the Distress Ink families.  Blending "Shaded Lilac" and "Tumbled Glass" created the perfect background for "Rita," my Loralie Designs art stamp.  If I had to change one thing, I probably would add more color to the wall behind Rita.  The wall she is sitting on does not have enough of the Shaded Lilac blended in.

Thanks for Stopping By,
Chana Malkah
Stuff I Used:
Loralie Art Stamp: "Rita" (No longer available)

Tuesday, March 16, 2021

Shopping Our Stash - Challenge #441 - The Rainbow Connection

 Hello, Crafty Makers!

"Someday we'll find it, the rainbow connection.
The lovers, the dreamers, and me!  
All of us under its spell, we know that it's probably magic!" 
Kermit, The Frog

It is time for another fortnight challenge at 
RAINBOWS
I decided on a non-traditional approach to this challenge.
One Bloom

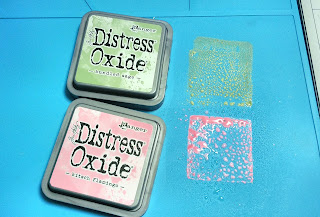
I think of my card as a deconstructed Rainbow. The background was created using a stencil and Distress Oxide Inks. The sunflower image was already cut and colored for use on an abandoned project.  The sentiment is from an old stamp set that I have had for almost 15 years.

This project came together quickly!  CAS is not my thing, but sometimes a project chooses its own direction.

My teammates have created fun projects for your inspiration.  Please join us!  Everybody loves rainbows!


Saturday, March 13, 2021

2021 Stash Bash #8 - You Are My Reason

 Hello, Crafty Peeps!

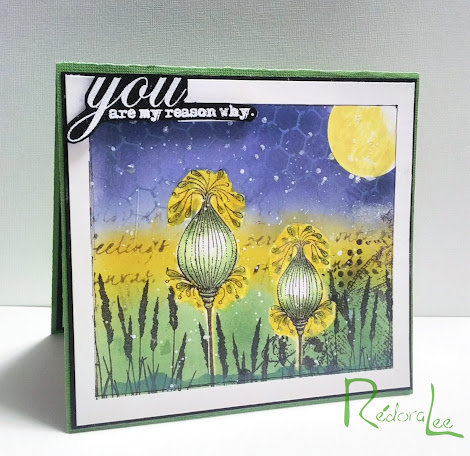
Today I am posting another "practice project."  It is one of those projects that I was guilty of overthinking.  And, when I realized my mistake, rather than starting over, I tried to fix it.  Anyway, I decided to just go with what I had at the end of it all.

This project was created with a mix of both new and old stash items.  The Lavinia Stamps have been in my stash for about two weeks.

I really must get better at photographing the glitter and Nuvo Glacier Paste™ effects on my projects.  I used glitter around the sprouts of the "fairy pods," and the glacier paste was used to create my stars.

Thanks for stopping by!
Chana Malkah
Stuff I Used:
Lavinia Stamps®: "Fairy Pods"
Technique Tuesday Stamps®:  "Simply You"
PanPastel® - 250.5 "Diarylide Yellow"
Distress Oxide Ink® - "Chipped Sapphire," "Rustic Wilderness"


Wednesday, March 10, 2021

2021 Stash Bash #7 - A Magic Mushroom

Hello, Crafty Makers!

I have developed so many addictions since the beginning of 2021.  I resolved that I would restrict my craft purchases, use previously untouched supplies, and try new techniques.

I am exploring new styles using AALL and Create Stamps, Lavinia Stamps, and Vera Lane Digital Images.  I had to purchase a few stamps but it has been well worth it.

This project was created using stash items but the style of the project was influenced by the Lavinia Stamps tutorials I have watched over the past few weeks.

I love this mushroom stamp and I think it pairs beautifully with both the image and the sentiment!   I rarely have a plan when I start making cards.  This project began as a "smooshing" practice. I was pleased with the result and decided to move forward with the project creation. 
The cute little fairy stamp is another 10-year-old stash item.  The sentiment is also from my stash.  
I added glitter glue to the cap and bottom of the mushroom stem.  It doesn't show well in this photo but it is pretty in real life.   The cap of the mushroom is also dimensioned and that is a cool effect.
This highlighting technique is one I learned at Lavinia Stamps and I really like it.  I was amazed at how simple it is to do and the difference it makes to the design.

Thanks so much for stopping by!
Hugz,
Chana Malkah
Stuff I Used:
Recollections Stamp: Fairies  - Possibly retired.
Unity Stamp Co. - Itty Bitty Stamp: "Mushy"
Just Rite Stamps - Fairy Garden
Glitter Glue - Dollar Tree

Monday, March 8, 2021

2021 Stash Bash #6 - Faux Leather Notebook - Journal Pages

 Hello, Crafty Makers

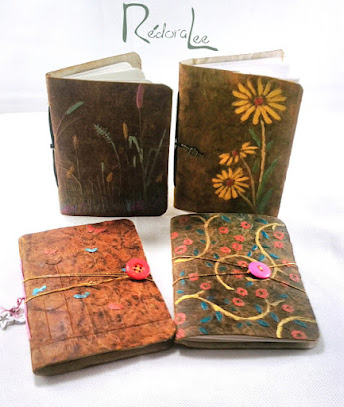
I am not an art journal person!  I did though have fun creating these pages. I think I am going to take a class on Art Journaling.  I may even get some of the bold and daring digital images and stamps. 
Nothing much to be said.  These pages reflect pretty much how I was feeling on the days I created them.  I was able to use up more untouched stash and that is always a good thing!

Hugz,
Chana Malkah


Sunday, March 7, 2021

613 Avenue Create - March Challenge #3 - Anything Goes w/Optional Twist: Create A Slider Card

Hello, Crafty Peeps!
The Optional Twist to this month's Anything Goes challenge at 613 Avenue Create gives us a chance to use a fun technique: Slider Cards!
Ease On Down The Road
I do not own, nor do I intend to purchase slider dies.  I had to rely on a label punch to create my slider card.  I also remain committed to using "never before touched" stamps, dies, and other stuff in my studio. So, when I came across an old Gina K. Stamp set I jumped at the chance to use at least three of the stamps in the set.  The focal image and two sentiments.
My project is very simple and straightforward.  One simply tilts the card and the car will "ease on down the road!"  
The inside is also very simple!
I found fun opportunities to use lots of stash stuff on this project.  The cute little "wallflowers" are from an old American Crafts™ stamp set.  I bought the set back in 2009 at Big Lots for $2.00.  I colored the flowers using  Smooch™ pearlescent ink.  I thought the bottles had dried up, but they just needed shaking.  Quite a miracle since I have not touched them since 2013.
I created a perfect road and then came to the realization that I had to cut into it to create the channel for my slider.  My fix did not work quite as intended, but it got the job done.  I love her little car, it reminds me of the orange Volkswagen Beetle of my college years!  I used a retired Prima Marketing™ stencil to create the sidewalk. The car is sitting a little lower than planned but moving the penny further down on the image caused my car to flip as it slid across the card face.
The stencil I used to create my wall is another seldom used stash item.  I originally intended to use my TH wall stencil, but that pattern is too regular.  This one has a more whimsical feel and fits better with the fun image.  My wall looked unfinished, so I colored some kraft card with distress ink and used it as a cap for my wall and an awesome resting place for my flowers.  It is amazing the difference that one bit of cardstock made to the appearance of my card.

The design team created some really awesome sliders, I think you will be inspired.  We cannot wait to see your entries this month at 613 Avenue Create.

Hugz,
Chana Malkah
Stuff I Used:
American Crafts™ Stamps: "Oolala" (2009)
Gina K™ Designs Stamp: "Tickle your funny bone" (2007)
Prima Marketing™ Stencil: Stone Walkway

Monday, March 1, 2021

A PLACE TO START - MARCH CHALLENGE #3 - PICK A SHAPE

 Hello, Crafty Peeps!
This month at A Place To Start we are challenging you to show us your clever use of shapes.  The shape can be the shape of your card, your embellishment, your sentiment, or all of the above.  You may use one or as many shapes as you like.  Have Fun!

FAIRY TALES
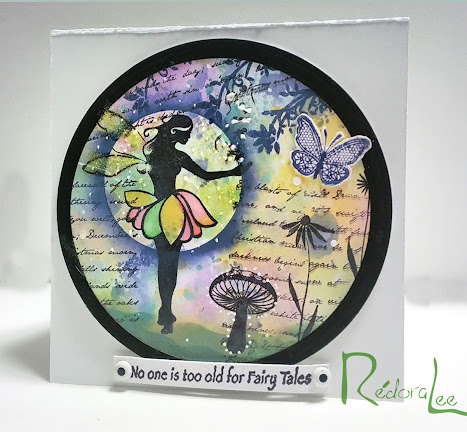
I chose to create a square card (5"x 5") base. 
 I also chose to use circles to create my fairy garden!
~  ~  ~  ~  ~
PICK A SHAPE CHOICES

My background was created by layering Distress Oxide Inks.  I used the smoosh technique to add the inks to my base. 
I smooshed the ink onto my silicone mat, sprayed it with water, and then dragged my card through it.  I would look at the result and press the card into the ink color that I wanted in a particular area.   Distress Oxides don't get muddy like regular distress inks, but I would still advise caution in choosing colors.
I used two colors at a time, using my heat tool to dry the inks between layers.  I did not have a particular color scheme in mind so I just kept adding inks until I had a blend that I liked.  I knew I would be using a 5"x5" base, so I used a 5-1/2"x5-1/2" piece of cardstock to create my background.

Once I was satisfied with my blend, I positioned my images (I used removable tape to position my circle die on the area I wanted to use) and stamped them using my stamp platform.  After that, I stamped text in selected areas The highlighting around the fairy was created by masking her upper body with a scrap circle piece and brushing the ink from the center outward.
  
The fairy's petals were colored with Arteza brush markers and water.  Liquid Pearls™ was added and sprayed with glitter to create sparkle around the fairy. I added glitter glue to the fairy's wings.  I also used my Sharpie paint marker to add white dots in selected places.

Thanks so much for stopping by!  I hope to see your projects in the challenge at A Place To Start!

Hugz,
Chana Malkah
Stuff I Used:
  Stamps:
Recollections Clear Stamp: "Fairies"
Bo Bunny Clear Stamps: "Snow Day"
Martha Stewart Crafts: "Doily Lace Butterflies"
Sweet 'n Sassy Stamps: "Light of Christmas" (script text)