Showing posts with label A Place To Start. Show all posts

Monday, March 1, 2021

A PLACE TO START - MARCH CHALLENGE #3 - PICK A SHAPE

 Hello, Crafty Peeps!
This month at A Place To Start we are challenging you to show us your clever use of shapes.  The shape can be the shape of your card, your embellishment, your sentiment, or all of the above.  You may use one or as many shapes as you like.  Have Fun!

FAIRY TALES
I chose to create a square card (5"x 5") base. 
 I also chose to use circles to create my fairy garden!
~  ~  ~  ~  ~
PICK A SHAPE CHOICES

My background was created by layering Distress Oxide Inks.  I used the smoosh technique to add the inks to my base. 
I smooshed the ink onto my silicone mat, sprayed it with water, and then dragged my card through it.  I would look at the result and press the card into the ink color that I wanted in a particular area.   Distress Oxides don't get muddy like regular distress inks, but I would still advise caution in choosing colors.
I used two colors at a time, using my heat tool to dry the inks between layers.  I did not have a particular color scheme in mind so I just kept adding inks until I had a blend that I liked.  I knew I would be using a 5"x5" base, so I used a 5-1/2"x5-1/2" piece of cardstock to create my background.

Once I was satisfied with my blend, I positioned my images (I used removable tape to position my circle die on the area I wanted to use) and stamped them using my stamp platform.  After that, I stamped text in selected areas The highlighting around the fairy was created by masking her upper body with a scrap circle piece and brushing the ink from the center outward.
  
The fairy's petals were colored with Arteza brush markers and water.  Liquid Pearls™ was added and sprayed with glitter to create sparkle around the fairy. I added glitter glue to the fairy's wings.  I also used my Sharpie paint marker to add white dots in selected places.

Thanks so much for stopping by!  I hope to see your projects in the challenge at A Place To Start!

Hugz,
Chana Malkah
Stuff I Used:
  Stamps:
Recollections Clear Stamp: "Fairies"
Bo Bunny Clear Stamps: "Snow Day"
Martha Stewart Crafts: "Doily Lace Butterflies"
Sweet 'n Sassy Stamps: "Light of Christmas" (script text)

Monday, February 8, 2021

A Place To Start - February Challenge - Sketch Challenge "Slay All Day"

 Hello, Crafty Makers!

Welcome to our monthly challenge at

A Place To Start

This month we challenge your creativity
 with a very simple sketch.
~  ~  ~  ~
Slay
As you can see, I took a lot of liberty with the sketch.  I didn't want to be too much "on the nose!" 
I had no plan when I started this project.  The only thing I did know was that I wanted to use buttons somewhere in the design.  It was a very pleasant surprise when I found these two wooden buttons in my stash.  Not only were they the perfect colors but they were also perfectly sized for stacking!  They have been in my stash since 2012.
 I normally use Ranger™ Distress Paints and Oxide Inks to create my backgrounds but after watching a Tracy Evans video, I decided to do this background using acrylic paint.  This panel was intended as a practice sheet.  I used a sponge dipped in glycerine to blend out the colors.  
The sketch calls for a banner. I wanted to add something a bit more dramatic.   The black trim in concert with the black sentiment strip gives me the visual I am looking for.  Using a bold sentiment embossed in white also serves to pull in the white card base and makes the composition more cohesive and integrated.  I used a stamp set from my planner supplies.
I used another sentiment and image from the stamp set to decorate the inside.  I may give this to my daughter.  Her boss surprised her today by doubling her bonus.  She also received a fabulous salary increase.  I would say she is slaying it alright.

Thanks for stopping by!
Chana Malkah


Monday, November 2, 2020

A Place To Start November 2020 Challenge: Mirror Stamping

Hello, Crafty Makers!

The Team at A Place To Start has another fun technique challenge for you this month.

MIRROR STAMPING

This is one of my favorite techniques.  You can use clear stamps or cling stamps and get a wonderful result.  You do not need a stamping platform (but having one makes it easier.)  This stamping technique lends itself to any genre and any creative POV!  

I wanted to use foil on my wonky stitched die to frame my mirror images.  I probably should have let the sandwich heat up a bit more before running through my Big Shot because there are a few stitches that did not get enough foiling!  But still, I like the effect.

I also die cut a small chipboard heart and foiled it with holographic foil.  The chipboard peeking through is just perfect.  I used oil pencils to color the images.  I wasn't going for fancy, I just wanted a little color.

Thanks for the visit!  I hope to see your projects in the challenge

Hugz,
Chana Malkah
Stuff I Used
Note:  I used the Paper Smooches Mirror Stamp Block.  They are out of stock and difficult to come by, so I have recommended an alternative.

Monday, September 7, 2020

A Place To Start - Create A Children's Card - September 2020 Challenge

Hello, Crafty Makers!
It is time for a new challenge at 
This month, we are interested in seeing the kinds of cards you would create for children!
In this case, a child is anyone from 0-18 years old so you do not have to limit yourself to "cute" kiddie creations.

Unexpected Friendships
If only we could get the entire world to believe this!  When my kids were growing up, the one phrase they were not allowed to use was, "because it has always been like this!"  We wanted them to learn that while there are many things in life that don't need improvement, most things in life can benefit from a slight tweaking every now and then.  As a result, they grew up learning to enjoy a diverse array of music, dance, literature, sports, and most especially, people.  

For two years, my grandson attended a private international school and we were amazed by his knowledge and acceptance of other cultures!  This past year, he attended a private homeschool academy located in a super-wealthy community!  I was terrified that he would be bullied not only because of his skin color but also because although he is from an upper-middle-class home,  you could put ten of my daughter's home into one of the homes of some of his classmates.  It took exactly one week for this child to develop friendships that have continued to this day.  Because my daughter chose to not have him return to a brick and mortar environment, he is back to full-time homeschooling in a Cyber Academy, however, he and his friends have "bullied" their parents into allowing them to have a "fully masked, socially distanced" Art Meet Up!  The thing that convinced my daughter was a comment from one of his former classmates, "Please, Mrs. Brooks!  It simply would not make sense to do this if Joshua cannot be there...we miss him!"   I really believe the next two generations will teach us old fogeys quite a bit about friendship and inclusion! 

Thanks for Visiting!
I hope to see an entry from you in our challenge!

I am entering this project into the 
#372 "Includes an Animal"


Monday, August 3, 2020

A Place To Start - August Challenge - Create A Shaker Card

Hello, Crafty Peeps!
I am just delighted with the theme for our challenge this month at A Place To Start!  I love making shaker cards and this challenge gave me the opportunity to create a slimline shaker card, my first.

 GOOD VIBES
I have found it easier to use craft foam on my shaker card than messing around with the double-sided foam tape. I also used a single sheet of acetate. 
I forgot how acetate picks up shadows. That is not a defect in my top circle, it is a reflection from the light hitting the acetate. I simply could not take one more picture!😄 This is the first slimline card I have done in almost ten years.  When I saw the framework dies, I had to break my crafting diet and purchase two. I wanted them all but impulse control is a part of my three-year "no spending" challenge.
I did not want acres of white space on the inside of my card so I used my Mini Cubic Stencil to create a pattern that matched the face panel.  I added a touch of "Shaded Lilac" Distress Oxide Ink to the inside panel to create a little more interest.  I also added a think strip of cardstock along the edge to give the eye a little relief.


Thanks for stopping by!  
I look forward to seeing your entry!
A Place To Start

Challenges Entered:
Artsy Divas:  Always Anything Goes
The Corrosive Challenge: Always Anything Goes
Dragonfly Dreams: Anything Goes


Stuff I Used:
Framework Cutting Die


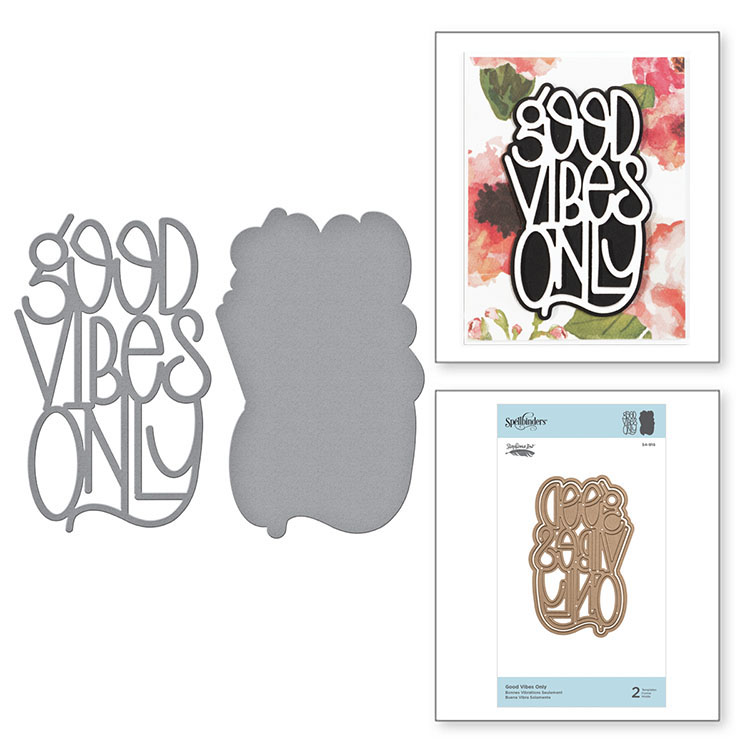
Spellbinders' Good Vibes Only

Memory Box - Sofia Heart
Sophia Heart Die - Memory Box - for Crafts :

Wednesday, July 8, 2020

2020 Stash Party #33 - I Love Life - Baby Wipe Pseudo Stamp Pads

Hello, Crafty Peeps! 
Today, I thought I might practice the "baby wipe" technique.  A very pretty card was entered into one of my challenge blogs and I liked the look.  I have used the baby wipes on stencils but never as a stamp pad.
I am going to add this card to the "Floral" challenge at A Place To Start!

Love the Life you Live and Live the Life you Love
I had no plan when I started.  My goal was to simply practice baby wipe stamping but the practice panel looked okay so it was only natural for me to figure out how to build it into a card.  

To create my floral background, I made two faux stamp pads using baby wipes.  One for the colors in my flowers and one for the colors in my leaves.  I practiced stamping on scrap paper until I had the look I wanted.  I toyed with the idea of coloring in the flowers but in the end, I decided that I liked it better uncolored. To add some dimension and texture, I made two small vellum flowers, colored them, and attached them with a brown brad.  The ribbon was added to balance the design and I embellished the ribbon with flatback pearls, again to add texture and depth. I used my Vintage Photo re-inker and water to create splatter.  Finally, I inked the edges with Vintage Photo Distress Ink and layered it onto the base.  This is definitely a fun technique and I know I will use it often to create my backgrounds.
Thanks for Stopping By!
I hope to see your Floral Inspired project at
Stuff I Used

Wednesday, May 6, 2020

A PLACE TO START - MAY 2020 CHALLENGE - CREATE A CUSTOM BACKGROUND

Hello, Crafty Makers!
We have a fabulous challenge for you this month at A Place To Start!
We are challenging all of our players to create their own custom backgrounds.  We accept all crafts, so you do not have to make a card, however, you cannot use designer paper.   I know this is a challenge Gelli Plate Artists can nail just using their wipe-offs!😊
Love Life
My card is being posted a couple of days late.  I am not always the best at anticipating how much time things will take.  I signed up for a bunch of Jewish Learning classes, not thinking that they might overlap some of my gig work and my crafting!  C'est la vie!

Decorated envelopes are always nice!  I only do them when I can use a simple image and not worry about decorating the inside.
Without those small flatback crystals, I don't think this card would have the same visual impact.  The waxed linen thread is perfect!
This is the most decorating I have ever done on the inside of a card.  The sentiment expresses my attitude.  I love life!  In spite of it all, life is good!
 <><><><><><><><><><><><>
How to create these backgrounds:
Use the stencil(s) of your choice
  • Cut a piece of white CS to 11.0" x 5-1/2".  Score at 2", 4-1/2" and 9".
  • On the backside of the card, apply Distress Oxide Inks: (Blend until you achieve your desired color.  
  • Next, cut the decorative edge on your small flap.  I positioned the die at 1/4" from the edge!  (The positioning of the die will be determined by the image you plan to stencil on your flap and the size of your border die).
  • Positioned your stencil so that a small part wraps around the back when folded.  Color in the stencil using your blending brushes.
  •  Allow the outside to dry thoroughly before decorating the interior. Use a blending brush to cover the entire surface with Vintage Photo Distress Oxide Ink. Wipe an anti-static bag over the inked surface. Use Pixie Spray or a low tack tape (like Scotch removable tape)to the back of your background stencil. (this design can be the same as the front. I just chose to make mine different.) Make sure that both the card and the stencil are secure. I applied two layers of VersaMark Embossing Ink. The first layer was applied using a piece of cut foam. The second layer was applied using the direct to paper technique and then embossed with clear embossing powder.
  • If you are using a second decorative stencil as I did, position the stencil on the inside and color it with blending brushes. After the stencil has been colored, you can apply Perfect Pearls or Wink of Stella to the interior surface. If you use Perfect Pearls, Remember to mist the stencil design (spray water into the air and then pass your card through it a few times) to set the Perfect Pearls.
  • Cut a piece of text weight paper to a size slightly smaller than the center panel and adhere it to your card using a glue runner. Stencil in the Design. You can use CS instead of Text!
  • Use a stamping platform to stamp your sentiment.
  • Secure your flap with cord (I used waxed linen ) or ribbon. Add other embellishments as desired.
<><><><><><><><><><><><><>
Stuff I Used
Heidi Swapp Stencils
Martha Stewart Stencil


SPELLBINDERS-Edgeabilities-Mix-amp-Match-CLASSIC-DECORATIVE-INSERTS-TWO-E8-010-Die

Monday, April 6, 2020

A Place To Start - April 2020 Challenge - Use a Ribbon or Bow

Happy April!
Time for a new monthly challenge at A Place To Start! 
We have a sponsor this month
Stamper's Delight
(formerly Scrappers's Delight)
I was so focused on trying to color this unicorn that I forgot to add my bow.  It wasn't until I had everything glued down that I saw my omission.  Technically,  I did not complete the challenge but I did use the sponsor's image so I am sharing the card!
This project presented another opportunity to play around with my Perfect Pearls™.  I wanted to add a little shimmer so after I colored my unicorn, I brushed on a light layer of "Pearl" Perfect Pearls™.  I also applied it to the background panel after I sponged the edges with Distress inks.  Although it is difficult to see in the picture, the card has a soft, satiny sheen that is so pretty IRL!
 If you click on these close-ups, you can see the shimmer!
I used Glossy Accents on her horn and hoves to add just a little more dimension and texture.  I ad a few technical issues with the card but since it is staying with me...I decided not to redo it!  I did, however, go back to shade in the white spaces on her hair.

Thanks so much for stopping by
Hugz,
Supplies:
Image: Stamper's Delight - Pegasus
Sentiment: Heidi Swapp Clear Stamps