Showing posts with label Mermaid/Toothbrush Blending Tools. Show all posts

Friday, June 7, 2019

Even Bad Days! Blending, Stamps, and Stencils

Hi, Crafty Card Peeps!
The insomnia bug hit me pretty hard last night!  Cleaning my studio didn't tire me out so I decided to do some crafting.  Two of my DT projects this week required the use of stencils and I still had a bunch of stencils on my side table.  As I looked at all the disparate elements, that age-old crafting mantra came to mind, "Why not?"
"Even Bad Days"
I do not color well.  That has not, however, stopped me from purchasing stamps based on how beautifully they were colored by other crafters.  I have shied away from using this stamp but I guess a lack of sleep and a need to create overshadowed my fear of Copics and I just dove in.  A combination of Stamps, stencils, and Distress Oxide blending finally got me to a comfortable place with this project.
The image is stamped and colored with Copic markers.  I created a mask and then used my mermaid makeup brush to blend my background.   I removed the mask and used various size brushes to fill white spaces in the image.  Next, I stenciled in the umbrella.  The umbrella color is a combination of Faded Jeans and Squeezed Lemonade.  The photo does not do it justice.  IRL it is a fabulously delicious color that looks like denim fabric.
The puppy was on the same stencil sheet with the umbrella.  To stencil him I used Vintage Photo ink.  I added Mowed Lawn and Cracked Pistachio to ground the images.

I used my circle and tornado stencils to add a little interest to the umbrella and the top of the card.  I added Stickles to the umbrella and a few sequins to complete the face of the card. 

In my stash, I found a pretty, soft brown and beige small gingham paper.  I mounted this onto a piece of olive green cardstock.

In the end, I was pleased with my work.  I know that far more talented people have colored this image to a level of perfection I will never know.  But for this card, which I plan to give to a friend who is in a bad place right now, I think I captured the mood.

Thanks for Stopping By!
HUGZ,

Challenges Entered
Stamping Sensations - Show Your True Colors


Tuesday, February 26, 2019

Shopping Our Stash Challenge #390 : Fabulous February

Hello, Crafty Peeps!
The fortnight (two weeks) challenge at Shopping Our Stash is:
Fabulous February.  
Make something inspired by February's stone (amethyst) or February's flowers (violet or iris)
~~~~~~~
 I realized long ago that there were many fabulous card designers out there creating "floral" cards and it seemed dumb to even try to do the flower thing. 
That was then, this is now.  Facing serious health issues changes how one sees so many things in life.  For the past four years, crafting has been a port in the storm for me. It has been my family's barometer for measuring how well I was doing on any given day. I have returned to the passion that made me fall in love with this hobby in the first place. I create for the pure joy of creating! 
Violet Passion
I don't know why I haven't used this Sizzix Die over the years because it is one of my absolute favorites.   For this challenge, however, I decided to continue my personal challenge of creating CAS projects, using "ancient" stamps and dies and learning at least one new technique each week.  Using old stuff is the essence of SOS Challenges. 

Personal Challenges Met:
1.  CAS Design
2.  New Technique: Splattering
3.  Ancient Supplies:  Sizzix Die, Hampton Arts Stamp, Vellum Paper, Purple Heart, Bling.

What I Did
1.  Cut a piece of heavy-weight white cardstock to 4.25"x11.50" (A2 card base)
2.  Make a banner cut at one end of the paper.  
3.  Score at 5.50" and fold.  Burnish with a bone folder.
4.  Cut a piece of white cardstock to 4.25" x 5.50".  Place this inside your folded base and trace the banner.  Use your trimmer or scissors to cut out the triangle shape.
5.  Emboss or use a background cut plate on the banner end only of your base.
6.  Repeat the embossing or die cutting on the small banner piece.  Use double-sided tape to adhere the small banner to the back of the banner shape on your base.  Make sure the embossed/die cut design is facing out.  If you want to wrap ribbon or twine, attach it before you glue the banner panels together.


7.  Cut a piece of vellum to 4.00" x 5.25".  Stamp your sentiment and heat set.  Place aside to dry.
8.  Cut a piece of white cs to a size that will allow you to place and cut your dies.  Blend your inks to achieve an ombre effect.   Splatter ink on opposing colors.  I also added gold splatter.  Arrange your dies on the sheet and cut.
 9.  Form your flowers and assemble.  I used double-sided foam tape between each layer except the bottom flower that is to be attached to the card base with double-sided tape and wet glue.
I created a card box to avoid crushing my flower!

Thanks for stopping by!
Hugz!


Wednesday, February 13, 2019

A Creative Brush with Brushes - Using Toothbrush/Mermaid Brushes for Blending

 Hello, Crafty Makers!
After much cogitation, I have finally entered the Realm of The much touted "Mermaid/Toothbrush Blending Tool." 
Hex Appeal
To color this stencil, I used three brush sizes (only two are pictured below).  Additionally, to test and compare the two brands, I used brushes from both the Laromni and DSC Beauty brand. I was pleased with the performance of both brushes. I was able to control the ink application to achieve the look I wanted.
Ode To Jessie
For this project, I used the Laromni brushes exclusively.  I must admit that the Laromni set is probably the better of the two.  I just like the feel of these brushes in my hand when I am coloring or blending, the process seems smoother but, as I wrote previously, both do a good job of blending and coloring.
 Two brushes were used to color this project.  Because of all the tight spaces, having a thinner brush made it easy to get into all the crevices between the petals. Details for this project can be found here
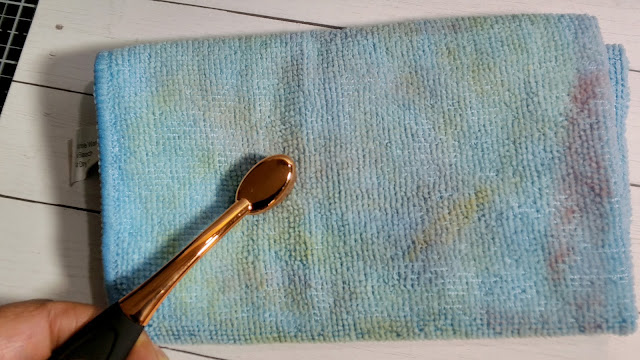
Cleaning the brushes between colors is a simple matter of brushing them across a microfiber cloth.  This takes seconds and speeds up the work process. 
The DSC Beauty Brush Set came complete with 10 brushes and this handy drying/storage rack.  I ordered a drying stand on Ali Express ($5.06 + $1.79 for shipping) for my Laromni Brush Set.  These stands are convenient and reduce desktop clutter.
The only true difference I spotted in the brushes was the head size.  The Laromni brushes are just slightly larger. 
The Laromni Brush Set 
 Now that I am using these brushes on a frequent basis, I have taken this chart and fashioned one that helps me decide which type of brushes work best on my stamps and stencils.  
For Example, the Hexagon Stencil would be 09, 05, and 04.

~~~~~~~
 Why I switched to Mermaid/Toothbrush Blending Tools.

Thanks for Stopping By!
HUGZ!
These products are currently available on Amazon.  Click the image for pricing and other information.