Showing posts with label Ann Butler Stencils. Show all posts

Saturday, April 18, 2020

Stash Party #12 - Believe

Hello, Crafty Peeps!
~~~~~
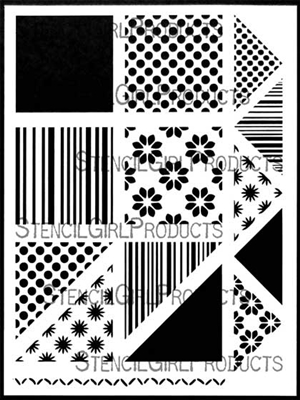
This is my second card using Perfect Pearls and Ann Butler's Squares and Triangles Stencil.  I guess if ever there was a time that we needed to walk in faith, this would be that time.
It is amazing how just changing the color of my paper (in my previous project the flowers were embossed on black paper) makes a huge difference in the personality of a project.

The major stash reducers in this project were the Butterfly and the satin ribbon.  Both have been in my stash for over five years!

The Quietfire "Believe" sentiment was given to me as a Guest Designer for the company about six years ago!

THANKS FOR STOPPING BY!
HUGZ!

Stuff I Used:
Squares and Tris Set 1 Stencil by Ann Butler Believe - Metal Cutting Die
3/8" Satin with Silver Metallic Edges Grape

Friday, April 17, 2020

Stash Party #11 - Stencils and Perfect Pearls!

Hello, Crafty People!

I am continuing with my personal stash party.  I completed two projects that allowed me to use a stencil created by my friend Ann Butler.
I fell in love with Ann Butler's Squares and Triangles stencil when she introduced it and shared a tutorial for creating a fun pincushion using the stencil and muslin fabric. You can see my project HERE.  My favorite pattern is what I call the "pansy square" and I wanted to use it on a card face.

I created the card face, but as it so often happens in card making, I couldn't pull the project together to match what I saw in my head.  I decided to cut the design paper I created into panels.
   
To create my paper design, I positioned the stencil and applied VersaMark Embossing Ink.  I had to apply extra pressure to ensure full coverage of the open areas on the stencil.  I worked in sections and I worked very quickly. 

Once I had my pattern established, I brushed on the Perfect Pearls.  I actually used two colors but the delineation is so subtle it is difficult to see it in the photo.  I also inked and colored the border strip found at the bottom of the stencil to be used as an accent piece.  The pattern was irregular but I found that I liked the artsy look.  The green splatter was added to pull in the color from my top layer.
   
I had the most wonderful debate with myself about the sentiment.  Originally it was cut from the Sea Glass card that I used for my top layer.  It was nice but the gold just seems to be more elevating.

I truly love how this card came together.  I don't think my photography does it justice.  IRL it has a very beautiful understated elegance.  I am tempted to keep it but it is already promised to someone, so...

Thanks for stopping by.  I hope you were able to find some inspiration here!

HUGZ!
Stuff I Used:
Squares and Tris Set 1 Stencil by Ann Butler 

Monday, June 17, 2019

A Place To Start /Mid-Month Project -Stencil Me In

Hello Crafty Peeps!
It is time for our mid-month DT make at A Place To Start.  I decided to create this fun pincushion using an Ann Butler tutorial.  This is my first attempt and I had a few issues but decided to post it anyway because our blog is all about new beginnings!
I used Ann Butler's Easy Design Elements (EZ-De's) Stencils for Stencil Girl to create this cute little pincushion.  I don't often use my very fancy Brother's sewing/embroidery machine but as part of my self-challenge for 2019, I am using sewing more on my projects.  The stitching was a little "wonky" so my corners did not turn out as evenly as they should have and there were a few other "oops" but in general, I am pleased with the outcome.
I am posting the link to the tutorial down below but I want to share some changes I made when creating my pin cushion.
  • I really did not want to purchase more craft inks, so I decided to see if the Distress Oxide Inks would work and they did. 
  • Because I am capable of losing anything while I am working on a project, I added a tassel to my pincushion.  
  • I also decided to use two buttons in the center of my cushion instead of one.
  • Rather than filling my pincushion with Fiber Fill (used in pillows, etc.) I used ground walnut shells.  This material keeps your pins sharp.
Links:    
I am including the YouTube Video but I recommend that you use the Step Tutorial HERE on Ann's Blog for correct measurements and cutting and sewing instructions!

Links to Stuff I used:
Fabric: Muslin

Stencils
Inks

Miscellaneous

Thanks for stopping by!  I look forward to seeing your fabulous stenciled project in our challenge!

Hugz!

Wednesday, May 1, 2019

Bella Crafts Giveaway - I WISH

Hello, Crafty Peeps!

I created this card using a sentiment from the gift basket I won in the Bella Crafts giveaway a few weeks ago.  If you are not familiar with  Bella Crafts Publishing, click the link and have a look.  Every Wednesday at 1:00 p.m. EDT (that's 10:00 a.m out West) Lisa Rojas (She and Ann Butler are the owners) presents a live tutorial and they have a drawing!  They also have a wonderful FB page called "Do You Love To Craft".  The group a true "drama free" zone.  No negativity, just pretty craft projects, and great inspiration.

As crafters, we see a lot of sentiments all the time.  The sentiments we use on our cards and layouts and the ones we see on the projects of other crafters.  We always find one or two that we like and want to use and some that inspire us and then there are the ones that resonate and speak directly to your soul.  This sentiment was the first one I pulled out of my package when it arrived in the mail.

I decided to use one of my old Blockhead Stamps so that I could continue my quest to use things I've not used before but that I have for umpteen years.  I also pulled out my Darice EF which has only had occasional use.  The banner dies arrived in the mail while I was working on this card...perfect timing. 
I used my new Ann Butler (for Stencil Girl) quilting stencil to create the background!

Thanks for Stopping By!
Hugz,


Sunday, April 28, 2019

Colorful World - Freshly Made Sketches

Hello, Crafty Makers!
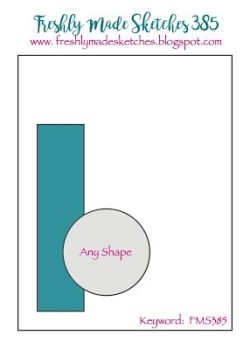
I was practicing lining up my new Stencil Girl®/Ann Bulter ™Quilting patterns before I tackle creating a pin cushion from one of Ann's tutorials.  Well, one of my practice sheets looked pretty not so bad, so I figured I would make a card.  
I looked around and found this sketch at 
That'll work!
~~~~
Colorful World
My world is a scrap piece of background paper I created on my homemade Geli plate.  I colored my frame with the Distress Oxide Inks used for the side panel then I used the Ann Butler™ stencil to add flowers.  The sentiment is from the Altnew® Crafty Mail Collection!
The challenge closes on the 29th. 
You still have time to play along..if you hurry!
Hugz,