Showing posts with label perfect pearls. Show all posts

Sunday, May 3, 2020

2020 Stash Party #17 - 5 Day Challenge: One Stamp Five Ways - Day 4

Hello, Crafty Makers!
So, my crafty buddy and I have arrived at day four of our five days, five cards, challenge.  In spite of my moaning and groaning, this has been a lot of fun, I even made a video while creating my first card!  I can hardly wait to see what my buddy comes up with next!

FAITH IN WHAT WILL BE
For this progression, I decided to use my colored cardstock for the base, to use a dotted designer paper as one layer, and use the white cardstock to create a frame.  I originally had the designer paper in the recessed area of the die-cut, but it looked too contrived for me so I got rid of it. 
This close-up image gives a little better idea of the satiny sheen I get on my panels using Perfect Pearls.  I just ordered another jar of the Perfect Pearls "Perfect Pearl" because I know I will use is often in my projects!
I wanted to keep the design as clean as possible so I added only this bejeweled butterfly to the lower right corner!  I used craft foam beneath my image to give so dimension to the project!

AN ADDITIONAL CREATION
As I was working on this card, I was simultaneously working on my planner spread for May!   Since I live in a state where the governor has decided that "black lives really don't matter,"  and that COVID-19 might just be the vehicle to help him reduce the black population of Metro Atlanta, I wanted to have this stamped sentiment in front of me every day in my planner.  I made a quick page divider using this stamp.   I plan to do it over and emboss the sentiment with white embossing ink which will make the sentiment easier to read.  But I like this one and plan to keep it!

Thanks so much for stopping by!
HUGZ,
Stuff I Used:
Couture Creations Embossing Folder - Pinstripe
FAITH in what will be

Saturday, May 2, 2020

Stash Party #16 - Day 3 - Use One Stamp 5 Ways - A 5 Day Challenge

Hello, Crafty Makers!

I am back with my third card in the 5/5 challenge.
For this iteration, I used a border die to cut this cool pattern in the bottom of my card face. Next, I embossed the top portion with a swiss dots embossing folder.  Rather than stamping my sentiment onto the card face, I stamped it on a separate scrap of paper and mounted it onto the card face with 3D dots.
I colored the image and distressed the edges with Broken China Distress Oxide ink.  After that, I used my blending brush to add Squeezed Lemonade Distress Oxide in the center of the image and blended it softly into the inked edges. I then applied Perfect Pearls to the panel, brushed off the excess, and wiped the panel gently with a microfiber cloth.  In real life, the panel has a smooth, soft, satiny appearance.  To finish the design, I added a strip of foiled washi tape and a flower.  I added bling to the image and the center of the flower.

I am pleased with this project since I believe that it maintains the continuity of the design of the first two cards.  These cards will make a very nice gift set for somebody!

Thanks for stopping by!
Hugz,
Stuff I Used:
FAITH in what will be

Friday, April 17, 2020

Stash Party #11 - Stencils and Perfect Pearls!

Hello, Crafty People!

I am continuing with my personal stash party.  I completed two projects that allowed me to use a stencil created by my friend Ann Butler.
I fell in love with Ann Butler's Squares and Triangles stencil when she introduced it and shared a tutorial for creating a fun pincushion using the stencil and muslin fabric. You can see my project HERE.  My favorite pattern is what I call the "pansy square" and I wanted to use it on a card face.

I created the card face, but as it so often happens in card making, I couldn't pull the project together to match what I saw in my head.  I decided to cut the design paper I created into panels.
   
To create my paper design, I positioned the stencil and applied VersaMark Embossing Ink.  I had to apply extra pressure to ensure full coverage of the open areas on the stencil.  I worked in sections and I worked very quickly. 

Once I had my pattern established, I brushed on the Perfect Pearls.  I actually used two colors but the delineation is so subtle it is difficult to see it in the photo.  I also inked and colored the border strip found at the bottom of the stencil to be used as an accent piece.  The pattern was irregular but I found that I liked the artsy look.  The green splatter was added to pull in the color from my top layer.
   
I had the most wonderful debate with myself about the sentiment.  Originally it was cut from the Sea Glass card that I used for my top layer.  It was nice but the gold just seems to be more elevating.

I truly love how this card came together.  I don't think my photography does it justice.  IRL it has a very beautiful understated elegance.  I am tempted to keep it but it is already promised to someone, so...

Thanks for stopping by.  I hope you were able to find some inspiration here!

HUGZ!
Stuff I Used:
Squares and Tris Set 1 Stencil by Ann Butler 

Monday, April 13, 2020

Stash Party #10 - My First Starburst Card

Hello, Crafty Makers!
Starburst Cards have been around for a long, long time.  I always intended to make one but I have the crafting version of ADHD so it never happened.  This card style is perfect for stash reduction!
Crafty Kraft
I am a big fan of kraft card.  I made this card with my final piece of kraft card.  I purchased about 50 packs of kraft card (25 sheets/pkg) back in 2010 at Big Lots.  They were selling them for $5.00/pkg.  I purchased 5 per visit and now wish I had bought them out! The lace is also a stash item.  I have this lace in three colors and I use them sparingly because I cannot find this particular pattern any longer.  The papers are from a Teresa Collins "Save The Date" 6"x6" pad that I have had for a few years.  
My flower was made about a month ago and was a reject from one of my vellum flower making practice sessions.  It has been sitting on my board and today it became the inspiration for my card.
I covered my design paper panel with Perfect Pearls.  IRL, the panel looks like satin and has a soft, pretty sheen!
The effect is created by simply applying VersaMark Embossing ink to the front of the panel and then brushing on Perfect Pearls.  I removed the excess PP by wiping it down with a microfiber cloth.  I actually buffed my panel to get the look and feel I wanted!

STEP TUTORIAL
There are dozens of tutorials on YT but I like to create these written tutorials for those who prefer them over videos.

Materials Needed:
White CS, Patterned Paper, Colored CS (Optional, depends on your design)
Embellishments, Sentiment Stamp.

Tools:
Paper Trimmer, Scissors, Glue Runner
  • 3 or 4 pieces of card stock cut to 4" x 1-1/2".
  • Cut them diagonally (corner to corner) to create a triangular shape.
  • (I added a fourth strip to my project to add more interest.)

  • Cut a piece of white CS (use scraps as this will be covered up.)
  • If you are using the Tim Holtz Glass mat, it is easy to find the center of your panel.  Line your panel up on the lined cross, as shown below.  Count over seven 1/4" squares and mark center on the top and bottom. 


  • Adhere the first patterned triangle to as shown below.  Line the strip up with the centerline.  Apply your second strip on the other side using your centerline mark as your guide.  Continue adding strips in your desired patterns. It will be necessary to adjust the position of the strips.  After your strips have been glued down, the two bottom corners will not be covered.  Trim the overhanging strips and use two of those to cover the corners.
  • I cut a piece of craft foam slightly smaller than the size of my decorated panel and attached it to the back for dimension.
  • Cut a piece of white CS to a size that is slightly larger than your decorated panel 4" x 5-1/4".
  • If you are planning to stamp your sentiment at the bottom, as I have done in my project, stamp the sentiment now before beginning your card assembly.
  • Cut a size A2 card base (4-1/4" x 5-1/2")
  • Gather your embellishments.  I changed my mind after I took the photos and decided to use smaller lace and to eliminate the aqua layer.  This gave my card a slightly larger border but I like it.  I also decided to ink the edges of my panel with Vintage Photo Distress Oxide Ink.

  • Assemble your card.
  • I created a second A2 card base using white card stock.  I trimmed the edges so that it was 1/4" smaller than my kraft card base and used a glue runner to adhere it to the inside of my card. 
    I tied a piece of twine around the card and made a cute little bow.
    The twine shows on the inside of the card.  I use a jump ring to attach a charm to the twine on the inside. The charm can be removed by the recipient!

    THANKS, SO MUCH FOR STOPPING BY!
    HUGZ,
    Stuff I Used:

    Monday, April 6, 2020

    A Place To Start - April 2020 Challenge - Use a Ribbon or Bow

    Happy April!
    Time for a new monthly challenge at A Place To Start! 
    We have a sponsor this month
    Stamper's Delight
    (formerly Scrappers's Delight)
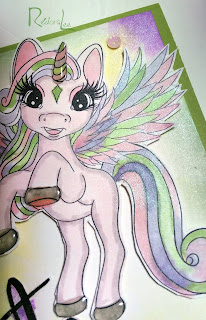
    I was so focused on trying to color this unicorn that I forgot to add my bow.  It wasn't until I had everything glued down that I saw my omission.  Technically,  I did not complete the challenge but I did use the sponsor's image so I am sharing the card!
    This project presented another opportunity to play around with my Perfect Pearls™.  I wanted to add a little shimmer so after I colored my unicorn, I brushed on a light layer of "Pearl" Perfect Pearls™.  I also applied it to the background panel after I sponged the edges with Distress inks.  Although it is difficult to see in the picture, the card has a soft, satiny sheen that is so pretty IRL!
     If you click on these close-ups, you can see the shimmer!
    I used Glossy Accents on her horn and hoves to add just a little more dimension and texture.  I ad a few technical issues with the card but since it is staying with me...I decided not to redo it!  I did, however, go back to shade in the white spaces on her hair.

    Thanks so much for stopping by
    Hugz,
    Supplies:
    Image: Stamper's Delight - Pegasus
    Sentiment: Heidi Swapp Clear Stamps

    Saturday, March 28, 2020

    Stash Party #9 - A Floral Thank You - Perfect Pearls

    Hello, Crafty Makers!
    My mojo is trying to work its way back.
    In order to keep it going, I raided my stash again looking for products I have not used in years!  
    Guess what I found:  Perfect Pearls™!
    I wanted to make vellum flowers and I wanted to make an aperture card.  I was able to do both and incorporate the Perfect Pearls™   
    To create my vellum flowers, I stamped the image onto a regular piece of vellum using VersaMark embossing ink and then heat embossed them using white embossing powder.  Using my mermaid brushes, I blended Distress Oxide Inks over the petals and the leaves.  I didn't have dies for these flowers so I fussy cut them.
    I couldn't get the light right, but you can see the shimmer!
    I created the "metallic" background using Ranger Distress Inks and Perfect Pearls.  I blended the inks on a piece of white card stock and then using a small paintbrush, I applied Perfect Pearls™ to the surface.  I used a microfiber cloth to wipe away the excess Perfect Pearls™.  The metallic finish is so pretty.


    Pretty much any background die will work.  I love this bold geometric die. 

    THANKS FOR STOPPING BY!
    ***The Heartfelt Creations™  floral stamps used in this project came out of my stash.  They are so old, I fear they may have been discontinued.  I no longer have the packaging for the die.  Perfect Pearls is a Ranger Product

    Monday, September 10, 2018

    Stamping with Mica Powders- Perfect Pearls - "L is For Leaf"- Sisterhood of Snarky Stampers


    Hello, Crafty Makers!
    This is my second make for the current challenge over at
      The note card base and the top panel of this project were cut from the same 12"x12" paper.  The top panel was covered with VersaMark embossing ink and then covered with perfect pearls.  I used a small makeup brush to spread the mica evenly.  I arranged my stamps on my Tim Holtz Stamp Platform and applied VersaMark embossing ink.  I stamped the image, applied more ink, and then stamped again.
    The embossing ink lifts away the mica powder and leaves a beautiful impression and your background has that fabulous sheen. I thought the textured paper added additional visual interest and helped ground my embellishments!

    Click HERE to watch Jennifer McGuire's Tutorial for this technique.

    HUGZ!


    Sunday, September 9, 2018

    Sisterhood of The Snarky Stampers - Weekly Challenge - "L" is for Leaves


    Hello, Crafty Makers!
    My goal this year is to learn a lot of new techniques and to use old supplies, tools, and materials I have been hoarding since the 1980's that I've never used.

    This is the first of two cards I created for the "Leaf" challenge over at the Sisterhood of The Snarky Stampers.  I was looking for inspiration to use my Perfect Pearl mica powders that I haven't touched for years and surprise, surprise, Jennifer McGuire posted a new video this week on that very subject.
    This card was actually created using the residual VersaMark ink on the image after the main stamping has been done.  My VersaMark pad needs replacing and I think a fresh pad would have left behind more ink and given a better image.   I also used textured paper and that may have had an impact.  All in all, I am pleased with the results.
    Here is a better shot of the gold mica stamping as well as the background stamp.  I colored some elements of the background stamp using my Arteza Brush Markers.  I am not an artist so I don't try to do fancy shading, etc.  I just add little bits of color and keep it moving.  

    HUGZ!
    CHANA MALKAH
    Visit SOSS and play along with them!

    What a wonderful stash clearing exercise using the following stuff:

    Materials:
    Cardstock:  Neenah "Solar White", Bazzill Basics Lavender, Gold CS
    Perfect Pearls: Sunshine Sparkle
    Arteza Brush Markers

    Heartfelt Creations: Bella Rose Vintage Background Stamp
    Gold Ribbon (stash, have no idea but I think it was in Michael's sale bin)
    Want 2 Scrap Baby Bling Rhinestones
    Finish Spray (I used Aleene's Matte Finish) this is optional, you could use water.
    White Craft Foam or Foam Tape.  I used Craft Foam.

    Tools:
    Soft makeup brush (works just as well as the Tim Holtz brush)
    Trimmer
    Strong Adhesive

    Project Sizes:
    Base: 4-1/4" x 5-1/2", Gold Panel: 4.0" x 5-1/4", Stamped Panel: 3-3/4" x 5.0"

    Challenges Entered:
    Sisterhood of The Snarky Stampers - L  is for Leaves