Showing posts with label general greetings cards. Show all posts

Monday, July 27, 2020

2020 Stash Party #35 - Joy Looks Good On You - Crayons, stencils, and Gesso Resist

Hello, Crafty Peeps!
It is so good to feel well enough to craft again, even though it only an hour or so each day.  I am still working with background creation and the use of bold sentiment stamps.  On this project, I am using another Tammy Tutterow sentiment.
JOY!
I always forget that stamping on resist projects can be challenging.  I probably could have stamped the sentiment several more times to get a bolder impression but I was hoping the clear embossing would intensify the color to my satisfaction.  Alas, it is okay but not ideal.  This was a fun technique to learn. 

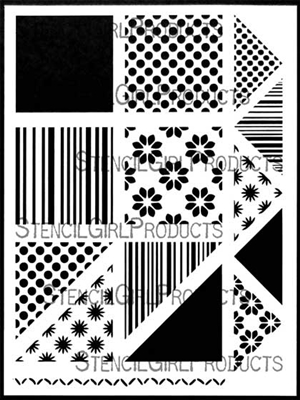
I started by making random scribbles on my panel with the Art Crayons.  I used a sponge to blend the colors.  Next, I used a stencil and gesso.  I need to thin out my gesso.  I did not get the full impression of my stencil but a nice section shows through in the lower right-hand corner.  I applied gesso in a random fashion.  After this has dried, I came in with darker crayon color and scribbled it randomly just as I did with the first layer.  I used a baby wipe to spread the color so that I can see the stencil design (gesso resist.)  I used a piece of tissue paper to wipe the area of the panel where I used the baby wipe.  I added a little more of the dark color in one or two random spots and use the baby wipe again to blend it out.

Once I was satisfied with my background, I used my Bira Stamping Platform to add the sentiment.  I rummaged through my stash and found a small piece of green ribbon and some green and aqua flowers.  I added these to the panel along with a few sequins.  I stamped a simple image on the inside of the card and added a thin washi strip across the top.

I hope this week will be one in which I can do more crafting and less resting!  I have yet to use any of the items in the "Dollar Tree" haul that "The Hubster" presented to me.
Thanks for stopping by!
HUGZ
STUFF I USED:

Friday, April 17, 2020

Stash Party #11 - Stencils and Perfect Pearls!

Hello, Crafty People!

I am continuing with my personal stash party.  I completed two projects that allowed me to use a stencil created by my friend Ann Butler.
I fell in love with Ann Butler's Squares and Triangles stencil when she introduced it and shared a tutorial for creating a fun pincushion using the stencil and muslin fabric. You can see my project HERE.  My favorite pattern is what I call the "pansy square" and I wanted to use it on a card face.

I created the card face, but as it so often happens in card making, I couldn't pull the project together to match what I saw in my head.  I decided to cut the design paper I created into panels.
   
To create my paper design, I positioned the stencil and applied VersaMark Embossing Ink.  I had to apply extra pressure to ensure full coverage of the open areas on the stencil.  I worked in sections and I worked very quickly. 

Once I had my pattern established, I brushed on the Perfect Pearls.  I actually used two colors but the delineation is so subtle it is difficult to see it in the photo.  I also inked and colored the border strip found at the bottom of the stencil to be used as an accent piece.  The pattern was irregular but I found that I liked the artsy look.  The green splatter was added to pull in the color from my top layer.
   
I had the most wonderful debate with myself about the sentiment.  Originally it was cut from the Sea Glass card that I used for my top layer.  It was nice but the gold just seems to be more elevating.

I truly love how this card came together.  I don't think my photography does it justice.  IRL it has a very beautiful understated elegance.  I am tempted to keep it but it is already promised to someone, so...

Thanks for stopping by.  I hope you were able to find some inspiration here!

HUGZ!
Stuff I Used:
Squares and Tris Set 1 Stencil by Ann Butler 

Monday, May 6, 2019

A Place To Start - Favorite Technique - Serendipity Squares

Hello, Crafty Makers!
is challenges you to show off your 
FAVORITE TECHNIQUE(s)
If you are like me, choosing one technique as a favorite is pretty difficult.  Fortunately, you can submit five entries to our challenge, so just pick your top five and let it rip!
If you need help choosing a technique, 
if you are a Newbie to crafting,
click the 1001 Techniques link above.   
~~~~
If this is your first time using a particular technique, we would also love to have you enter it into our
 Crafty Hugz!
This was my first time using the Serendipity Technique on a card.  I have used it a few times on mixed media projects and while a little time consuming, the results are well worth the effort.  I only used three square here, but my project actually yielded nine.
~~~~
How I Did What I Did

1.  I chose scrap papers that coordinate and tear into pieces and or strips.  I later added grey and blue polka dotted papers to the ones shown in this picture.  All of my papers were double sided so I got a lot of different colors and patterns.  Most will be hidden but the bits and pieces that show through will create a unique mosaic.
2.  I cut a piece of kraft cardstock to 5"x 5"(use whatever size and cardstock you wish for your base.) Just make sure it is card and not paper.  I glued the beige polka-dotted sheet (which I cut to 4.75" x 4.75" to create an eighth-inch border all around. This is not necessary, I just wanted my squares to have a lip) I stamped two images onto the paper.  I used a large background stamp and a smaller text stamp.  Once the image was stamped.  I colored in random parts of the flowers.  Then I began randomly gluing down my scrap papers.  I made sure that I left so areas of the flowers uncovered.
3.  Once the glue had dried (helped a little by my heat gun) I created a gold glitter wash and brushed it randomly over the paper.  I use DecoArt Metallic Paint "Splendid Gold", Glitter "Crystal", and Water to create the wash.
4.  I used Ranger "Wilted Violet" Distress Oxide Ink to color portions of my flowers and I knew I wanted to use a Lilac colored cardstock as my base so I decided to create a second wash using Inka-Gold "Violet Violet" Metallic Wax.
5.  Next, I repeated the stamping that I used on the first layer.  I stamped the small stamp first using black ink.  Then I stamped the larger image using embossing Ink.  I embossed the image with white embossing powder.
6.   Next, I cut my squares (1.50"x1.50").  I ended up with six even squares and three squares that are 1.50" x 2.0".  I used a cream card to cut three squares 1-5/8" x 1-5/8" as layers for my squares.
7.  I found a scrap piece of green card onto which I stamped my large floral background.  Again I heat embossed it using white embossing powder.  Using another piece of one of the scraps I used to create my serendipity design, I stamped my sentiment and cut it out with my circle punch.  I cut a piece of kraft card and colored it with Rangers Tea Dye Distress Ink.  A used my gold wash to give it a sheen. I used the Wilted Violet Ink to distress the edges of a piece of white card and then layered that onto the kraft card.  I had a thin strip of serendipity
left over from cutting my squares.  I added this to the center of the small layered card and attached my sentiment circle using double-sided foam tape.
8.  The final step was to add the elastic gold string and a small brad.
Thanks for stopping by!
Hugz,
Stuff I Used
Stamps:    Hero Arts™ "Flower Text"; LaBlanche Stamps "Transilvano Dialogo"
Papers:     Various scraps from my stash; Neenah® Classic Cream, Kraft Card
Inks:         Ranger® Distress Ink™"Tea Dye", Ranger® Distress Oxide Ink™ "Wilted Violet; Inka-Gold® "Violet Violet" Metallic Wax.
Product Links

Sunday, August 24, 2014

So Grateful - Dr. Greene's Gift Collection - Part II

Good Morning Crafty Peeps!

The Challenge this week at 613 Avenue Create is:  Anything Goes / With
OPTIONAL TWIST:  Create a Post It Note Holder.  The design team members have created a variety of note holders to inspire those who plan to play the twist this week.

So Grateful - Gift Collection  Part II
(Notepad Holder, Key Chain Tag Mini, Tags, Book Marks)
I still have many pieces to complete.  I thought I would do the "fun" stuff first.
THE BASKET 
   My first attempt at creating my own designer sheet for a project. 
 I am so pleased with the outcome!  I had a ball designing this paper.
NOTE PAD HOLDER w/MINI CLIPBOARD

Thanks to hubby, who built a pad press for me a few years back, I was able to customize and pad my own paper.  The note tray holds two gummed pads.  The mini clipboard is functional and works great for little notes!  It also serves as a cover for the note tray.

KEY CHAIN TAG MINI ALBUM
My Shero
Dr. Tamara Greene, M. D. (Neurology)

This mini album started life as an empty Orbitz Chewing Gum Box.
The front of the tags read: smile, love, hope, etc., the backs of the tags are gold!
BOOKMARKS 
The bookmarks are covered with clear shelf liner to protect against stains.
AND GIFT TAGS
These are tags that the Doc can use for gifts to family and friends!  
Some are embossed and others are stamped.


I have created a box to hold this first group of items. Next, I will tackle the lap desk or the actual stationery sheets, which  are the most laborious, because the stenciling and embossing all have to be done the "old fashion" way....metal stencils, light boxes...you know.  

Tutorials  
Key Chain - Mini Tag Album   
Large Gift Tag
Picnic Basket - Th-INK-ing of You - (Grace Nyewing)

Supplies:
Designer Paper - My Mind's Eye - Pretty Things
Ribbon - Really Reasonable Ribbon
Brads - Bo Bunny
Metals - Tim Holtz Ideology: Hinge Clips, Word Bands, Word Sticks, Key
Flower - Petaloo - Textured Elements

Thanks for stopping by!
Hugz,

Tuesday, September 10, 2013

My Favorite Stampy Technique - Shopping Our Stash


Hi, Crafty Peeples! The challenge at Shopping Our Stash this week asks crafter's to show off their favorite "Stampy" Technique.  Well, those of you who are regular visitors to my blog know that I really don't do a lot of techniques.  I am pretty much a straight on basics kind of designer.  I know how to do a lot of techniques, but my mind does not immediately go there. As this design took shape, I knew I was in trouble. Here goes.

  I colored this image over two months ago. She and her companion pieces have s been propped up on my WIP (Work In Process) stand ever since. As a matter of fact, these items were sitting there just as they appear here.  I often know how I want a focal group to look, but deciding on which project to use them is another thing all together.  Usually, I wait until the spirit moves me.  I find if I force a design, it does not present well.  At least not to me. Once the decision to use this grouping was made,  I only needed to scor-tape it to my card base.  I cleared away 4 Stash items, 5 if you count the ribbon.
Note: The corrugated cardboard was painted (acrylic) spritzed and then lightly sanded.

The inside panel is where my "Stampy" technique can be seen (such as it is).  I used the "Bordered Sentiment" technique.  This is another focal that actually started its life as the front of this card, but in my warped view of things, it works so much better on the inside.  The white panel on the right provides lots of room to write a personal note!

THE BACK STORY
Images: (Front, digital) Lacy Sunshine Stamps
(Inside, rubber) Unity Stamp Company-Itty Bitty Stamps
Papers: Bazzill Basics - Black, Grey, White
Other papers: Scraps from My Stash
Copics: YR02, Y13, C4, N0, C3
 Misc. Y's, G's, R's and B's (For paint cans and splatter)
Chalks: Yellow and Orange
Sharpie: Black Fine Point
Ribbon: Amy Tangerine Ribbons
Brads: My Stash
Hope you like it!  Thanks so much for stopping by!  Hugz,  Chana