Showing posts with label Wet Embossing. Show all posts

Thursday, August 6, 2020

2020 Stash Party #37 - One Good Friend - Kid Quotes Card #1

Hello, Crafty Makers!

I try to avoid clean and simple cards at all costs but my sisters over at Shopping Our Stash have given me an alternative description, KISS.  "Keeping it Simple, Sister" allows me to add ribbons and brads and fun embossing without all that worry about "untouched" or "white" space.

My stash reduction goal this week is to use the leftovers from a few of my most recent projects and to incorporate the use of old stamps.
Kids Speak - Dontay Hall, Age 9
I am in love with the inkadinkadoo collection of Kid Quotes. I have not used them in many years and I have decided that they are perfect for a set of cards I have been commissioned to create.
Lavender, and all of its associated shades, is among my favorites colors.  I love mixing it with greens and aquas!  So, it stands to reason that I have tons of scraps in these colors and I seriously want to get rid of at least two or three of my scrap bags. 😊
Isn't it just amazing how this textured cardstock accepts embossing? I particularly like how it shows up in the ridges.  So far, the Wild Pansy is the only textured paper that behaves that way.
As I was rummaging through my stash, I found two small pieces of ribbon, and I decided that I could use the shorter of the two on this project.  The color was perfect and I felt that the little pop of pink on the ribbon would add visual interest to the project.  Tying bows around brads has become one of my favorite embellishment tricks.  It is a great way to use up small pieces of ribbon or elastic cord. 

Thanks so much for stopping by!
Hugz,
Challenges Entered:
Always Fun Challenges - Embossing

Stuff I used:
Really Reasonable Ribbon - Printed Grosgrain Ribbon
Bo Bunny Brad
Gina Marie 
BIG AND LITTLE CHAIN RECTANGLE DIE SET

Sunday, January 5, 2020

Challenge #229 - 613 Avenue Create - ATG w/Optional Twist - Make It Shiny

Hello, Crafty Makers!
Happy New Year!
This month, at 613 Avenue Create
 Our Optional Twist is Make It Shiny!
Anything Goes, as well.
Any shiny element works.  So you don't have to overthink!
I am fully committed, once again, to limiting my spending on crafty things and reducing my stash.  I did not purchase any craft items for ten months in 2019. I am shooting for twelve months in 2020.  

FEEL BETTER SOON!
Gold, Vellum, and Rhinestones
What could be shinier than creamy Pearl vellum paper over that gold card?  I used my Arteza Brush pens to color the images which were first embossed with white ep.  Once the images were dry, I applied iridescent watercolor medium over the wash to add extra shimmer.  The extra thin elastic gold cord with a flat back pearl finished off this project nicely!
The picture does not do justice to the "silky" shimmer on these stamped images.  I am going to try the technique again, using clear embossing powder.  The vellum and gold card I used on this project are both over 20 years old. The vellum is no longer manufactured so I have used it sparingly.  When I say I have a large stash, I am not kidding.  Which is why I am not buying any paper, embellishments, stamps or dies in 2020.

Stop by 613 Avenue Create and share your "Anything Goes" or "Shiny Creations.  We think it is a fun way to start off the new year!

HUGZ!
Stuff I Used:

Friday, February 15, 2019

A Place To Start - Use An Inspirational Stamp or Die - Mid-Month DT Make

Hello, Crafty Makers!
The creative challenge this month at 
is to use an inspirational stamp or die.  Mostly, I have inspirational sentiments that I try to pair with images that communicate things like, Hope, Joy, Peace, etc. 
 Hope 
 It is so funny how creative endeavors always seem to take on a personality all their own.  I started out creating the project using one of my watercolored tissue paper panels.  I wanted to put patterned paper behind it but when I found this lovely paper and my entire project changed. 
  The paper worked so well with the dragonfly that I cut the dragonfly away to use as a stand alone embellishment.
For this little fella, I used three different embossing powders. After each color was embossed, I applied a fresh layer of Versamark, added the EP and heated one again.  The final EP was a Clear Iridescent Powder that added amazing sparkle to the die cut.  The surprise benefit here was that the Tim Holtz Distress Embossing Powder that I used as my base layer, resisted the other EPs in some areas.  
I have always used black cs with my shadow dies, but in this instance, I thought to pull in the background paper might create more tension and I was right.  To give added dimension, I used the shadow die to cut a piece of craft foam and attached to the back of the shadow shape.  The effect of elevated sentiment is way cool.
I had a bunch of stitched panels in my stash, so I used Vintage Photo Distress Oxide Ink to distress the edges and added 3 crystals to finish off the design.

I hope you will join us at A Place To Start Challenge.  
Here is a chance to use all those inspirational sentiments that you have been hoarding!
HUGZ,
Challenges Entered:

Supplies & Stuff
Gina Marie™Wonky Stitched Die
Hampton Art Hunter Green Embossing Powder (no longer available)
Basic Grey® Life of The Party Paper Stack (retired)


Tuesday, February 12, 2019

Shopping Our Stash #389 - Make Your Mark - Color Anything Using Markers

Hello, Crafty Makers!
My quest to conquer CAS design continues.  
Shopping Our Stash Challenge is now a fortnight challenge. Thus, I had lots of time to ponder how to meet this challenge and my personal goal which is to create as many CAS projects as I can this year. 
I can live with this result.  My only regret is that the silver embossing did not photograph as well as I would have liked.
~~~~~~~~~~
FOREVER
An Embossed, Copic Colored, CAS Heart Project
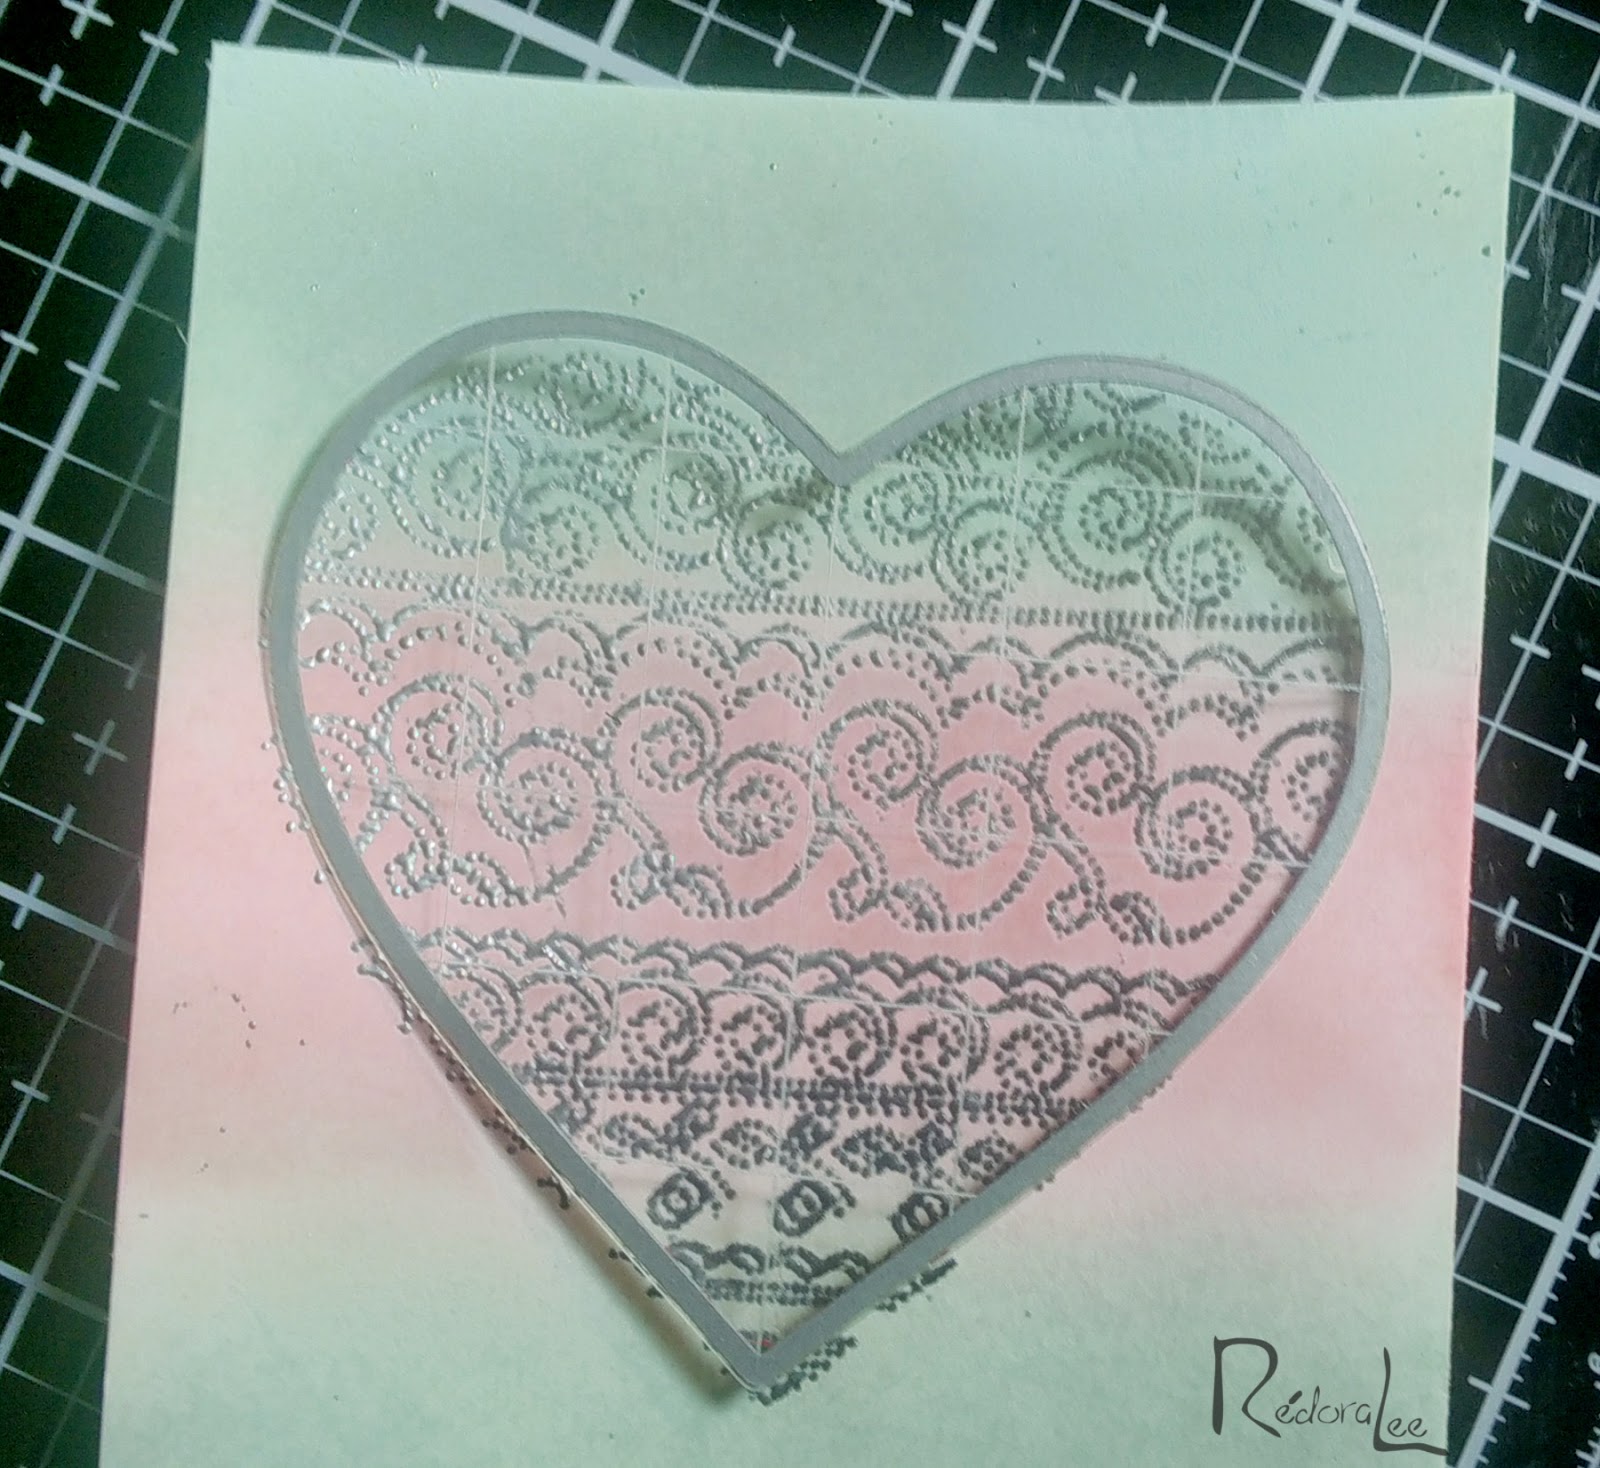
In the spirit of "less is more," I chose not to color an image.  I have rediscovered the joy of wet embossing and decided to combine die cutting, wet embossing, and coloring to create a CAS make.  I have to thank my SOS Teammate, Maria, for making me aware of this wonderful Gina Marie Rectangle Die, I am in love!  
I decided to do a little coloring on the inside, so I added another layer of cardstock and colored it with my Copic.  I have a stash of these panels from cutting frames and I just layered it on top of the colored panel.  Nice look!
~~~~~~~

Thanks for Stopping By!   If you want to create this project, there is a short step tutorial below.
Hugz,
~~~~~~~~
Challenges Entered:

A Little Tutorial
Materials:
White Cardstock: 110lb
1-piece  - 4.25 x 11 (A2 card size)
2-pieces -4.00"x 5.25"
1-piece - Rectangle Die cut frame (4.00" x 5.25") 
1 Scrap piece for stamping image.
Rubber or Clear Stamp (Deep cuts work better for embossing)
Silver Embossing Powder
Markers
Acetate
Rectangle Frame Die
Sentiment Die
Flatback Crystals
Clear Embossing Ink (like Versamark)
Wet Glue, Double-sided tape, Double-sided foam.
Embossing Powder Tool
Tools
Stamping Platform
Heat Tool
Die Cutting Machine
Paper Trimmer

STEPS BY STEP (Sorta-kinda)
1.  Use a piece of scrap white cs or cut a piece of cardstock large enough for your stamp image. 
2.  Determine if you are going to color before or after you stamp.  For this project, I colored the paper first.
3.  Once your paper has dried, wipe the panel with your embossing powder tool.  Position your panel on the stamp platform.  Position your stamp, apply embossing ink and stamp.

4. Apply embossing powder to the image and use your heat tool to emboss. ***Optional: You may, if you wish, return your image to the stamp platform, apply embossing ink to the stamp and the heat emboss again.  I did this for my image to get more detail.
If you decide to double emboss, make sure your paper placement on your platform is exactly the same otherwise you will get this:
5.  Die or fussy cut your image.   Luckily for me, I had an open heart frame die from the same company that fit this stamped image perfectly.  
Cut four additional hearts from scraps and glue them to the back of your heart.  This adds dimension to the image.  
6.  Cut a piece of acetate that is the same size or slightly smaller than your frame.
7.  Add double-sided tape to the back of the frame and adhere the acetate sheet.  Once the acetate is in place, add strips of double-sided foam tape to the frame.
8.  Attach your embossed image to one of the 4.00"x 5.25" panels and glue that panel to the front of your card base (A2).  Add your acetate fame to the panel.
9.  Use wet glue to attach your sentiment and crystals to the front of the panel.
Voila!  Your card is ready for an envelope!
~~~~~~
Note: I removed my heart stamp from its block so that I could use it on my stamp platform.

Memory Box Cupid Heart Die (retired)
Memory Box Classic Heart Wood Mounted Stamp (retired)