Showing posts with label Copic Markers. Show all posts

Tuesday, February 12, 2019

Shopping Our Stash #389 - Make Your Mark - Color Anything Using Markers

Hello, Crafty Makers!
My quest to conquer CAS design continues.  
Shopping Our Stash Challenge is now a fortnight challenge. Thus, I had lots of time to ponder how to meet this challenge and my personal goal which is to create as many CAS projects as I can this year. 
I can live with this result.  My only regret is that the silver embossing did not photograph as well as I would have liked.
~~~~~~~~~~
FOREVER
An Embossed, Copic Colored, CAS Heart Project
In the spirit of "less is more," I chose not to color an image.  I have rediscovered the joy of wet embossing and decided to combine die cutting, wet embossing, and coloring to create a CAS make.  I have to thank my SOS Teammate, Maria, for making me aware of this wonderful Gina Marie Rectangle Die, I am in love!  
I decided to do a little coloring on the inside, so I added another layer of cardstock and colored it with my Copic.  I have a stash of these panels from cutting frames and I just layered it on top of the colored panel.  Nice look!
~~~~~~~

Thanks for Stopping By!   If you want to create this project, there is a short step tutorial below.
Hugz,
~~~~~~~~
Challenges Entered:

A Little Tutorial
Materials:
White Cardstock: 110lb
1-piece  - 4.25 x 11 (A2 card size)
2-pieces -4.00"x 5.25"
1-piece - Rectangle Die cut frame (4.00" x 5.25") 
1 Scrap piece for stamping image.
Rubber or Clear Stamp (Deep cuts work better for embossing)
Silver Embossing Powder
Markers
Acetate
Rectangle Frame Die
Sentiment Die
Flatback Crystals
Clear Embossing Ink (like Versamark)
Wet Glue, Double-sided tape, Double-sided foam.
Embossing Powder Tool
Tools
Stamping Platform
Heat Tool
Die Cutting Machine
Paper Trimmer

STEPS BY STEP (Sorta-kinda)
1.  Use a piece of scrap white cs or cut a piece of cardstock large enough for your stamp image. 
2.  Determine if you are going to color before or after you stamp.  For this project, I colored the paper first.
3.  Once your paper has dried, wipe the panel with your embossing powder tool.  Position your panel on the stamp platform.  Position your stamp, apply embossing ink and stamp.

4. Apply embossing powder to the image and use your heat tool to emboss. ***Optional: You may, if you wish, return your image to the stamp platform, apply embossing ink to the stamp and the heat emboss again.  I did this for my image to get more detail.
If you decide to double emboss, make sure your paper placement on your platform is exactly the same otherwise you will get this:
5.  Die or fussy cut your image.   Luckily for me, I had an open heart frame die from the same company that fit this stamped image perfectly.  
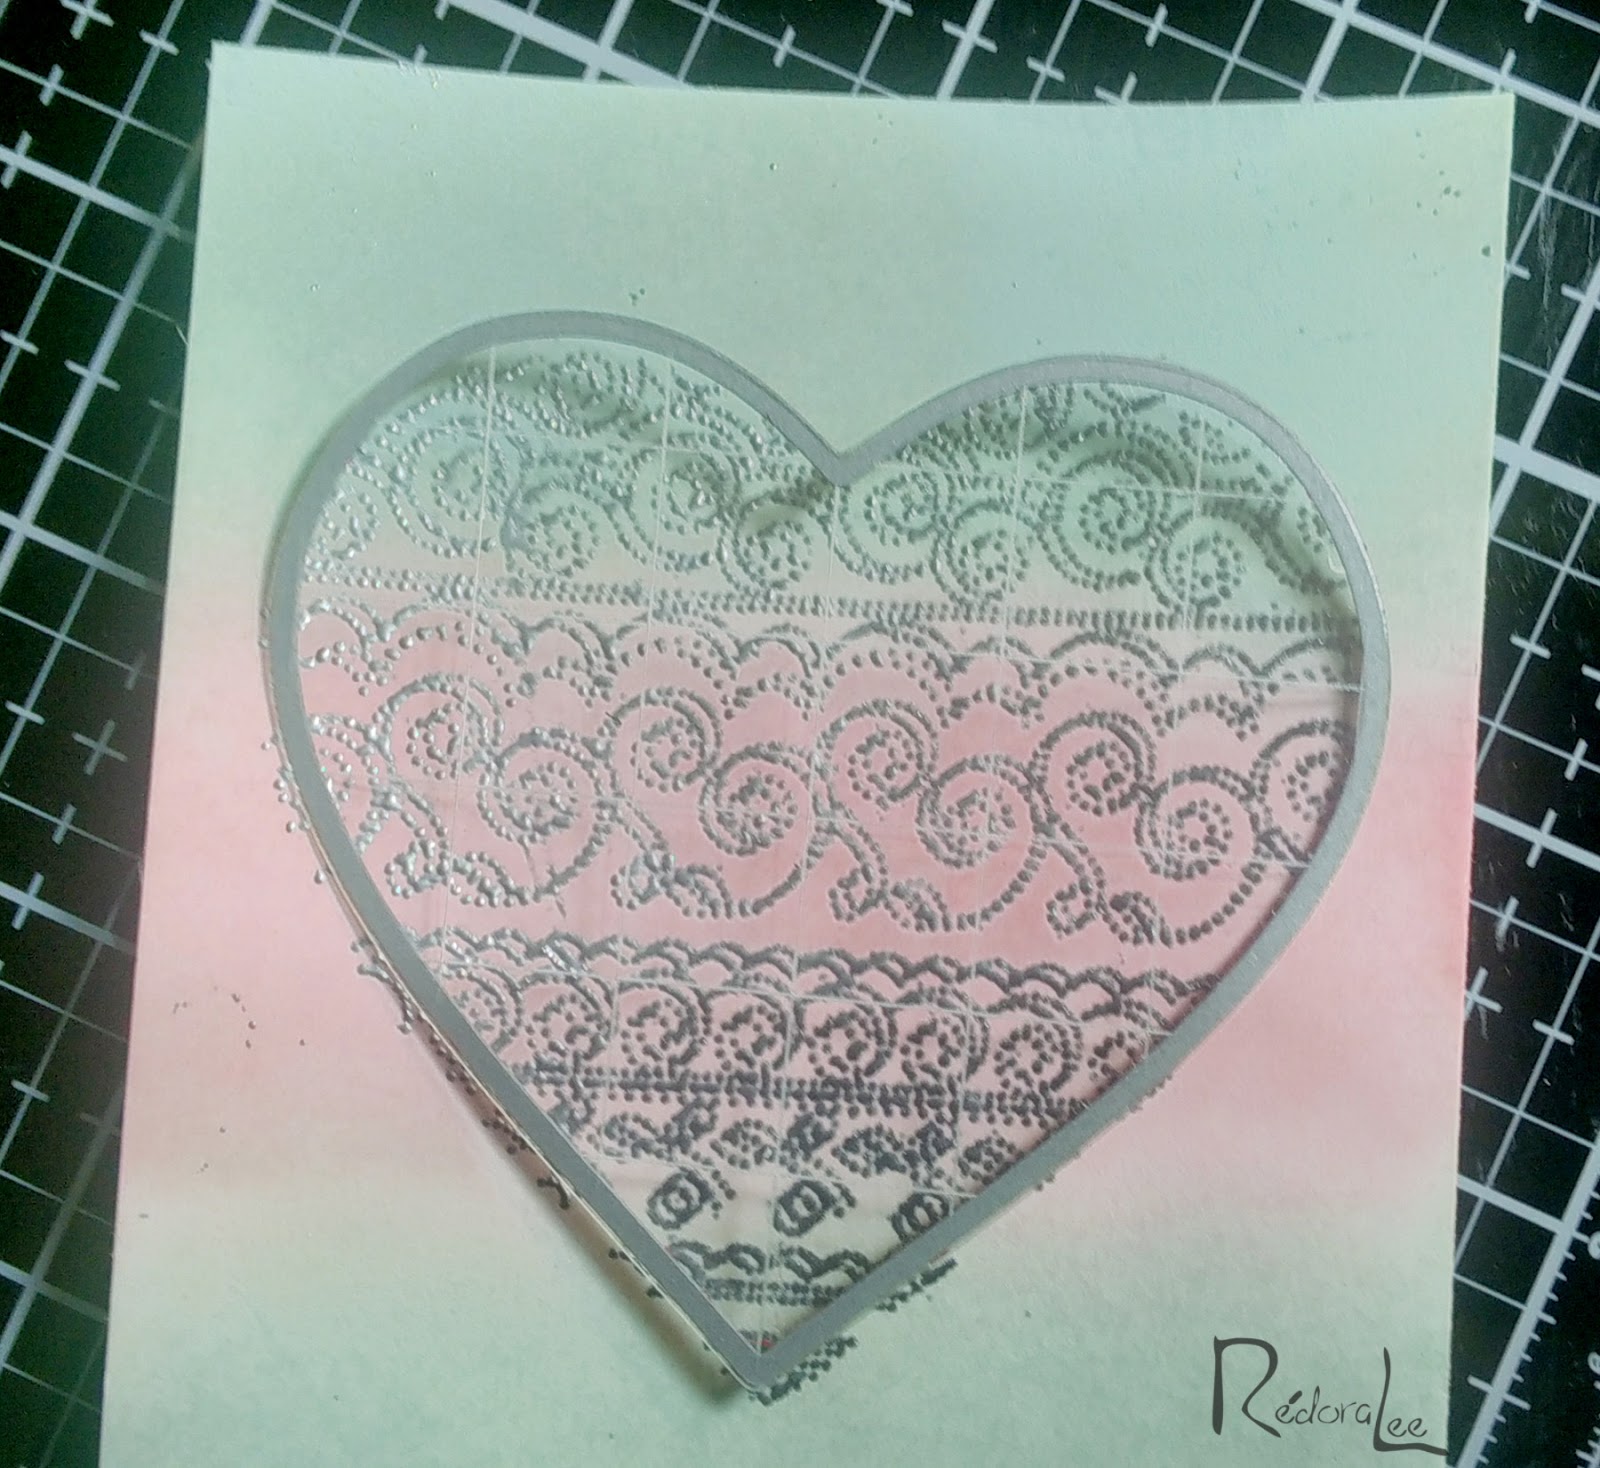
Cut four additional hearts from scraps and glue them to the back of your heart.  This adds dimension to the image.  
6.  Cut a piece of acetate that is the same size or slightly smaller than your frame.
7.  Add double-sided tape to the back of the frame and adhere the acetate sheet.  Once the acetate is in place, add strips of double-sided foam tape to the frame.
8.  Attach your embossed image to one of the 4.00"x 5.25" panels and glue that panel to the front of your card base (A2).  Add your acetate fame to the panel.
9.  Use wet glue to attach your sentiment and crystals to the front of the panel.
Voila!  Your card is ready for an envelope!
~~~~~~
Note: I removed my heart stamp from its block so that I could use it on my stamp platform.

Memory Box Cupid Heart Die (retired)
Memory Box Classic Heart Wood Mounted Stamp (retired)

Tuesday, November 26, 2013

You Are So Cool!

Hello, Crafty Peeples!
Welcome to another challenge at Shopping Our Stash.  We are the challenge blog that suggests you can have Retail Therapy in your Studio/Craft Room every single day of every week.
Yes, we promote discovery.  Go ahead and admit that your DH is perfectly justified when he says:

"What, more stuff?  I bet you have stuff you have never used, probably don't even know what you have in that room.  Honestly, I wish you would go back to buying shoes!"

I bet you can guess how I came up with that quote!
So, here we are giving you another chance to Shop Your Stash.  Then, you can wear those really cool shoes you bought two weeks ago.  He won't be any the wiser! :D)

Since Thanksgiving is nearly here,  this will be a two week challenge and  pretty simple:  
CREATE A WINTER CARD.  
See, easy peasy. Simply use the scraps from the 10,000 Christmas Cards you've made!

Here's Mine.  Very CAS
I don't do much CAS, but I had fun with this one. 
 I was inspired by a fabulous design of my friend Carla Suto of Carla's Stamping Spot


The Ribbon I used for the bow is almost three years old!  The green paper is left over from a school project I did with my grandson.  All of the white Neenah CS are pieces that were left over from other projects.  For all my Shopping Our Stash projects, I try to use items that are at least six months old.

Happy Turkey Day!  Happy Chanukah!

THE BACK STORY
Image: Unity Stamp - Itty Bitty Stamps - Bernie
Sentiments: Unity, Itty Bitty Stamps: Simple Snowman Joy (Feel The Joy)
 Penguin Coolness (Holiday Wishes)
Card Stock: Neenah Solar White, Linen 80#
Embossing Folders: The Paper Studio - A2 Scalloped Dots 
Couture Creations - 5"x7" Dreamscapes Collection: Swiss Dots
Ribbon: Trim A Home Holiday Ribbon and Offray 1/8" Metallic Wired Ribbon
Misc:  Scor-Tape, 3D Foam Squares, Scotch 3/4" Dblsided Foam Tape
Stickles (Silver and Green) Liquid Pearls

Tuesday, September 10, 2013

My Favorite Stampy Technique - Shopping Our Stash


Hi, Crafty Peeples! The challenge at Shopping Our Stash this week asks crafter's to show off their favorite "Stampy" Technique.  Well, those of you who are regular visitors to my blog know that I really don't do a lot of techniques.  I am pretty much a straight on basics kind of designer.  I know how to do a lot of techniques, but my mind does not immediately go there. As this design took shape, I knew I was in trouble. Here goes.

  I colored this image over two months ago. She and her companion pieces have s been propped up on my WIP (Work In Process) stand ever since. As a matter of fact, these items were sitting there just as they appear here.  I often know how I want a focal group to look, but deciding on which project to use them is another thing all together.  Usually, I wait until the spirit moves me.  I find if I force a design, it does not present well.  At least not to me. Once the decision to use this grouping was made,  I only needed to scor-tape it to my card base.  I cleared away 4 Stash items, 5 if you count the ribbon.
Note: The corrugated cardboard was painted (acrylic) spritzed and then lightly sanded.

The inside panel is where my "Stampy" technique can be seen (such as it is).  I used the "Bordered Sentiment" technique.  This is another focal that actually started its life as the front of this card, but in my warped view of things, it works so much better on the inside.  The white panel on the right provides lots of room to write a personal note!

THE BACK STORY
Images: (Front, digital) Lacy Sunshine Stamps
(Inside, rubber) Unity Stamp Company-Itty Bitty Stamps
Papers: Bazzill Basics - Black, Grey, White
Other papers: Scraps from My Stash
Copics: YR02, Y13, C4, N0, C3
 Misc. Y's, G's, R's and B's (For paint cans and splatter)
Chalks: Yellow and Orange
Sharpie: Black Fine Point
Ribbon: Amy Tangerine Ribbons
Brads: My Stash
Hope you like it!  Thanks so much for stopping by!  Hugz,  Chana