Friday, August 31, 2018

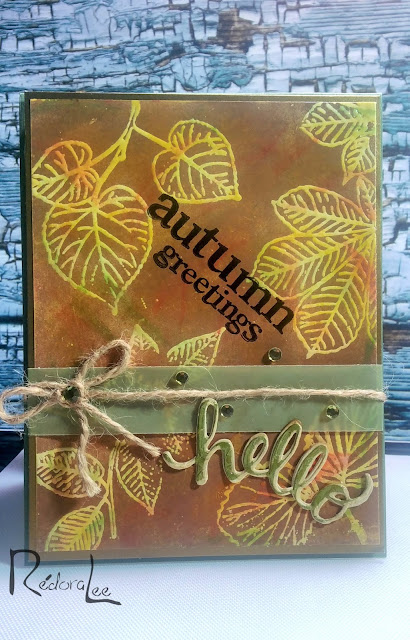
Autumn Greetings - Joseph's Coat #2

Hello, Crafty Makers

I am still messing around with the Joseph's Coat technique.  I created another card and I think I am going to enter it into the Simon Says Wednesday Challenge.

I am going to try these same colors using Oxide Distress Inks™.  The regular Distress Inks™ do not blend as well.  Still, I like the results but really should have distributed the colors more evenly.  I love this technique and will continue playing with it!  If you have never tried it, there is no time like the present!

HUGZ!
Chana Malkah

Tools:
Paper Trimmer
Die Cutter
Heat Tool

Materials:
Stamps (I used an old set of Martha Stewart Stamps)
Cardstock for Base
Glossy Cardstock for Panel
Distress Inks™/Oxide Distress Inks™
VersaMark (or another embossing ink)
White Embossing Powder

Distress Inks I used:  Mowed Lawn, Candied Apple, Scattered Straw, and Gathered Twigs

Tuesday, August 28, 2018

Simon Says Stamps Monday Challenge: Fall/Autumn

Hello, Crafty Makers!

I have spent the past two weeks or so working on an old technique called "Joseph's Coat."   I have done several iterations (some far more successful than others) and this Autumn themed card is my favorite thus far.  This was created for the Simon Says Stamps Monday Challenge.

"Nature's First Green"
It is always fun to discover techniques both old and new and add them to your skill toolbox.  While some may have really elevated reasons for trying techniques, I normally don't.  For example, I was looking for projects that would allow me to make use of the five reams of glossy cardstock I have been holding on to since the year 2000.  I think eighteen years is long enough.  This technique was the perfect solution. For those of us who are blending challenged, it is good practice in blending and working with both types of Distress Inks®. 
There are a ton of colors in my "forest" background.  In my first attempt, I used Distress Oxides™ but that panel did not turn out right.  On this panel, I used regular Distress Inks™.  The Oxides work fine, but they didn't create the kind of depth I wanted.  I used Teresa Collins for ColorBox® "Gold Shine" to color my "Hello" die.  To get the best effect, I cut several of the sentiment (kraft paper), glued them together, and then pressed them down into the ink pad.  


Other Challenges Entered:
Crafty Sentiments Designs - Anything Goes
Through The Craft Room Door - Anything Goes

Supplies:
Cardstock:
Dark Chocolate, Antique Gold, Glossy, Vellum, Kraft 
Stamps:
American Crafts "Autumn Leaves" Collection, Hero Arts "Hello" Stamp and Cut.
Distress Inks:
Wilted Violet, Vintage Photo, Mowed Lawn, Twisted Citron, Scattered Straw!
Other Inks: 
VersaMark Embossing Ink
Teresa Collins/ColorBox "Gold Shine" (Pigment Ink)
Miscellaneous:
Clear Embossing Powder

Tools:
Trimmer
Die Cutting Machine
Anti-Static Pouch
Sponges/daubers
Adhesive
Bone Folder

Note:  Chunky stamps work best for this technique but you can get fabulous results with line art stamps as well.  The key, I found, lies in choosing the right ink colors and not over blending.  

Thanks for stopping by!
Hugz! 
Chana Malkah


Shopping Our Stash Weekly Challenge - Quit Buggin' Me!

Hello, Crafty Makers!
This week at Shopping Our Stash, the challenge is to use an insect somewhere on your card.   I don't do "cutesy" or "critter" cards, so there wasn't much in my stash that could be used in this challenge.

"The Butterfly Effect"
Every maker has at least one butterfly stamp, die, or embossing folder in their stash.  I decided to approach this challenge as an opportunity to continue practicing the technique of using Distress Inks to create watercolored backgrounds.  I also wanted to work more with pastel ink colors and heat embossing.

Stash Items:
  Everything used is over 5 years old.
Materials Used:
Neenah Cardstock: Solar White and Ebony
Vellum: Papertrey Vellum Cardstock
Distress Inks: Carved Pumpkin, Picked Raspberry, Mustard Seed, Peacock Feathers, Twisted Citron
Embossing Powder: WOW Bright White Extra Fine
Embossing Ink: VersaMark Watermark Stamp Pad

I followed this tutorial by Kelly Latevola


Happy Making!
HUGZ,
Chana Malkah

Tuesday, August 21, 2018

Shopping Our Stash Weekly Challege - Hot, Hot, Hot! - Stamp/Embossing on Vellum

Hello, Happy Makers!
The SOS challenge this week is full of fun!  Just make it hot, which means it could be spicy foods or weather-related.  You can use the word HOT if you so desire.  Be creative.  We can't wait to see!
~~~~~~~
  I used a Jennifer McGuire tutorial for this project.
The background was created using a stencil stamped with a pink solvent ink.  The ink was partially heat set and air dried. After the ink dried, I repositioned the stencil and applied VersaMark and then embossed with an opalescent embossing powder.  
 This view shows the beautiful colors in the background using the Opalescent Clear embossing powder.
It is difficult to photograph glitter but you can kinda-sorta see the pretty result achieved by applying Wink of Stella™ to the little puddles and foliage.

Materials used:
Hero Arts® Color Layering Flamingo
Hero Arts® Frame Cuts® Flamingo Die
ColorBox® Art Screens "Rooftop" Stencil
ColorBox® Opalescent Clear Embossing Powder
Inkadinkado Washable Ink - Hot Pink
Papertrey Ink LinenVellum Cardstock

Note: Use whatever supplies you have on hand.  With the exception of the die frame and stamps, I have had  the other materials for over ten years.   I was surprised the ink pads were still viable.

So glad you stopped by!  
Happy Making!
CHANA!

Friday, August 17, 2018

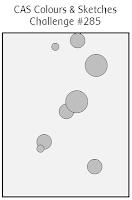
CAS Colours and Sketches - Take Flight

Hello, Crafty Makers!
Today, I crafted two cards for submission to 
CAS Colours & Sketches Challenge.  
~~~~~~~~~
 For my first design, I used the smoosh technique with Ranger Distress Oxide Inks to create my "faux" watercolored background.  I arranged my feather stamps using my Tim Holtz Stamping Tool.  I had only four small stamps in this collection, so I had to stamp twice but using the tool made short work of that.  I added Wink of Stella to the feathers and I was done!
Note Card Size: 4.25"x5.5", Panel Size: 4.0"x5.25"
Panel:
Materials:
Hot Off The Press "Feathers" Stamp Collection
Neenah "Ebony" and "Brilliant White" Linen Cardstock
Wink of Stella
Ranger Distress Oxide Inks: 
Peeled Paint, Fossilized Amber, Broken China
Other Inks:
Ranger Distress Ink: Vintage Photo, StazOn Solvent "Jet Black"
~~~~~~~~
For this second project, I first stamped and heat embossed the feathers and sentiment.  Then, I painted my background using my distress inks.  I felt the white spaces needed to be toned down to allow the white embossed feathers to stand out more.  I achieved this by lightly dabbing Vintage Photo Distress Ink on most of the white spaces and to distress the edges of the panel. The final touch was to stamp a few star sprays around a few of the feathers and apply a little Wink of Stella to my feathers.  I was going for an abstract presentation and I think I got there.
Note Card Size: 4.25"x5.5", Black Layer: 4.0"x5.25 Panel Size: 4-3/8"x 5-1/8"
Panel:
Materials:
Hot Off The Press "Feathers" Stamp Collection
Neenah "Ebony" and Brilliant White Linen Cardstock
White Embossing Powder, Wink of Stella
Ranger Distress Oxide Inks: 
Peeled Paint, Fossilized Amber, Broken China
Other Inks:
Ranger Distress Ink: Vintage Photo, StazOn Solvent "Jet Black" 

Happy Making!
HUGZ,
CHANA MALKAH


Submitted To:
CAS Colours & Sketches
 CAS Colours & Sketches Challenge


Wednesday, August 15, 2018

Spellbinders' Good Vibes Only! - Large Word Die Cut

Hello, Crafty Makers!

Today I am playing with Spellbinders' new large word die called "Good Vibes Only" by Stephanie Low!  I always get super excited when my hubby gets excited about one of my projects.  This one got four hubby visits in one hour... that is a record!   I think some of his appreciation for this project was forged in the fact that I forgot to use my Press and Seal.  My hands are a bit shaky these days so he had to position all the small pieces of the die. He o ordered the 4 pack of Press and Seal from Amazon and left it on my drafting table.  I am trying not to read too much into that!


HAPPY MAKING!
HUGZ,

Tuesday, August 14, 2018

Shopping Our Stash Weekly Challenge: Leaf It To Me - Use Leaves on Your Project

Hello, Happy Makers!
The challenge at Shopping Our Stash this week encourages makers to create a project that features "Leaves." 
I love the wrap cards because you can use almost any large stamp or die to produce a beautiful design.
I used one of the trimmed away flowers as an embellishment for my small sentiment.  I love all the white space!
Another great feature of style is the generous white space.  You can write a short letter.  I added a sentiment on the inside but it could easily be left blank.
 This image is not as "leafy" as the one above but I thought it would make a cool wrap card!   I added Glossy Accents™ to all the flowers and a little Wink of Stella™ to the pails.
I was able to use a large sentiment stamp on this one!

Thanks for visiting!
  I hope to see your work in our challenge.
HUGZ!
Chana Malkah


Submitted to:


Tuesday, August 7, 2018

Shopping Our Stash Weekly Challenge: Silhouettes

Hello, Crafty Makers!
This week's SOS Challenge is Silhouettes.  
You may use stamped or die cut images.
It just so happens that my assignment this week for my graphic design class is to find an example of a contemporary product that borrows a 19th-century concept in its design or advertising.  My mind was still in that loop when I started this project so my silhouette design has a very 19th Century swag!


This originally going to be the front of my card!