Sunday, August 30, 2020

2020 Stash Party #43 - Another Purple Shaker - Thinking of You

Hello, Crafty Makers!
I made a couple of die purchases this year that made it easier for me to create slimline cards.  In the past, I would simply use my geometric dies to cut my windows (and I still do for plain windows.) But I saw two dies that I really wanted to add to my collection.  

For this project, I decided to use only two of the windows instead of three.  I like it!
Thinking of You
Normally, I would have cut four panels and used three of them plus a layer of craft foam to create the wells for my shakers.  But I only used one layer of foam to create the wells and it seemed to work ok!  I was testing it because I want to make a shaker bookmark and need to be sure I would still get the shaker effect!
I added a die-cut to the interior.  I did not feel that an interior sentiment was necessary.


HUGZ,
Stuff I used:
PinkFresh Studio SLIM STITCHED SCALLOP CIRCLE PANEL Essentials Die Set pf032es Preview Image

Saturday, August 29, 2020

2020 Stash Party #42 - Tag Along!

Hello, Crafty Makers!
This is just a quick post of a simple "Fall" tag.  I have a "tag background library" and this was originally created to be added to the library.  I create a background on tags and use "unconventional" objects to create my designs.  I was going to use scissors on this one but the colors were so autumnal, I changed my mind!

Distress Inks Used: Tea Dyed, Old Paper, Antique Linen
The sentiment was stenciled using Memento "Bamboo Leaves"

I resisted the urge to stamp an additional sentiment on the back.  I just love this paper and as I used it here, it stands well on its own.

Thanks for Stopping By!


Wednesday, August 26, 2020

2020 Stash Party #41 - Totally Tag Time - Blends and Splatters

Hello, Crafty Makers!

One of the worse symptoms of my disease is FATIGUE!
I have been so tired these past few weeks that I have barely been able to muster the strength to get out of bed.  My doctors keep reminding me that my disease is in remission not cured.  There is no cure for what ails me.  It really sucks when I can't do the one thing that brings me to my happy place.  Anyway, enough of my pity party!  

This afternoon, I felt well enough to make a try at crafting.  It has been quite a while since I created a tag and it occurred to me that I needed to make another YT video for my Beginners Series and that a tag would be "easy" and fun.
"I Wish"
I just love how this background turned out even though my Shaded Lilac Distress Oxide pad is a soupy wet mess.  I don't think this particular pad  (and one other that I own) got the right mix of distress and pigment inks.  This one seems to be more pigment ink than Oxide.  In the end, I was able to blend the inks to my satisfaction but it was not easy!  I do not own Spun Sugar and Tumbled Glass Oxide Ink so I used the regular Distress Ink and it worked just fine.  

I had some unexpected fun while playing around with my splatters.  I had intended to use just water splatter and white splatter but when I put my brush into the water it turned the water a very soft and pretty green.  I decided to splatter it onto my tag anyway.  It works. I also added a white splatter and a light splattering of plain water.
I must have 200 or more 6"x6" designer paper pads.  I don't use paper that much these days and I determined that using these paper pads needs to become a part of my 2020 and 2021 Stash Challenge.  I created this tag using a scrap from my stash and needed to cover the back.  I just picked a random pad and this particular design included the colors I needed and coordinated well with my lavender ribbon.

I failed to leave a spotlight (a space that does not have color) for my sentiment but it turned out okay!  I actually like the way the blended colors weave through the words!
The project needed a bit of texture so I added a bit of sparkle and a few sequins.


I will have to create another tag for the YT video and I think I will use different colors.  But making this little tag definitely lifted my spirits.
Thanks for stopping by!
Hugz,
Stuff I Used:
Paper Pad: My Mind's Eye - Cut & Paste "Flair"
Ribbon: Stash

Friday, August 14, 2020

2020 Stash Party #40 - A Friend Who Has Chocolate

Hello, Crafty Peeps!
This is the third card in a series of cards I am creating using Inkadinkdoo's Kid Quotes Collection "Friendly Wisdom." 
CHOCOLATE!
I accidentally blended away her "peace" sign. If you look hard enough, you might just be able to make them out! I rarely repeat cards. I like this one and want to send it to a couple of people.  I think I will use the sentiment with different images and backgrounds. The pearl embossing powder I used on the silhouette photographed much darker than it appears in real life.  Still, I am pleased with the effort. 

Thanks, so much for stopping by!
Hugz,
Stuff I Used: 
Andy Skinner Mixed Media Stencil: Hippy Chic
The Crafter's Workshop Stencils:  Mini Viva La Art, Mini Cubist, Mini Coptic Impressions
Tim Holtz Layering Stencil: Crackle

Distress Inks and Distress Oxides:
Speckled Egg (DI, O)
Worn Lipstick (O)
Vintage Photo (O)
Walnut Stain (O)
Tumbled Glass (DI)

I created my background panel by first blending together Speckled Egg Distress Ink and Speckled Egg Distress Oxide over the entire surface of the panel.  I started with one color at the top and the other at the bottom.  I blended them in toward the center making sure to leave some areas lighter than others.

I stenciled in the four background stencils using Tumbled Glass, Vintage Photo, Walnut Stain, and Worn Lipstick Distress Inks.

The Hippi Chic image was embossed using WOW Pearl White EP.


Wednesday, August 12, 2020

2020 Stash Party #39 - Let It Be

Hello, Crafty Makers!
Today, I was feeling down for the first time since all of this craziness began three and one-half years ago.  I always had faith that the country would rebound, that the walls around the constitution would hold but I don't believe that anymore and I honestly think that the worse is yet to come.

Crafting is my happy place. To distract me, I decided to limit myself to using only whatever was on my table.  Earlier, I had pulled out a stencil and some distress ink colors that I don't normally use and planned to play around with them.  The most astounding thing of all was that the song, "Let It Be" had been flowing through my mind all day and it just so happened that the sentiment group I last used included those very words.  Maybe G-d is trying to tell me something!

I was so happy to finally be able to use this vellum flower.  It has been in my stash box for a few months and I was really about to toss it.  I had both ribbon and gold cord on the work table and I tried them both.  The elastic cord won by a country mile!

I was pleasantly pleased with the result of applying Fossilized Amber ODI to my panel and then coloring in the stencil with Speckled Egg DI.  The colors are complementary and blended together they take on a soft almost velvet look!  I used the Speckled Egg DI to color the sentiment panel and I stamped the sentiment in Fossilized Amber and embossed it with clear embossing powder.

Thanks for Stopping by!
Stuff I Used
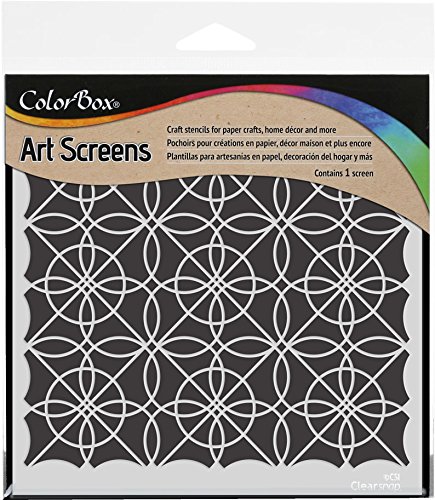
BIG AND LITTLE CHAIN RECTANGLE DIE SETClearsnap Geometrics ColorBox Screens

Friday, August 7, 2020

2020 Stash Party #38 -Hand Stamped Sentiment Color Challenge #345

Hi, Crafty Makers!
I very rarely enter card challenges but since I am trying all things new this year, I thought it would be a good thing to attempt to enter a minimum of three challenges for my new projects. 

If you follow me, you know by now that I am addicted to using my stencils and other media to create my own backgrounds.  I created this "Tropical Palm" background using my TP Stencil and WOW's White Pearl Embossing Powder.  The sentiment is also embossed with clear EP.
~~~~~
Bloom Where You are Planted
Another Stenciled Background!

I tried to get my colors as close as possible to the challenge colors! The colors of Coastal Cabana and Bumble Bee were easy, however, I did not have magenta-colored paper so I used Ranger's Picked Raspberry Ink on my focal as a nod to magenta.  I used Star Dust Stickles to add a bit of sparkle to my flowers!
I used Ranger Distress Inks to capture the colors of the challenge.  I created the background for my sentiment stamp by blending  Speckled Egg, Iced Spruce, Cracked Pistachio, and Picked Raspberry!   

This video shows how to create the Stenciled Background
This self-imposed Stash Bash Party Challenge has been a very good thing for my creative soul.  I own a few extraordinarily beautiful Doily Dies and I never use them.  I have tons and tons of flowers but they are not on the list of the first things that I reach for or even think of when crafting.  Somehow, this version of my "Tropical Palm" stenciled background panel seemed to just cry out for flowers and a little lace!
Thanks For Stopping By
Hugz,
Challenges Entered:
Hand Stamped Sentiment: Color Challenge
Always Fun Challenge: Embossing
~~~~~~~~~~~~~~~~~~~~~~~~~~~~~~~~~~~~~~~~~~~
Stuff I Used:

Thursday, August 6, 2020

2020 Stash Party #37 - One Good Friend - Kid Quotes Card #1

Hello, Crafty Makers!

I try to avoid clean and simple cards at all costs but my sisters over at Shopping Our Stash have given me an alternative description, KISS.  "Keeping it Simple, Sister" allows me to add ribbons and brads and fun embossing without all that worry about "untouched" or "white" space.

My stash reduction goal this week is to use the leftovers from a few of my most recent projects and to incorporate the use of old stamps.
Kids Speak - Dontay Hall, Age 9
I am in love with the inkadinkadoo collection of Kid Quotes. I have not used them in many years and I have decided that they are perfect for a set of cards I have been commissioned to create.
Lavender, and all of its associated shades, is among my favorites colors.  I love mixing it with greens and aquas!  So, it stands to reason that I have tons of scraps in these colors and I seriously want to get rid of at least two or three of my scrap bags. 😊
Isn't it just amazing how this textured cardstock accepts embossing? I particularly like how it shows up in the ridges.  So far, the Wild Pansy is the only textured paper that behaves that way.
As I was rummaging through my stash, I found two small pieces of ribbon, and I decided that I could use the shorter of the two on this project.  The color was perfect and I felt that the little pop of pink on the ribbon would add visual interest to the project.  Tying bows around brads has become one of my favorite embellishment tricks.  It is a great way to use up small pieces of ribbon or elastic cord. 

Thanks so much for stopping by!
Hugz,
Challenges Entered:
Always Fun Challenges - Embossing

Stuff I used:
Really Reasonable Ribbon - Printed Grosgrain Ribbon
Bo Bunny Brad
Gina Marie 
BIG AND LITTLE CHAIN RECTANGLE DIE SET

Tuesday, August 4, 2020

2020 Stash Party - Shopping Our Stash - CAS - Keep It Simple

Hello, Crafty Peeps!
This fortnight the Shopping Our Stash theme is 
CAS Keep It Simple
~~~~~~~
I am fairly certain that for the purist, this card has one too many layers to qualify as CAS but it is as close as I can get!
LOVE
A few weeks ago while I was fooling around with using baby wipes to make plaid backgrounds, I decided to experiment with other patterns.  Some were more successful than others but I decided to hold on to them all just in case (you know how we crafters do that!) I thought this yellow and green panel would yield a fabulous fun flower and I was right.  I cut some funky leaves as well (and managed to lose one of my dies in the process) but opted not to put one on the inside because I want to use them both to create cards.  

Hugz,
Chana Malkah

Challenges Entered:
Artsy Divas - Always Anything Goes
Crafty Sentiments - Anything Goes


Monday, August 3, 2020

A Place To Start - August Challenge - Create A Shaker Card

Hello, Crafty Peeps!
I am just delighted with the theme for our challenge this month at A Place To Start!  I love making shaker cards and this challenge gave me the opportunity to create a slimline shaker card, my first.

 GOOD VIBES
I have found it easier to use craft foam on my shaker card than messing around with the double-sided foam tape. I also used a single sheet of acetate. 
I forgot how acetate picks up shadows. That is not a defect in my top circle, it is a reflection from the light hitting the acetate. I simply could not take one more picture!😄 This is the first slimline card I have done in almost ten years.  When I saw the framework dies, I had to break my crafting diet and purchase two. I wanted them all but impulse control is a part of my three-year "no spending" challenge.
I did not want acres of white space on the inside of my card so I used my Mini Cubic Stencil to create a pattern that matched the face panel.  I added a touch of "Shaded Lilac" Distress Oxide Ink to the inside panel to create a little more interest.  I also added a think strip of cardstock along the edge to give the eye a little relief.


Thanks for stopping by!  
I look forward to seeing your entry!
A Place To Start

Challenges Entered:
Artsy Divas:  Always Anything Goes
The Corrosive Challenge: Always Anything Goes
Dragonfly Dreams: Anything Goes


Stuff I Used:
Framework Cutting Die


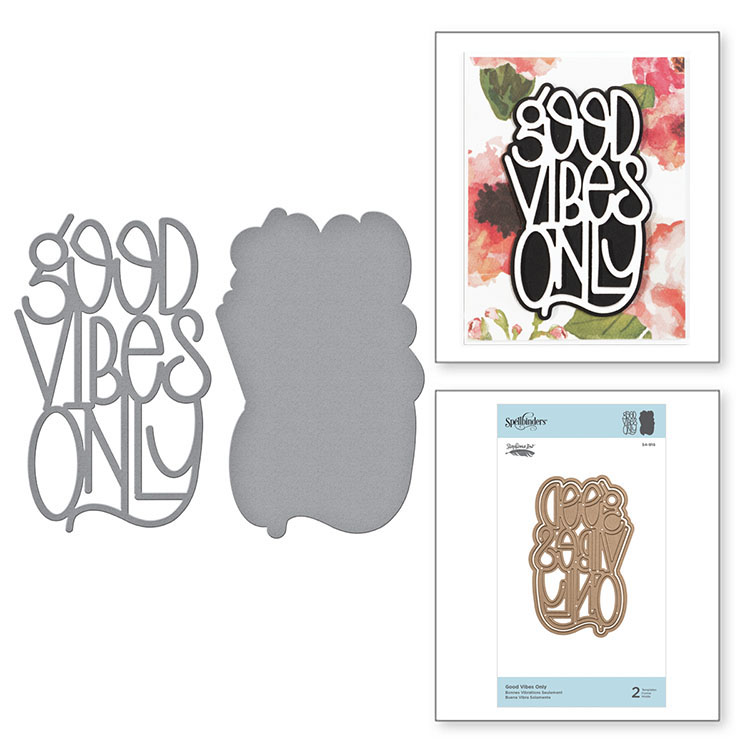
Spellbinders' Good Vibes Only

Memory Box - Sofia Heart
Sophia Heart Die - Memory Box - for Crafts :

Sunday, August 2, 2020

613 Avenue Create Challenge - August 2020 - Use Washi Tape (Foil or Matte)

Hello, Crafty Makers!
The Optional Twist at 613 Avenue Create this month is to use Washi Tape (foiled or matte.)
  
I own tons of Washi and I rarely use it. I subscribe to a planner kit and each month I get 6 to 8 rolls of foiled and matte Washi tapes. Although I use these in my planner, it is difficult to use an entire roll in one month of planning.  This challenge made me think about more interesting ways to use my tapes so you may see a lot of Washi tape on my upcoming projects.
A Bad Day
Fade-Out Infinity Stenciling is so cool.  I keep my color wheel handy because I don't want to end up with muddy colors. I am amazed at how each layer claims it's own space and also at the preception of depth this technique creates!

This lovely weekday (foiled) Washi was the perfect choice for my sentiment.  I started the design,  Creating my own backgrounds has definitely become an addiction for me. I have a huge collection of stencils and now feel justified in making so many impulse purchases! I could not afford them at today's prices! I actually ordered mylar this week so I create stencils of my favorite dies

I added a little gold splatter to the face panel and while it has an orangish tone in the photos, it sparkles IRL.  I experimented with three different card bases but in the end, the black card seemed to be the best choice.

Happy Moments


Step Tutorial

Tools:
Paper Trimmer
Stamping platform or acrylic block
Die Pick
Blending Brushes
Craft Tweezers
Heat Tool (embossing)


Supplies:
Distress Inks: (I used: Squeezed Lemonade, Shaded Lilac, Worn Lipstick, Cracked Pistachio, Iced Spruce.)  Use what you have.  You may substitute any ink as long as it is dye-based.  Pigment ink will not work.
Other Inks: Momento Tuxedo Black, VersMark Watermark

Paper:
Black Card Stock 110 lb or higher
White Card Stock 110 lb or higher 
Craft Foam Sheets

Other Supplies:
Stencils (at least two)
Washi Tape
Sentiment Stamp(s)
Sequins
Embossing Powder
Embossing Powder Tool
Teflon Bone Folder

Adhesives:
Wet Glue
Glue runner
Double-sided tape
removable tape or low tack tape

Process
Cut the black cardstock to 4-1/4" x 11" and score at 5-1/2"
Cut your white cardstock to 4-1/4" x 5-1/2" (you will trim this later)


Using low tack tape, adhere the white cs to your work surface.
Optional: You may apply a base color to your white cardstock before beginning to stencil.
Place your first stencil over your paper and adhere it to your work surface.  Avoid placing tape over any area of the stencil that will be inked.  Using your first ink color, begin blending from the outer edges and work toward the center. Blend in additional colors as desired.  If you plan to highlight your sentiment or an image from your second stencil, you should leave white space in the center of your design.  Remove the first stencil.
Position your second stencil.  You can move the stencil to color images into a particular area depending on your desired design.
Color your "anchor" image.
Color remaining images and blend in your complimentary colors.  When coloring is complete, use a clean blending brush to blend in all the colors making sure to blend out any sharp lines.
Trim your panel to the appropriate size.  The panel of the tutorial project was trimmed to 4" x 5-1/4".
Add splatter (I used gold and white) or other mediums to give your background design additional interest.  Water droplets are another possibility if you are using Ranger Distress Inks or Oxide Inks.
Wipe the front of the panel with a powder embossing tool.

Position your sentiment on your stamping tool or acrylic block.
Stamp your sentiment/images black ink.
Use a baby wipe to clean your stamps (do not remove them from your stamping tool.) Stamp the sentiments/image again using the VersaMark embossing ink.
Cover the entire sentiment/image with CLEAR embossing powder.  Return excess EP to the container and lightly tap the back of the panel to remove the excess powder.  Heat emboss the sentiment. (apply heat to the back of the card first and then move to the front.)
For added dimension, apply craft foam or double-sided foam tape to the back of your card.  If you use craft foam, cut it 1/8" smaller than your panel. 
Secure the foam to the back of your panel with both double-sided tape and wet glue.
Position the panel on your card base.
Add your decorative strip.  (I used Washi tape.  You can substitute ribbon or an intricate die-cut border strip.)
Add sequins or other embellishments.
Add paper to the inside.
~~~~~
Thanks for Stopping By!
HUGZ!
Challenges Entered:
Artsy Divas:  Always Anything Goes
We Love To Create: Anything Creative/Mixed Media Goes

~~~~~~~~

Stuff I Used:
Joyful Home Sentiment Stamps: Bad Days Happen
(Hello Dahliang Collection)