Showing posts with label Outlawz Greetings Challenge. Show all posts

Tuesday, September 29, 2015

Outlawz Greetings Challenge - Chanukkah Gift Basket

Hello, Crafty Peeples!

Very Late Post!   
I have been a little tired the past two weeks or so and I failed to post one of my challenge projects created as a Guest Designer for the Outlawz Greetings Challenge.  I am just thankful that Linda gave me two months notice and I was able to create my projects in advance.

This is always a difficult time of year for me when it comes to crafting.  Most of the challenges are centered around Halloween and/ or Christmas, two days I do not celebrate.  Also, this time of year is generally when our High Holidays begin and I am focused mainly on spiritual things.  Add to that the fact that Jewish Holidays are celebrated mostly in the synagogue (and have zero commerical emphasis) and you can see my problem.  Some families give gifts to their children during the eight day celebration of Chanukkah, so I figured I would create a little basket.  It felt really weird doing Chanukkah stuff in September.

 I created my own paper for basket and holders. The contents of the basket are: Tic Tac Holder, Tea Bag Holder, and Chanukkah Candles!
The Tea Bag envelopes were made using Pink Paislee's Butterfly Garden Papers


Thanks for stopping by!
I am feeling better, but will not be on the computer or creating during the eight days of Succoth!

Hugz
Chana Malkah


Monday, September 28, 2015

Outlawz Monday Greetings Challenge - Anything Goes

Hello, Crafty Peeps!
This week is my final project for my GDT stint at The Outlawz Monday Greetings Challenge.
The challenge theme this week is Anything Goes, and for my project, I chose to create this fun greeting card box!

Giving cards as gifts is one of the fun benefits of being a paper crafter and finding pretty and interesting ways to present those cards is one of my favorite pursuits.   I have found that Graphic 45 papers are probably the best selection for boxes and other 3D projects. 

Slide Out Greeting Card Gift Box 
I was digging around in my ribbon collection when I came across this fabulous ribbon that I found in the sales bin at Michaels fifteen year ago.  It always looked very Christmasy to me, and since I don't celebrate Christmas, I was at a loss as to how I would use it.  Works perfectly here! 
The thumb slot plus the ribbon pull make it super easy to open the the box.  Normally the interior paper would show in the front view.  I didn't realize the mistake until I was in PS and did not want to ask hubby to take another picture!
The cards in this set are all made from the Couture Cut Aparts.  I lined the inside with cream paper to match the envelope.  I am keeping this set so I did not use a sentiment.  I have the matching Couture Stamps and will add the sentiments as I use the cards.
More pretty papers on the holder!  I also used this paper on one of the cards!  None of my peacock feathers were small enough to fit the outside, so I used a FabScraps peacock and a black crystal.  

MORE PICS!
 Kept the envelopes simple.  Totally forgot I have an envelope punch board.  I created all my envelopes the old fashion way.   Will not do that again!


Thanks for visiting!  I hope you will give this project a try!
Hugz,
Chana


Monday, September 14, 2015

Outlawz Monday Greetings Challenge - Use Pink - Crafty Friend Gift Box

Hello, Crafty Peeps!


Sharing today my creation for this week's challenge at The Outlawz!  I am the September GDT for the Monday Greetings Team and our theme this week is Use Pink!  In addition to finding some wonderful inspiration, you also have the opportunity to win a great prize.

I have wanted, for a while now, to make this wonderful "Double Flip" gift box.  For this challenge, I created a "Crafty Friend" gift selection and it fit perfectly into this large box.


What a cool way to send a "crafty" to your favorite creative buddy!

The tutorial for this box can be found on Crafty Caroline's YouTube Channel

The angled cuts on the side add graphic interest to the design.
(Yes, one flap is slightly crooked.  Should have used the cutter!)
 The flaps were coated with Mod Podge Sparkle.  
I also spinkled on a little Fairy Dust Glitter for additional sparkle!
 The fold over flaps on the inside of the box add sturdiness and stability.  To keep the design cohesive, I  glued a piece of card stock to the bottom of my box.


Supplies Used:
Designer Paper - Pink Paisleee "Oyster Bar"
Base Paper - Bazzill Card Stock (from my stash, don't know color)
Flower - Prima Flowers "Life Time"
Crystals -  Prima - "Sunrise Sunset"
Distress Inks - Black Soot, Vintage Photo
Misc: Ephemera (7 Gypsies), Crystal Heart (stash), Fairy Dust Glitter "Sugar Shimmer"

Thanks for Stopping By
HUGZ!

Wednesday, September 9, 2015

The Outlawz Monday Greetings Challenge - Use Circles

Hello, Crafty Peeps,

This project should have posted on Monday!   But leave it to me to type in the wrong year...Ugh!

Anymahoo, my personal foibles aside, I was delighted to be invited by Linda Weber to be a guest designer for the Outlawz Greetings Challenge.  
The Monday Greetings Team was my very first design team and I figured I would be an Outlawz DT  member forever.   Unfortunately, my illness forced me to make some changes and one of them was stepping down as the Team Leader for the Greetings Challenge!   

For this week's challenge we were asked to use Circles!   I decided to create a "circle flip" card.


 I created this card the old fashioned way (I could not bring myself to purchase another die that would probably be used only once.)  Actually, it was not that difficult to use my circle die and get it done.
Paper Piecing and Glitter are fast becoming my new design "helpers!"

I hope you will stop by the Outlawz and enter a project in this challenge.  There are so many creative interpretations of "use circles" and we would love to see yours!

You must join to play!  There are seven other weekly challenges that will inspire you!

Hugz,
Chana Malkah


Wednesday, May 6, 2015

The Outlawz Greetings Challenge - Show Us Your Polka Dots

Hello, Crafty Peeples!

Last week I made the painful decision to step down as Team Leader of the Outlawz Monday Greetings Challenge Design Team.  For the first time since 2010, I am creating as a regular member.  
The Outlawz was my first team and will always hold a special place in my memories.

So here is my Polka Dots Card.  I chose to do a mixed media panel for the front of my card!  I have so many new paints and spray with which to play, I just couldn't pass up the opportunity.

Painting on burlap paper was an experiment that worked out pretty well.  I also enjoyed the effects achieved by varying the sizes of polka dots and making irregular strokes across the wet paste. 
Viva Inka Gold Wax (Old Gold, Old Silver, Greenyellow) added highlights and kept the colors from becoming too muddy.  The most difficult part of this design was choosing the ephemera!

STEPS AND PRODUCTS USED TO CREATE THE PANEL: 
  • Cut a piece of burlap paper to 4"x6"  - (DCWV Burlap Stack)
  • Apply a thin coat of Gesso.  (Earth Safe Finishes) VOC Free Product
  • Use Stencils and molding paste (I used three different sizes) to create Polka Dot
  • Circle Stencils: Heidi Swapp, Hero Arts, Crafter's Workshop (Mini Life Shapes)
  • Molding Paste: Liquitex, Homemade Texture paste mixed with Stormy Sky DI
  • After past has dried (use heat tool to speed drying time) apply paints in the desired colors
  • Tattered Angels: Plain Jane Simply Sheer Cozy Yellow; Plain Jane Baseboard Grass
  • Tattered Angels: High Impact Paint Tan
  • Shimmerz: Bamboo Leaf
  • Tim Holtz: Distress Spray Stains: Mermaid Lagoon and Abandoned Coral; Paint: Picket Fence; Distress Ink: Vintage Photo
  • Viva's Inka Gold: Old Gold, Old Silver, Greenyellow
  • Choose and apply your Ephemera.  I used Tim Holtz's Thrift Shop, Emporium, Expedition.  The Hello speech bubble was cut from Simple Stories SNAP Color Fusion
  • Polka Dot Designer Paper - Simple Stories Snap Color Vibe 1
  • Border Punch: Martha Stewart's Embossed Zigzag
  • Ribbon and twine from my stash
I am finding my way back to making cards now that I have a comfort level with using mixed media for my front panels.  I am off to try to color a Rick St. Dennis image to use in a project!  Fingers don't fail me now!    Thanks so much for stopping by!
Hugz,
Chana

Tuesday, April 28, 2015

The Outlawz Greetings Challenge: Anything Goes

Hello, Crafty Peeps!

Although I did not know it at the time, this is my final project as a member of The Outlawz Design Team.    The Outlawz was my first ever DT and I thought I would be there regardless; but life is just full of little surprises.   As much as I like to think that all I need do to defeat my illness is be of a "strong will," the fact of the matter is I need to pick my battles....stress is something I can control, by not taking on more than I should and accepting the fact that I have limitations in my life now, that I did not have previously.

I have also come to the realization that there are other matters to which I want to devote my time and the only way to free up time is by cutting back on my crafting hours.   I will miss the ladies at Outlawz!  It was a fun experience, free of drama, and full of encouragement and inspiration!

MY BEST FRIEND - THE HAND FAN
I made this fan for ME!  I have had a hand fan by my side since the onset of menopause, and actually, for a few years before that! One of my favorite oriental fans disappeared (in church of all places).  I left my seat, came back and my fan was gone! SSMH over that one.  I left my FDR fan at my last place of employment.  Since I never wanted to see that place again, I didn't even attempt to retrieve my fan.  I was planning to go to The Little White House in Warm Springs to get another, but then lighting struck and TLWH burned to the ground, so the park was temporarily closed. Finally, I lost a fan I have had since 1995 (sigh) so I decided to make a fan for myself.   We humans do love to attach ourselves to the strangest things!

 Actually, this project gave me an opportunity to use the cool vintage stamps from the Canvas Corps (7 Gypsies) American Vintage Collection.  I also used some of the vintage road signs.  I think my favorite is the Route 66 sign.  Brings back memories of the old TV show!  I love my new fan and all the funky textures!
On the back, I used this opportunity to play with some of my Tattered Angels Sprays and Mists.  I even used two of the Plain Jane Baseboard Mists (Clay and Bittersweet) to stain the handle!  

This has been a quick post!  Thanks for stopping by!
Hugz,
Chana

Monday, April 6, 2015

The Outlawz Greetings Challenge-Happy Spring/Use An Animal -= A Tutorial

Hello, Crafty Peeps!

Welcome to another challenge at The Outlawz.  The Greetings Challenge Team would like to see your Spring Creations. 
 Our theme this week is "Happy Spring/Use An Animal."

I am working on a recipe book for another DT and one of the elements I am including are fancy recipe and menu cards.   Since I am not coloring these days, the "use an animal" twist tin this challenge threw me off a little but I did find a piece of ephemera that allowed me to at least comply with the spirit of the challenge1 :D)


My inspiration for this project is a tutorial at:  Tammy Tutterow  Use her tutorial if you want to recreate her project!  Hugz, Chana


RECIPE CARD STEP TUTORIAL

Supplies:
2 pcs - Neenah Cover Stock White or Cream  (4" x 6") 
1 pc  -  Core'dinations Cardstock - All in the Family "Out to Sea" (4 1/2" x 6 1/2")


Tropical Pink Glimmer Mist
Plain Jane Simply Sheer Matte Mist - Un-Birthday
Plain Jane Simply Sheer Matte Mist - Cozy Yellow
Plain Jane Baseboard Matte Mist (semi opaque) Sky
Plain Jane Baseboard Matte Mist semi opaque) Grass


Tim Holtz Ranger Distress Inks:
Gathered Twigs, Broken China, Peacock Feathers, Scattered Straw

Heidi Swapp Mixed Media Stencil - Square Lattice
Pink Paisley - Nantucket Ephemera and Stamps (<---Click Link) This product is discontinued, but Jo~Ann's still has some in stock.
Misc:
Seam Binding - colored with Distress Inks and Sprays (I used a scrap piece)
Brads, Flowers
Texture Paste, glue, mod podge( or other sealant) Gesso


Cut a piece of Neenah Natural White Linen Cover Stock to 4" x 6" and cover both sides with Gesso and let air dry (or use heat tool to speed up drying.) The brush strokes from the Gesso add additional texture to the design.

Mist the panel with your various sprays (all or any combination of the colors in supply list)until you achieve the desired effect.  Some of this will be covered with texture paste.  I blotted lightly each time I sprayed, but this is not necessary.  Let your eyes be the best judge.  Use heat to dry.  Note: Colors will be softer.

Position your stencil and apply texture paste to the desired area.  It is helpful to have some idea of where you plan to place you emphemera so that you don't totally cover the stenciled design.

Lift the stencil and allow paste to air dry or use heat tool.  Clean your stencil with water.

Reposition the stencil over the paste and align the imprint (sorry for the shadows, my paper bowed a little) sponge stenciled area with Distress Inks (Gathered Twigs, Peacock Feathers, etc.)

Sponge edges with Gathered Twigs (Vintage Photo will work just as well)


(1) To Make A Greeting Card: Cut a card base of a coordinating color 1/4 " to 1/2" larger than your card front.  Add your ephemera, ribbon, and stamped images or sentiments to your card front and attach it to your base cardstock.  For a more vintage look, use your distressing tool to tatter your edges. 

(2)To Make A Tag or Door Hanger:  Cut a piece of cardstock in a coordinating color 1/4 " to 1/2" larger than your panel front.  Add your ephemera, ribbon, and stamped images or sentiments to your card front and attach it to your accent backing.  Punch a hole in the center of your tag and use your crop-a-dile to insert an eyelet, thread ribbon through eyelet. 

This is the panel I used for my finished project.  The panel created during this tutorial will be used for another recipe card!

(3)To Make The Menu Card:  Adhere your ephemera, ribbon, and stamped images or sentiments to your card face and set it aside.  Cut a piece of cardstock in a coordinating color 1/4 " to 1/2" larger than your card front (my panel is 4 1/4" x 6 1/4".)  Type or print your recipe on the second 4" x 6" piece Neenah linen cover stock.  Attach menu to cardstock.  Turn over and attach card front.  Use corner chomper to round off corners,  I use 1/2".

Before placing the panel in my recipe book, I applied a piece of very thin cold laminating paper to the recipe to protect it.  I wanted to see if the WRMK Photo Fuse tool would seal it to the paper, but since I am still wating for the tool to be delivered, I will have to see if the lamination works!

Thansks for stopping by.   Also, thanks to Tammy Tutterow for being such an inspiration!
Hugz,
Chana


Monday, March 30, 2015

OUTLAWZ GREETINGS CHALLENGE - ANYTHING GOES!

Hello, Crafty Peeps!   
As I have said in the past, I love using brown lunch bags to make cards and tag holders.  This past week I decided to return to that old favorite to create my DT projects.  
I was also inspired by the coming of Passover and the gentle stirring of Spring.
This was a fun, quick, and easy project that utilizes a small bag.  
I did not do a step out tutorial for this project but probably will photograph the next one.
Thanks for stopping by, I look forward to seeing your project in the challenge.
I love the ease of creating pockets with the brown paper bags!  The secret is in the folding!
To save on crafting costs, I keep all the cardboard backing from embellishments and use those for my tags.  These two tags were create using the carding from a Graphic 45 Staples purchase and  from some Bo Bunny Brads.

Hint: Once your brown bag is folded, run it through your Big Shot.  This will smooth out any wrinkles in the bag and reinforce your folds.

Supplies Used:
Papers:  My Mind's Eye - Miss Caroline - Howdy Doody
Inks:  Broken China, Vintage Photo, Spun Sugar and Scattered Straw Distress Inks


Thursday, February 12, 2015

Everything Will Come Together - OUTLAWZ GREETINGS CHALLENGE - USE 2 OR MORE INCHIES

Hello, Crafty Peeples!

Well, you know you are getting old when you think you've posted a project!   I am here with a quick post of my DT make for The Outlawz Greetings Challenge.    We want you to create a project using 2 or more inchies.   Inchies were all the rage a few years back and it is nice to revisit "old" friends.   I actually plan to try to incorporate inches into some of my future mixed media projects.  It would probably add great depth.


 The Stamp: Whatever The Weather  by Unity Stamp Company (Itty Bitty Stamp Club)

I just added a little drywall tape and stencils for depth and texture.  The drywall tape has gold accents, but that did not translate so well when I took the pictures.. alas!


Thanks so much for stopping by!
Hugz,
Chana

Monday, February 2, 2015

IT'S A TWINE THING! - THE OUTLAWZ MONDAY GREETINGS CHALLENGE

Hello, Crafty Peeps!

It's ANYTHING GOES week at the Outlawz Monday Greetings Challenge.  So, any project you create that incorporates the use of TWINE is eligible for submission.  The only other requirement is that the project must have a sentiment.

Remember The Outlawz has Seven Weekly Challenges plus a Progressive Challenge. 

 Trendy Twine's "Charcoal"
Papers used: Neenah Black Linen CS; 
Cards and Pockets Butterscotch CS; Tim Holtz Paper Stash - Kraft Resist.
Inks: Versa Mark
Embossing Powder: Tim Holtz Spiced Marmalade Distress Powder
Sentiment Stamp:  Technique Tuesday "Simply You"


Thanks so much for stopping by!  I look forward to seeing you in our challenge!

You might be a regular visitor to The Outlawz Challenges or perhaps you're a new member. Either way, we want you to know what you could possibly win by playing here at The Outlawz Challenges each month.   Remember there is a brand new challenge that starts every single day.

There are several ways you can win one or more of our fabulous prizes.   Enter your creations into the Inlinkz and win a monthly sponsor's gift. Or you can enter one of the 8 individual challenges and win one of the challenges' prizes of the week or month.  The sponsors for the individual challenges change each month and we will keep you posted on the changes.    So come on and join the fun!

OUTLAWZ PRIZE BOARD

 Site Wide Prizes:

 Oozak Online Craft Store:           

          (3) $15.00 gift certificates.

 7 Kids College Fund Online Craft Store:

          $15.00 gift certificate.

Paper Temptress Online Paper Store;

          40 (half) sheets of Cryogen White Card Stock.

Squigglefly Digital Images:

          3 Digital images of your choice.

Rick St. Dennis:

          3 Prizes – each with 3 digital images of your choice.

Touched By A Butterfly

          $10.00 gift certificate.

Challenge Prizes

Sunday – CAS Challenge:

One year subscription to “Through the Craft Room Door Magazine.”

Monday – Greetings Challenge

          Beansie's Doodles:  5 digital images of your choice.

          Dee Dee's Digi Stamps: $15.00 voucher

          Dee Dee's Digi Stamps: $15.00 voucher

          Robyn's Fetish: 3 digital images of your choice.

Tuesday – Color Challenge

          The Paper Nest:  3 digital images of your choice.

Wednesday – Sketch Challenge

          Stamping Boutique – 2 digital images of your choice

          If you use a Stamping Boutique image on your project you will receive 3           digital images of your choice.

          Bonus: If 40 entries are made in the month of February – a $5.00 gift             voucher to a random winner.

Thursday: Thursday Twist Challenge: 

          Stitchy Bear Stamps: 5 digital images of your choice.


Friday – Coloring Challenge

Sweet Pea Stamps: 4 digital images of your choice.

Saturday PAM:

          Scrapbook Stamp Society: 3 digital images of your choice.

          Sweet pea stamps:  4 digital images of your choice.

          Bugaboo Stamps:   $21.00 store gift certificate

          Rick ST Dennis:  2 digital images of your choice.

          Sassy Stamps:  2 digital images of your choice.

February Progressive Freebie Challenge:

          Sandi Samples Digital Stamps:  3 digital images of your choice. 

Hugz,
Chana Malkah

Challenges Entered:


Tuesday, January 13, 2015

The Outlawz Greetings Challenge

Hello, Crafty Peeples,

This is my second post today.  Here is a quck project for
 The Outlawz MONDAY GREETINGS CHALLENGE
THEME:  Use Black and White plus 1 Color

The Outlawz is a Membership NING Community so you must join to enter the challenges.  Membership is FREE...so no worries there.


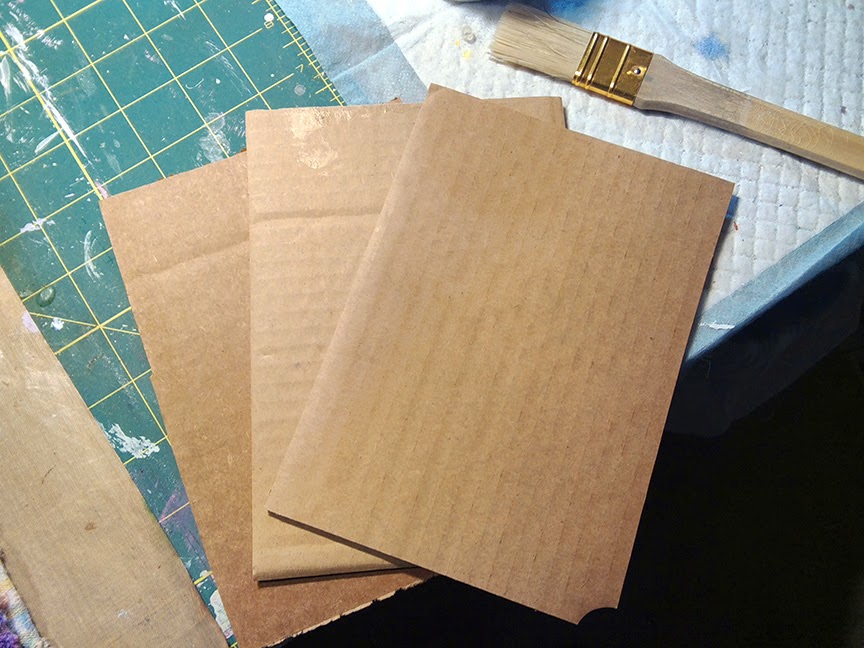
I try to repurpose, reuse, recycle, upcyle most packing materials. For this wall hanger,  I used a corrugated cardboard box from an Amazon order to create the base.
I used padding glue to adhere the three 4"x6" pieces.
 The cardboard block was then covered with a piece of scrap fabric.
Gesso was applied to the edges 
Here, as is so often the case, I began to just play around with "possibilities" and did not take pictures along the way.  My hubby says I should just turn on my camera and let it run while I'm working and then go back and edit. 
I colored the panel using DecoArt Acrylic Paints Black, White and Majestic Red Metallic.
I sprayed the surface of the panel wtih 
 I used The Crafter's Workshop's "Art Is" stencil on the panel and 
the "Art Washes Away" stamp for my sentiment

The ribbon is from Really Reasonable Ribbon, the pearls from Want2Scrap
ART CAT was colored using Gesso, Tim Holtz Black Soot Distress Ink and
Tattered Angels' Almost Black Glimmer Mist


Challenges Entered:

Through The Craft Room Door - Always Anything Goes

I hope you will stop by The Outlawz and join in the fun!

We have 8 Challenges each week and you can participate in as many as you like. Prizes are awarded by each challenge team as well as Site Wide Prizes.

  • Monday - Greetings

    Monday - Greetings   -  Chana, Team Leader

    114 membersLatest Activity: 9 minutes ago
    Welcome to Monday's Greetings. Each card/project must have a visible sentiment on it.
  • Color Challenge

    Color Challenge

    100 membersLatest Activity: 10 minutes ago
    Welcome to the Tuesday Color Challenge. We will give you an inspirational photo or palette of colors each week to create your cards/projects…
  • Freebie/Progressive Challenge

    Freebie/Progressive Challenge

    120 membersLatest Activity: 3 hours ago
    Each month we will send you a free digital image to use in the Freebie/Progressive challenge. Once your creation is completed, upload it…
  • Friday Coloring Challenge

    Friday Coloring Challenge

    112 membersLatest Activity: yesterday
    Welcome to the Friday Coloring Challenge where we will create beautiful cards and projects using images that have been colored with any type of…
  • Sunday - Clean and Simple

    Sunday - Clean and Simple

    102 membersLatest Activity: 18 minutes ago
    Welcome to the Clean and Simple Challenge where we will create beautiful C&S cards.
  • Saturday Paper A La Mode

    Saturday Paper A La Mode

    102 membersLatest Activity: 16 hours ago
    Welcome to Paper A La Mode Challenge where we will create beautiful or fun cards, layouts and other creations together!
  • Twisted Thursday

    Twisted Thursday

    507 membersLatest Activity: 44 minutes ago
    Welcome to Twisted Thursday Challenge where we will create beautiful or fun cards, layouts and other creations together!
  • Wednesday Sketch

    Wednesday Sketch

    95 membersLatest Activity: yesterday
    Welcome to the Wednesday Sketch Challenge.  We will provide you with a new sketch each week and will have fun creating cards or other…