Showing posts with label Tammy Tutterow Tutorials. Show all posts

Tuesday, September 25, 2018

Shopping Our Stash Weekly Challenge - Use The Smooshing Technique

Hello, Crafty Makers!
This SOS Challenge features one of my favorite techniques: Smooshing!  
Of course, I had to create two cards for this challenge!

Smooshing is a  fun way to create a "faux" watercolor look especially for non-painters like me. The technique works with all ink types.
I admire the work of Tammy Tutterow and was so happy when she joined Spellbinders® Stamp Designers.  This is my favorite, I think!

Stash Items Used:
Bazzill Basics - Hummingbird
Neenah - Natural White
Tim Holtz™ - Water Color Paper
Tammy Tutterow™ (for Spellbinders®) Be Sunny
Ranger Distress Inks: Carved Pumpkin, Squeezed Lemonade, Shabby Shutters, Mowed Lawn, Scattered Straw, and Vintage Photo
Glossy Accents (just a drop)
Water
I laminated a piece of cardstock and used that as a proof sheet for mixing my colors.   I applied the ink directly to my acetate sheet, spritzed it with water and then "smooshed" it on the cardstock.
 ~~~~~~
 Smoosh, Splatter, Swipe and Emboss
Two years ago, I was a Guest Designer for ClearSnap®.  One of their partners at the time was Hot Off The Press™ and they sent this fabulous "Feathers" stamp set to all the designers.  I have provided the link to Paper Wishes which is the site for HOTP retail customers.

Stash Items Used:
Bazzill Basic - Wild Pansey
PaperTrey - White Cardstock
Paper Wishes™ "Feathers" Stamps w/Sentiments
Tim Holtz Rub On - Elements
ColorBox® - White Embossing Powder
 Distress Inks:  Milled Lavender, Scattered Straw, Dried Marigold, Cracked Pistachio!
Water
For this card front, I applied the ink to my laminated sheet, spritzed with water and then applied the diluted ink to the card front.  I wanted more control and I wanted to do more splashing, wiping and splattering than smooshing.  Some designers like to have a plan before they smoosh.  I just freestyle!
(CLICK SMOOSHING TO SEE TUTORIAL)

Happy Making!
HUGZ,
Chana Malkah

Tuesday, December 8, 2015

Shopping Our Stash #230 - UFO's - Unfinished Objects

Hello, Crafty Peeps,

Leslie has come up with another one of her fun challenges to help declutter your studio/craft room and to stimulate your creative juices.
Use an UnFinished Object(s) (project) that has been languishing in crafting limbo.

 I am CASEing One of my favorite designers, Tammy Tutterow.
This large tag card was inspired by a Tammy Tutterow Tutorial (say that four times, really fast) I started this about a month ago, but did not finish because I needed to order supplies.  Amazon did their wonderful 2 hr delivery, but, two hours is a long time for a crafter and I had already moved on.
I had fun creating my own vellum "background" paper.
This is how it looks with the light shining through the vellum!

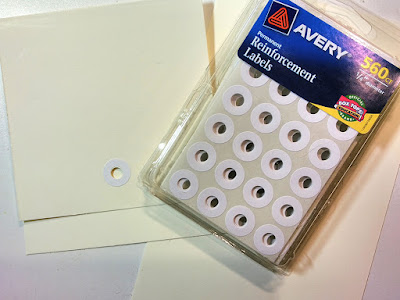
To create the tag, I cut a piece of CS to 9 7/8" x 4 1/8".  Punched hole and used reinforcement.  Since this is a card, you don't really have to use the reinforcement.  I just happen to like that look on the project, so I chose to include it.  
Fold your tag, 4 3/4″ from the bottom edge of the tag to create a top fold card. 
Then: using the die of your choice (I used Tim Holtz Thinlits 4 Die Set Courtyard Pattern) position your die so that there is a small border along the sides, top and bottom. (my border is about an eight of an inch.) Make your first die cut, open your card and position the die over the embossed/partially cut pattern, and run through your Big Shot/cutter to complete the cut.  Your patterns should line up perfectly!
Next: Paint the inside of the card with Tim Holtz White Picket Fence Paint.  Paint in straight lines from top to bottom.  Dry with heat tool, turn over and repeat on the other side. 


Now: Spray the solid side with TH Broken China Distress Stain.  Blot away excess.  Spray the die cut pattern with Bundled Sage, blot excess.  Dry using heat tool.  (These are the colors used in the tutorial, you may use the colors of your choice.  I turned my Distress Stain bottles into sprayers when I realized that the tops for my plastic bottles fit perfectly.
I stamped a piece of white vellum using stamps, stencils, and Distress Inks.  I had no particular theme in mind, I was really just focusing on the colors and making sure they would 
 I stamped on both sides of the paper. In the tutorial, Tim Holtz's Wildflower Vellum is used.
Cut a piece of vellum to match the size of you card back.  Apply glue (I used Elmer's school glue stick) to the front of your vellum and affix to your card.  Allow to dry.  Turn the card over and apply die cut, sprinkle glitter over the pattern.  Tap off excess and allow to dry.
.I recommend just being careful applying the glue.  Fixing this is tedious.  Use collage glue
Select your embellishments, and color.  I used distress inks to create a pattern on my solid butterfly that would match the pattern of the designer paper from which I cut the open butterfly.  I then highlighted both with TH Vintage photo DT! 
 I was lucky to find in my stash a piece of seam binding that was a perfect match for this project.  I also applied some gold and patina Run 'n Buff Metallic Wax to portions of my pattern.

I applied white and patina metallic wax to a TH word token and used a jump ring to attach it to my bow.  Added the "Love" sentiment from TH's "Love" Thinlits.  The rub ons are from TH's Botanical Set.

                TAMMY'S PROJECT                                                       MY CASE

I tried to follow Tammy's Tutorial as closely as possible,  but used different butterfly dies, changed the color of the ribbon, created my own paper, and used different rub on images.


 Supply List
Vellum paper
24# Cover Stock

TH Distress INKS: 
Black Soot
Bronken China
Stormy Sky
Pickle Raspberry
Vintage Photo
Scattered Straw
STENCILS:
Tim Holtz Layering Stencil - Brick Wall, Crackle
The Crafter's Workshop - Mix and Match Hearts
Heidi Swapp Mini Stencil Sets - Phrases

STAMPS:
Prima Mini Script
Tim Holtz Mini Flutter

Challenges Entered:
Lemon Shortbread Challenge - Always Anything Goes!


Tuesday, December 9, 2014

Shopping Our Stash - Favorite Technique - Fabric Banner - Staining/Stenciling on Muslin


Hello, Crafty Peeples
This post is a continuation of my effort to put up projects that were interrupted by a recent illness.  You can see the Subway Art Mini Album HERE
I totally missed the DT deadlines, but thought the projects were fun and worth sharing.  I was not happy with the project when I added the embellishments, so I am posting this picture of the design before I messed it up.  When I get to the end, I may...share my disaster.  We'll see.
Added  to all that is my now deeper understanding of just what "suffering for your art" truly means. It would be a dishonor my to my aching hands if I did not post these projects.   I should tell my neurologist that I will never need a physical therapist, just a DT and a deadline.  These muscles were made for crafting!

DISTRESS STAINED AND STENCILED FABRIC BANNER
The Technique I am showcasing here  I learned at Tammy Tutterow's Blog.  You can find her project details here.

1. CUT A LARGE SWATCH OF MUSLIN AND MOISTEN WELL WITH WATER.
 Bleached or unbleached is fine.  As Tammy suggests on her blog, I always cut fabric larger than my intended project.  Two benefits are derived from this, first, when your fabric has been stained/dyed, you will be able to select the best location to place your banner template and, the leftover material can be used on future projects.  This is particularly true for me since I tend to work in the same color families most of the time.

2.  SPRAY FABRIC WITH YOUR CHOSEN DISTRESS INKS. CRUMPLE FABRIC TO BLEED COLORS.  SQUEEZE OUT ANY EXCESS WATER.
Mess around with this until you achieve the color profile you desire. The fun part of TH/DI is that they are so reactive with water and you can play about with them freely. 

3.  ALLOW FABRIC TO AIR DRY!  
Don't be impatient.  The result will be worth the wait!
I added additional color uisng acrylic paint after my fabric was dry.  I also added a little of TH White Distress Paint to my fabric.


 4.  Using the Art Banner Template provided by Tammy Tutterow, you can find template here, TRACE THE PATTERN ONTO YOUR COLORED FABRIC.
I cheated.  I glued the pattern to piece of cereal box and used the template to cut my fabric. 


5. ATTACH FABRC TO A PIECE OF COTTON BATTING.
Tammy uses Phoomph, but I did not have any, so I attached my fabric to a piece of cotton batting.  CUT THE BATTING WITH PINKING SHEARS.  BATTING SHOULD BE SLIGHTLY LARGER THAN THE FABRIC.


5.  ALLOW FABRIC ADHESIVE TO DRY.  SELECT THE STENCIL DESIGN YOU WISH TO USE ON YOUR PROJECT.  USE A TIM HOLTZ DISTRESS MARKER TO TRACE THE INSIDE EDGES OF YOUR STENCIL.  EMBELLISH PROJECT AS DESIRED.
I used distress markers to add color to my leaves and branches.  Next time I plan to use a different stencil.

I did not like my final design and decided NOT to post it here.  I may post the rework at a later date. I hope you will give the technique a try.

Hugz,
Chana


Tuesday, October 22, 2013

Peter, Peter, Pumpkin Eater - Outlawz Greetings Challenge

Hello, Crafty Peeples!  It has been a minute since I posted a challenge.  It feels good to be able to create again.  Okay, so this week at The Outlawz Challenges, The Greetings Team is challenging you to create a project that includes a pumpkin!
Since I do not celebrate Halloween or Christmas, this time of year is always interesting for me.  I usually end up doing a lot of fall themed projects or a lot of Thanksgiving cards.

This challenge gave me the opportunity to use a favorite image from my ever increasing supply of digis.  One of the few images I have colored and actually liked the outcome.  Hope you like it as well!

Thanks for dropping by!
Hugz, Chana
 Correction:  This lovely image is by Squigglefly,  I have used it several times, because I enjoy coloring it,  I think it is the wonderful balance that really draws me! 
I was so pleased to find the little brad with the pumpkin in the center!  And I just loved using this paper that I have had for over a year.  My current focus is mixing papers which has lead to me making some wonderful discoveries in my (Extremely Large and Exceedingly Fast Growing) 6"x 6" Pads collection.
These wonderful leaves were made using vellum and TH Distress Inks.  There is a link at the bottom of this post to the Tammy Tutterow Tutorial.  I had the leaves straightened, but they began to curl again as we were setting up the photo shoot.  I love this technique and plan to use it for other embellishments.

I just received this little Acorn Stamp last week, so timely!

THE BACK STORY
Front Image: Squigglefly
Colored with: Copics
Back Image: Unity Stamp Co. Itty Bitty Stamp
Stamped with: Momento Rich Cocoa Dye Ink
Card Stock: Neenah Red Hot Pepper - Linen; Neenah Classic Crest
 Neenah Natural White - Smooth
Designer Papers: My Mind's Eye: Kraft FUNDAY 6x6 Designer Pad
Brad:  Bo Bunny
Leaves: Handmade (the tutorial is HERE)
*Note:  I used the TH Alterations - Tattered Leaves Die 
**I also only used the Rock Candy Crackle.  I did not add the distress stickles.
**I do not own the stamp or the stickles**


So Blessed:  This project was recognized by these blogs:


Thursday, June 6, 2013

Friends and Flowers

The Linen Look
from a Tutorial by Tammy Tutterow

Hello, Crafty Peeples!

The tag I am posting today was not created for any particular challenge.  A few months ago, I stepped down from five design teams so I could free up time to spend with my husband and also so I could spend more time learning new card making and other paper crafting techniques.

I used to describe myself as a "slow designer" but now I consider myself a "deliberate" designer.  I have in the past, and on my three current design teams, worked with ladies who were/are capable of creating mini masterpieces in five minutes.  I don't even wish I could do that.  For me, the true fun of my hobby is the creative process itself.  I don't want to finish a card in five minutes, I want to linger over it, have an opportunity to run across that "perfect" embellishment that will make this little creation spring to life.  Now, with only 3 DT projects to produce on alternating weeks, I have time to explore YouTube, take classes, and take my time.  None of this makes me a better designer.  But it does allow me to return to the pure enjoyment of relaxing and making cards.

 Today, I am posting a tag that was the result of my efforts to learn a new technique.  The goal was to make my tag background look like "linen".  This post will chronicle my "failed attempt". 
 I really like the tag I eventually created.
I didn't realize that my Ranger Picket Fence Distress Paint was almost empty and because of that, my paint layers were too thin to make the lines appear as distinct as they should. But I think you can see the linen pattern in the area around the large butterfly.  The linen effect is achieved by putting down a layer of Picket Fence Distress Paint and while it is still wet drawing vertical lines the lenght of the tag with your craft scratcher.  Dry the layer with your heat tool and then repeat the process only this time the lines are drawn horizontally.  I did four layers (two each vertical and horizontal).

Unfortunately, I do not own a lot of background stamps, so the image I stamped was a large Flourish.  You can see a bit of it above the butterfly wings.  The image is stamped with embossing ink and then heat embossed with clear embossing powder.  Next you apply the Distress Paint (you cannot use Distress Stains for this) and dry with your heat tool.  Once it is dry, you place the tag inside a folded piece of newsprint or kraft wrapping paper and iron it.  This will remove the embossing powder.

The trick to ironing off the embossing powder is to remove the paper while the embossing powder is still hot.  If you are not quick enough, the paper will stick to your design.  If that happens, you can simply iron it again.  I rather liked the look of the few patches of paper that stuck to my tag, so I left them and dabbed this with a little Ranger "Vintage Photo" Distress Ink.  I really liked the one large patch at the bottom of the tag.  There is a smaller patch above the large butterfly's right wing that I stained with a bit of Ranger "Antique Linen" Distress Ink.


Here is the link to Tammy Tutterow's Tutorial.  As you will see, if you use a stamp with a bold design, your linen look tag will be more dramatic.  Tammy creates the most amazing tags.  She also teaches fabulous techniques so if you have not signed up for her e-mails, you should.

Tammy tried to comment on my project, but the comment did not go through.  Here is her comment.  I feel better about the tag now and how it turned out!

in response to Chana Malkah:
Thank you so much for giving it a try! I tried leaving a comment, but I am not sure if it went through. I think your tag turned out stunning! I really loved the distressed effects around the edges. Beautiful!

Thanks for Stopping by!

Hugz,
Chana

Materials used:

Dies:  Spellbinders' Parisian Motifs

inks/Paints:  Ranger Distress Paints: Picket Fence, Faded Jeans; Ranger Distress Inks: Vintage Photo, Antique Linen

Other embellishments:  K and Company Grand Adhesions: Small Butterfly;  Prima: Flowers, wooden banner and larger butterfly.  Pearls: Want2Scrap;   Cheese Cloth from stash.

Challenges Entered:
Aud Sentiments Challenge - Anything Goes (must have a sentiment)
4 Crafty Chicks - Flowers
C.R.A.F.T. Challenge - Anything But A Card
Crafts and Me Challenge - Shabby Chic
The Paper Shelter - Flower Power
Whimsical Designs - Vintage